To Install IIS on XP
The default IIS version is 5.x on Windows XP SP2 and SP3.
1) Installation through Add Remove Program
To install IIS on XP, follow these steps,
Insert the Windows XP installation CD on the drive. You can also copy the XP setup files to your local machine or can browse from a Network Drive.
# 1.Go to Start -> Settings -> Control Panel -> click on Add or Remove Program (Alternatively you can go to Start-Run-Type Appwiz.cpl)
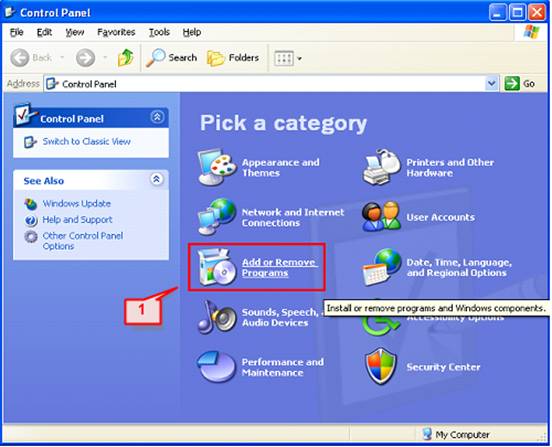
# 2.Add remove program screen will appear, click on Add/Remove Windows Components
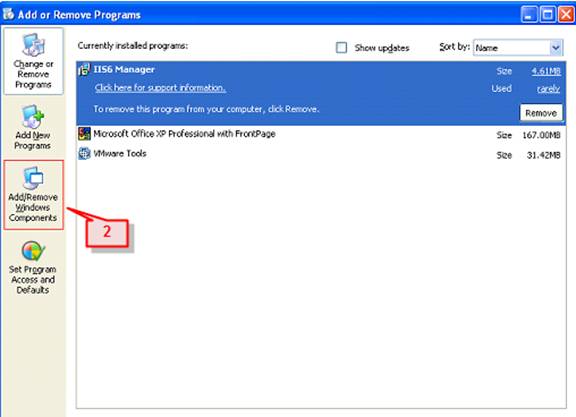
The Add/Remove Windows Components will display the below window.
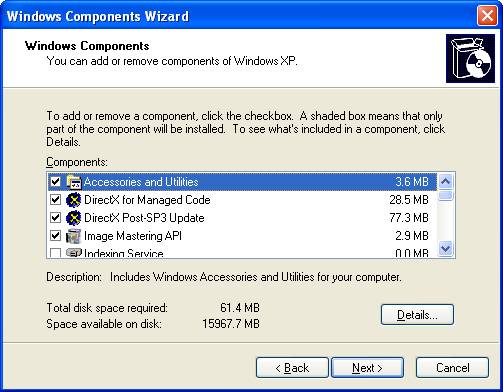
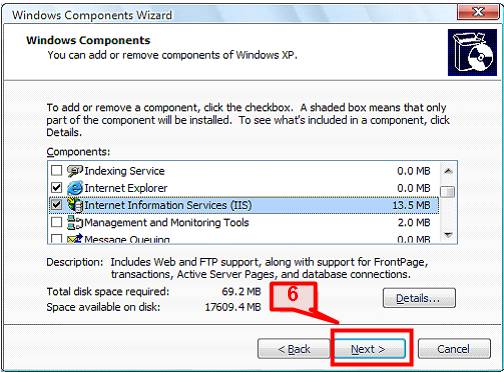
# 3.Scroll down and select Internet Information Services (IIS)
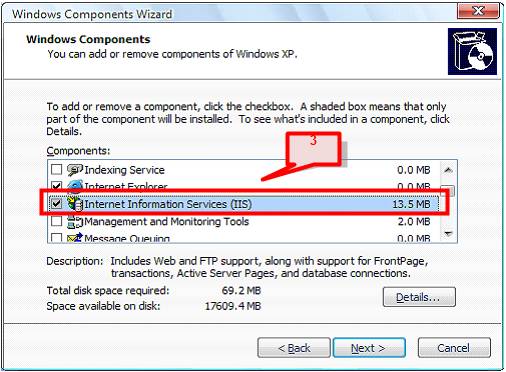
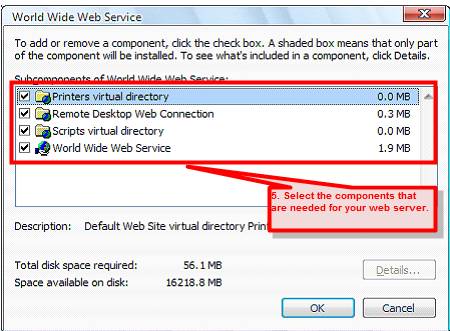
# 4.You can click on details to customize which IIS components are getting installed. Select World Wide Web Service.
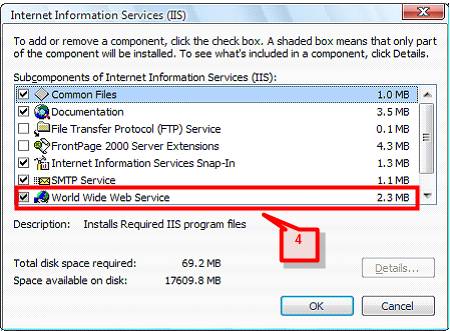
# 5.Click the Detail button. One can further customize World Wide Web subcomponents.
# 6.Go back to previous screen and click Next,
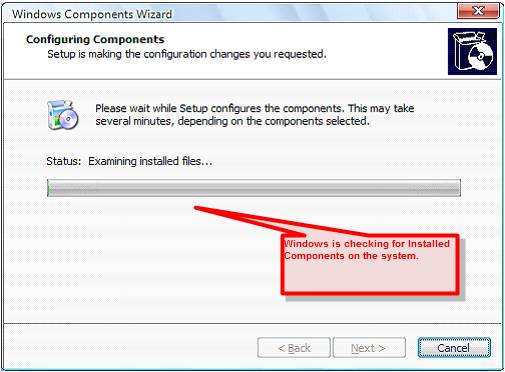
# 7.OS will examine the system to check required IIS files are present or not,
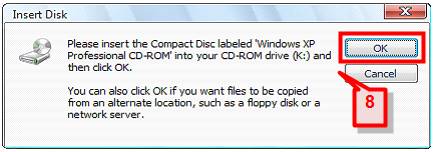
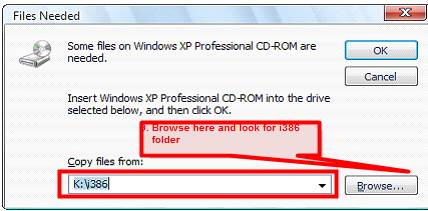
# 8.If IIS is not previously installed, It will then pop-up the screen to insert the Window XP CD on the CD Drive. Here one can insert the CD or one can also browse for the i386 folder if the Windows XP setup is copied to local machine or on a shared drive.
Click OK.
# 9.On the installation CD or from Local drive or from Network Path, Click on the Browse button and find the %i386 folder.
# 10.Installation will then start, Windows will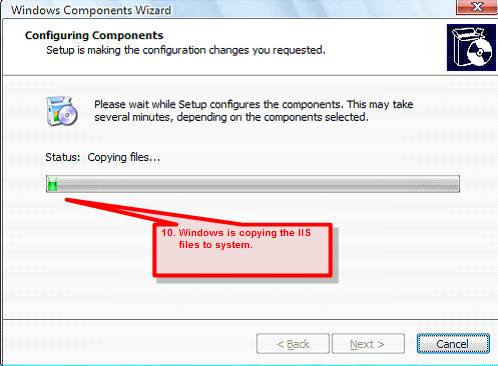
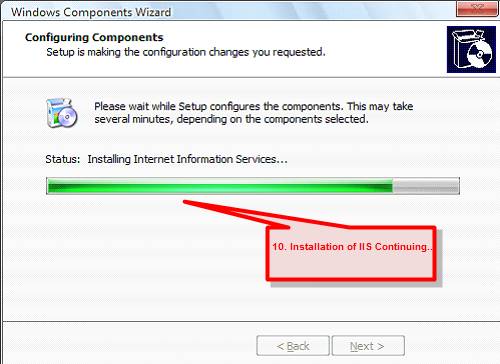
start copying files,
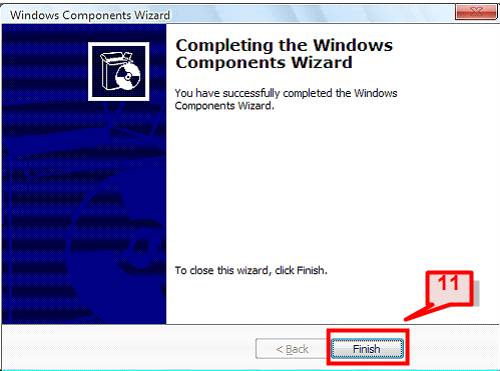
# 11.Installation will then complete, click Finish
2) Installation from Windows Installation Setup
Alternatively one can install IIS from Windows XP Setup CD.
Look for windows Installation setup files on CD and search for setup.exe,
Double click setup.exe, the following screen will pop-up,
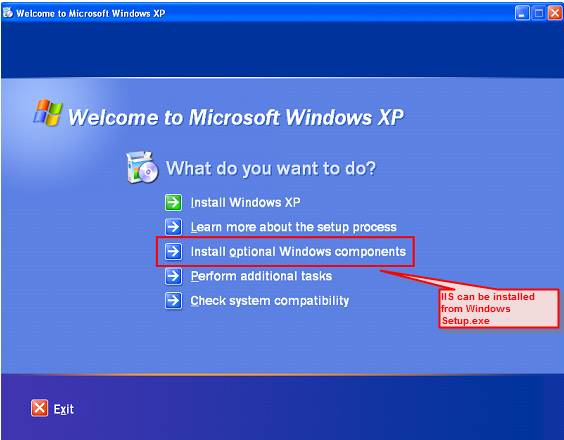
Click Install Optional Windows components, this will show Windows components dialog box (#2 screen). Then select IIS from the list and rest of the process is same as started above.
To check IIS Installation integrity
To check whether IIS installation is successful or not and to test whether it is working or not,
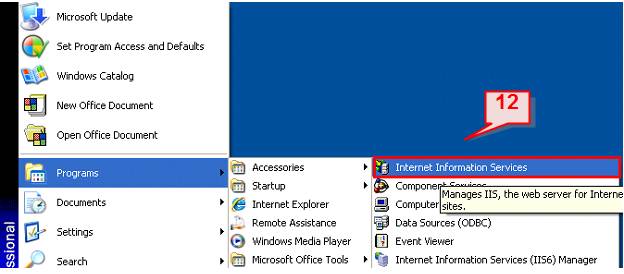
# 12.Go to Start -> Administrative Tools -> Verify Internet Information Services (IIS) link is there or not.
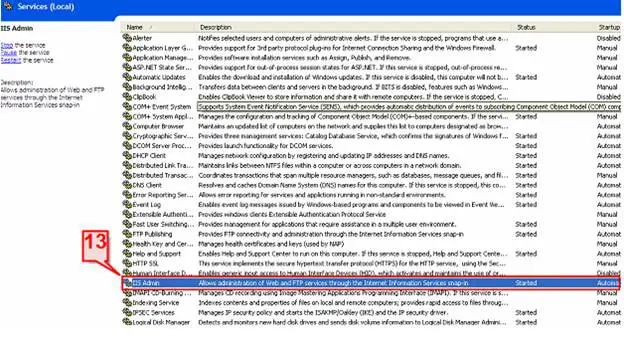
# 13.Go to Start -> Administrative Tools -> Services -> check whether “ IIS Admin” service is present and running.
# 14.Open Internet Explorer (IE) and type in the address line,
http://localhost or https://www.techyv.com/
Note: Windows XP Home edition doesn’t have the option to install IIS from Add Remove Program Windows Components.
Host a web page after IIS installation is done.
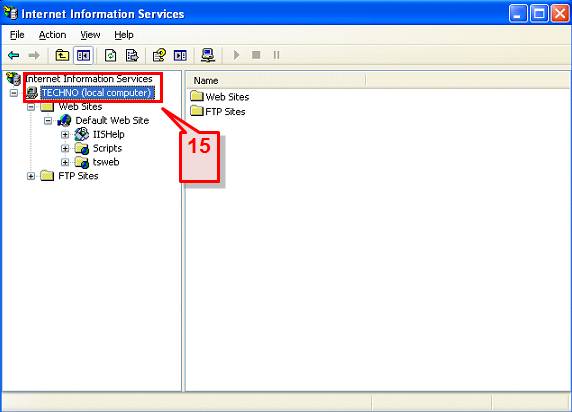
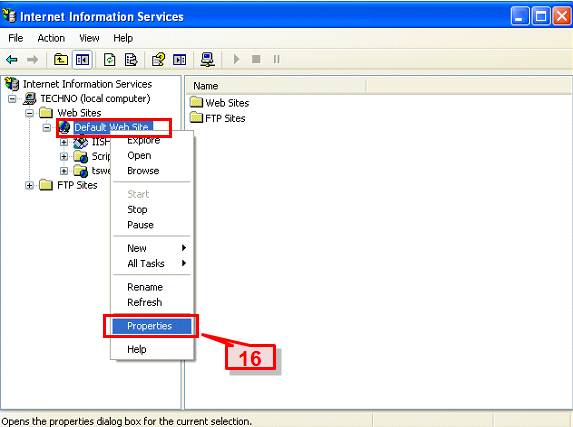
# 15.Open the IIS snap-in. Start > Administrative Tools > Internet Information Services, the below screen will pop-up.
# 16.Select the Default Web Site folder -> right-click mouse -> select Properties context menu
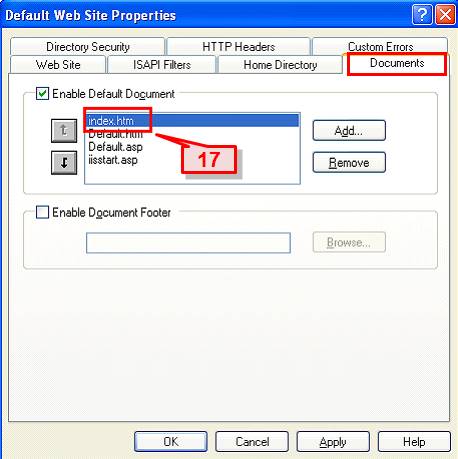
# 17.Select the Document tab. Move the index.htm page to the top. Index.htm will be the first page that will displayed to the user.
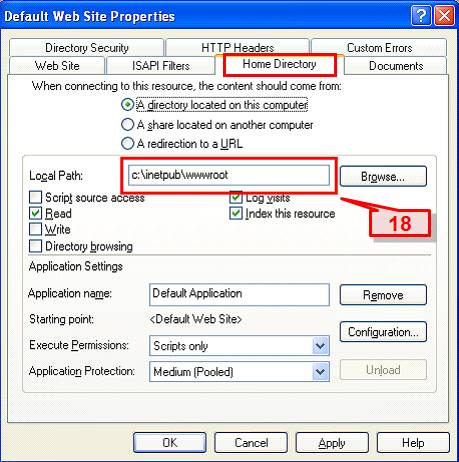
# 18.Then, click Home Directory tab. The default physical local path where IIS files and web directors files is C:inetpubwwwroot. This can be changed to other directory or can be redirected to any other valid URL.
Lets create a new index.htm page that user can see when they open the site.
# 19.Open Notepad, and let’s type, IIS Installation on Windows XP and Web Site testing…
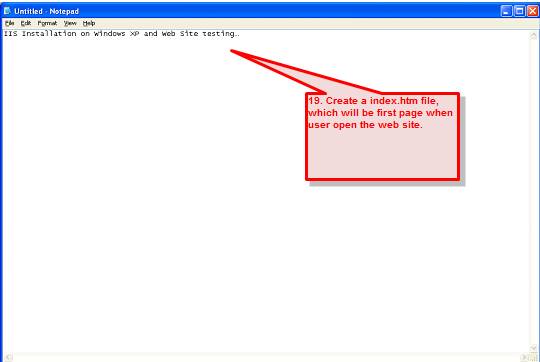
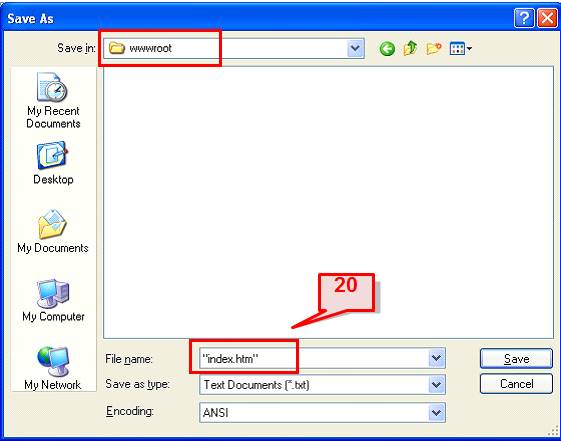
# 20.Select File -> Save as -> and save as “Index.htm” and put this under C:Inetpubwwwroot.

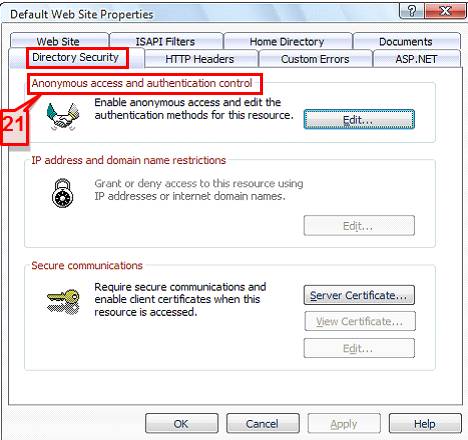
# 21.Select the Default Web Site folder -> right-click mouse -> select Properties context menu. Select the Directory Security page. Click the Edit button for the Anonymous access and authentication control
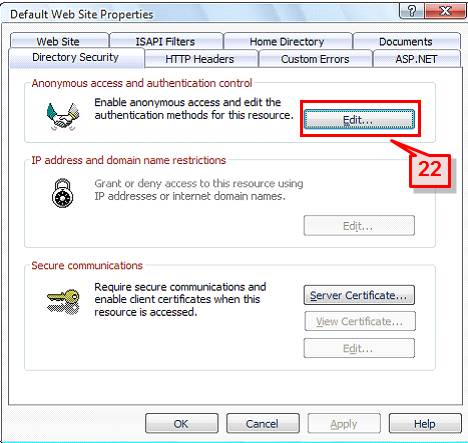
# 22. Click Edit
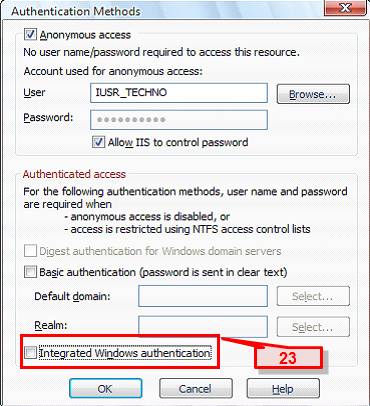
# 23. This page shows default settings of Anonymous access and Integrated Windows authentication. For normal remote user to access our web site without prompted by the login page, only the Anonymous access needs to be checked. So, un-tick the Integrated Windows authentication check box.
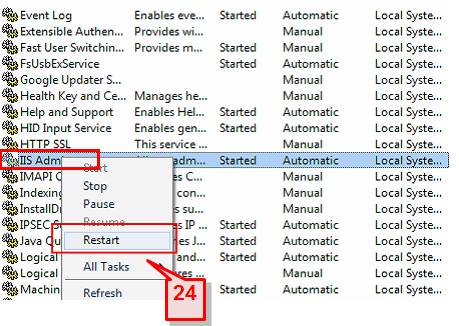
# 24.Once the customization is done and to change these settings, we need to restart the IIS.
To restart, go to services and restart “IIS Admin” service.
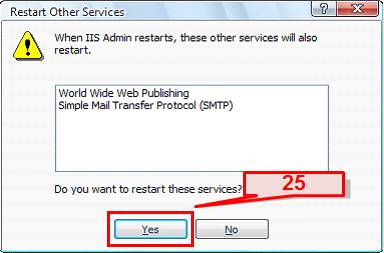
# 25.Click the Yes button for restarting all the hosted services under the IIS Admin. You have also have option to restart any one services also.
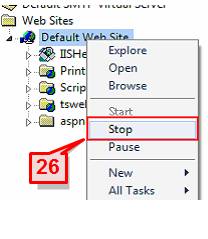
# 26.One other way to restart the IIS is from IIS admin console. On the web site where you have hosted your pages. Click on the website and click stop, once IIS is stopped, follow same process and click Start.
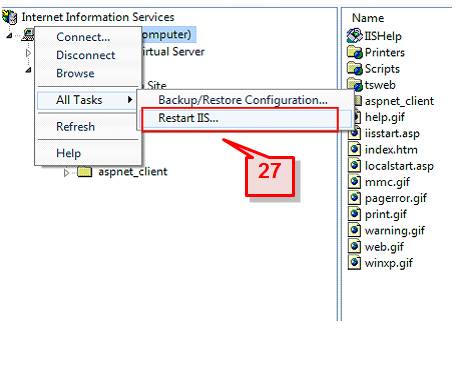
# 27.Or, select the Computer folder -> right-click mouse -> select All Tasks -> select Restart IIS
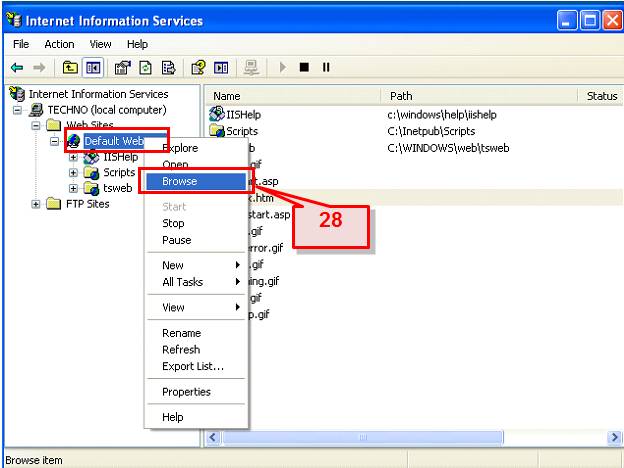
# 28.Then to test your web pages, Go to the IIS -> select the Default Web Site folder -> right-click mouse -> select Browse context menu
# 29.Or, you can also open on Internet Explorer, type http://localhost or https://www.techyv.com/ as the address.
The page that you hosted, will then display in IE,
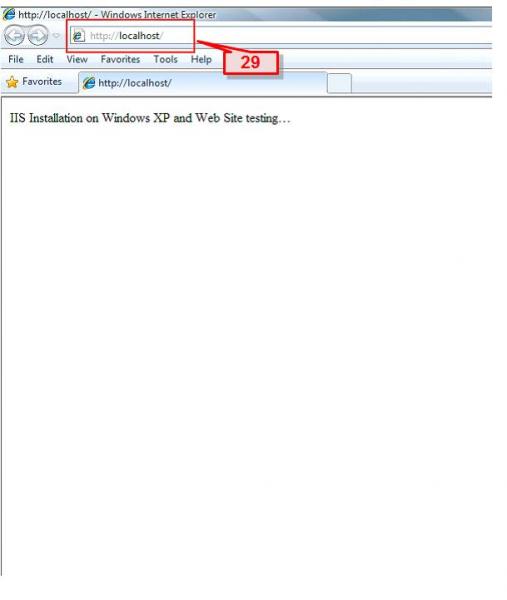
The Page that you have designed, will display.


