Asked By
Holt Huse
0 points
N/A
Posted on - 10/17/2017

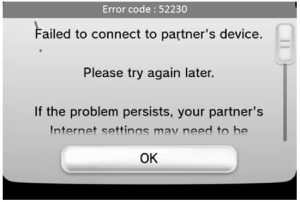
My Wii is unable to connect to the internet from my wireless router. Whenever I try to connect my Wii it shows the error code 52230 wii. Can anyone help to solve this issue? Thanks in advance.

What Does Error Code 52230 Wii Mean And How To Resolve It.

Hello, the error code 52230 wii is because of your Nintendo Wii is unable to secure wireless connection between the Wii and internet. Try the following methods to solve this error.
Make sure that your internet connection is compatible withthe Nintendo Wii. If it is accordant, then there might be a problem with firewall settings, go to the router settings then click on WAN setup and disable the SPI firewall.
The changing of routers channel may also help with can be done in wireless settings of your device. Place the Wii near the router for strong signals and restart the router.
What Does Error Code 52230 Wii Mean And How To Resolve It.

If you encounter error code “52230” when playing with Nintendo Wii, it indicates that the console was able to connect to the network but it can’t connect to the Nintendo servers. This problem may also indicate a problem with your internet connection. Note: Nintendo Wii does not support guest networks or publicly provided networks that will require a user to sign in or accept a terms of service.
Try troubleshooting your connection and verify that your internet connection is working. Try restarting the Wi-Fi router to troubleshoot your connection. If the router has a power button, press it to turn it off then unplug the router from the power for about twenty (20) seconds. Press any button on the router to discharge any leftover power or to power cycle.
After this, plug the router back to the power and turn it on. When the router is ready, open your web browser and visit a website then try clicking some links. Verify that your internet connection is working. If the problem continues, try changing your DNS server addresses. On your console menu, select the circle icon on the bottom left corner.
Next, select “Wii settings” then move over to the second screen using the arrow button then go to “Internet,” “Connection Settings” then select the connection file you wish to edit. After this, select “Change Settings” then press the arrow button on the right three times or until you see “Auto Obtain DNS.” Here, select “No” then go to “Advanced Settings.”
Next, select “Primary DNS” then enter the following IP address and then select “OK”:
8.8.8.8
When you are finished, select “Secondary DNS” then enter the following IP address and then select “OK”:
8.8.4.4
When you are finished, select “Confirm,” “Save,” and then “OK” to test the connection.


