Installation and Configuration of IIS – Part 4
Now that we have the AD is ready for the server with DNS and DHCP, the next step is to install and configure IIS Server. IIS is required for web based reports that SCCM support.
To Install IIS please follow the below steps
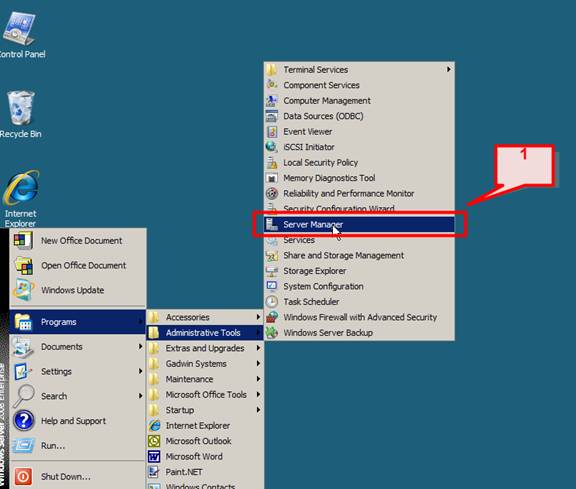
1. Click on Start -> Administrative Tools -> Server Manager
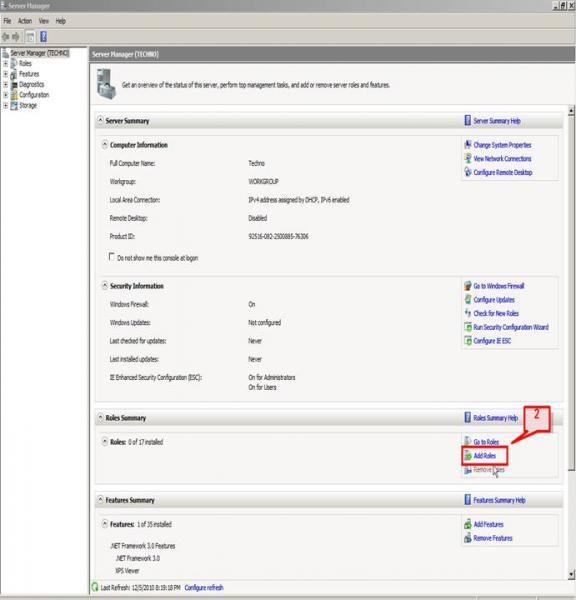
2. In the Server Manager window, on right pane, scroll down to Roles Summary, and then click Add Roles.
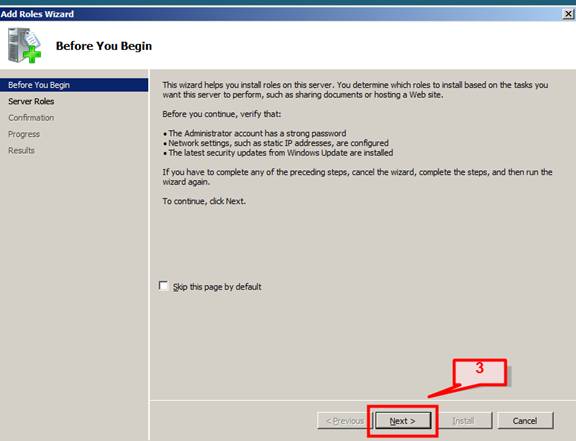
3. Add role wizard screen will appear. This wizard guides you to install roles on the server. Click Next
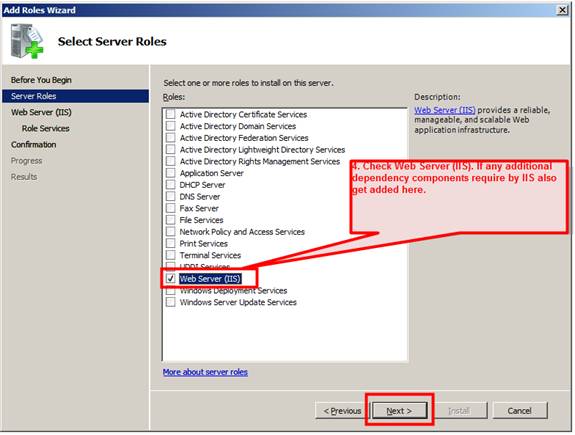
4. Select Web Server (IIS) on the Select Server Roles page and click Next
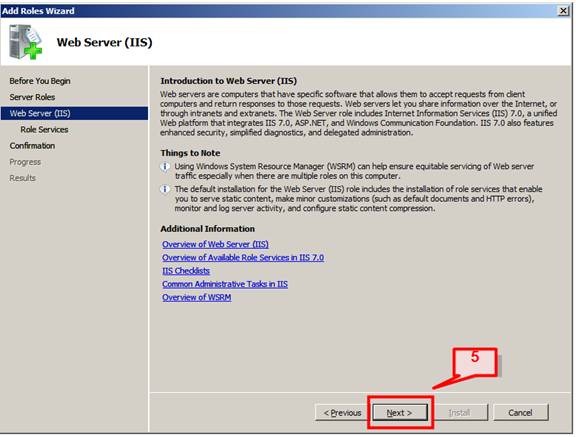
5. The next page will provide some basic information on IIS Web Servers and a few links with extra information. Click Next to continue,
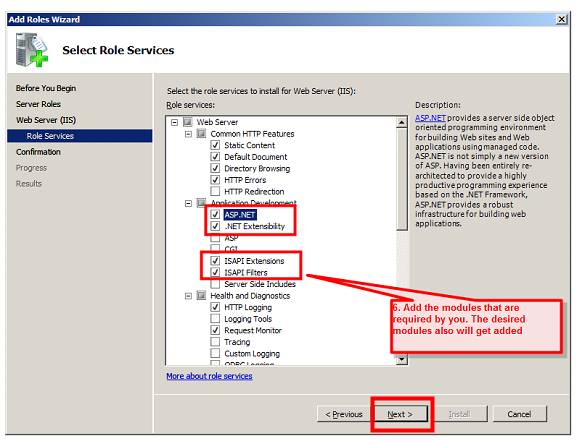
6. The next window is the Select Role Services. Customize you selection here, and add only the modules necessary for installation of IIS. One can select all the modules also.
E.g. I have selected ASP.NET. Its desired modules, ISAPI Extension and ISAPI Filters and .NET Extensibility will get added also.
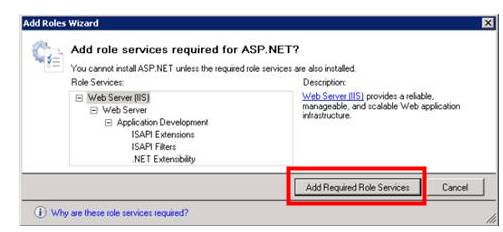
When you click on a module, on the right pane the description of that module will appear. If you add a required module and if that module has some dependencies module, all will get added. Click Next.
7. Click next will show Confirm Installation Selections screen to verify your chosen settings. This will provide you the detail summary of the selection that you have customized during IIS installation wizard.
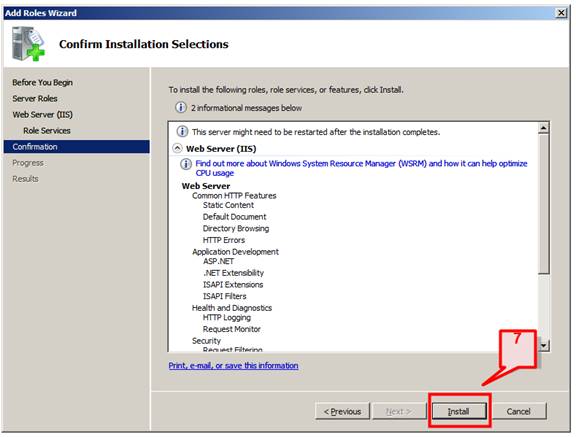
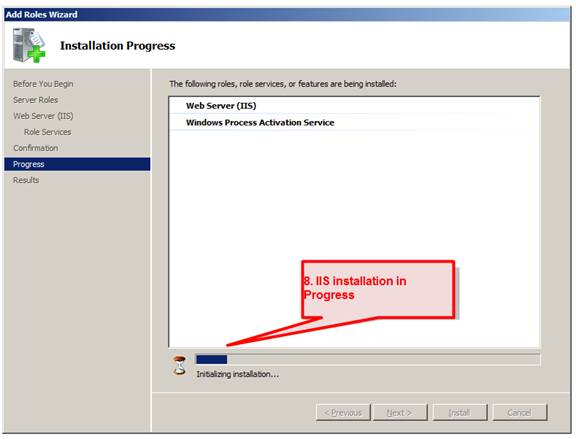
8. Click Install and installation will start.
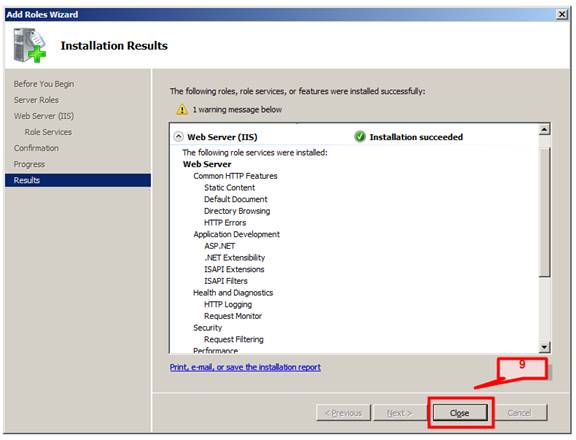
9. After installation, Installation Results page will appear. Click Close to finish the process.
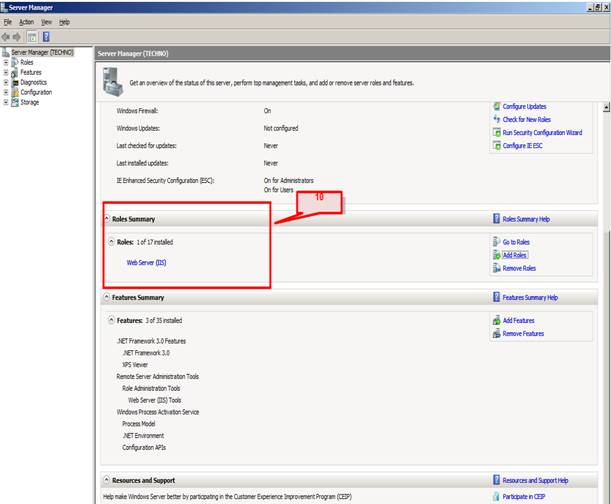
10. In Role Summary section, we can now see the Web Server (IIS) is added.
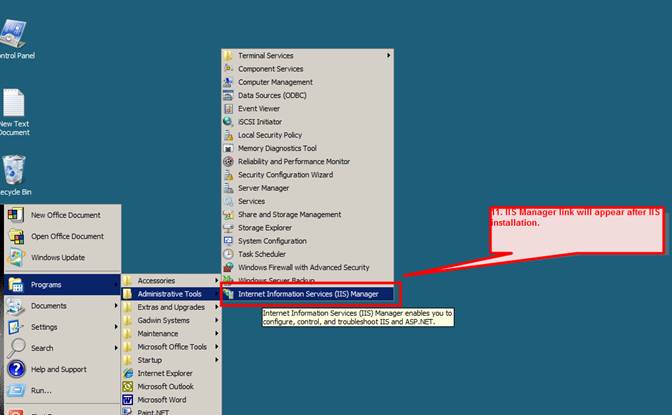
11. Confirm that IIS is installed successfully and Web server is working.
Go to Start -> Administrative Tools -> Internet Information Services (IIS) Manager
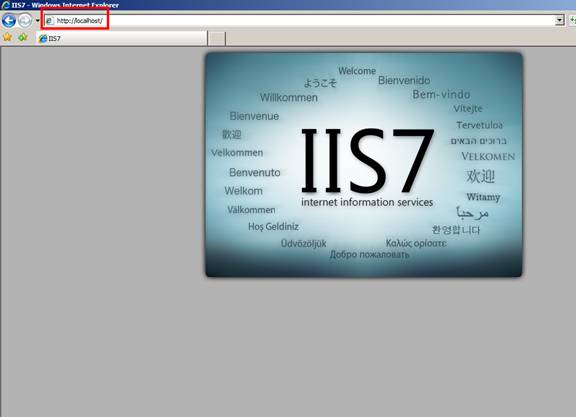
12. Confirm that the Web server works by using http://localhost on IE.
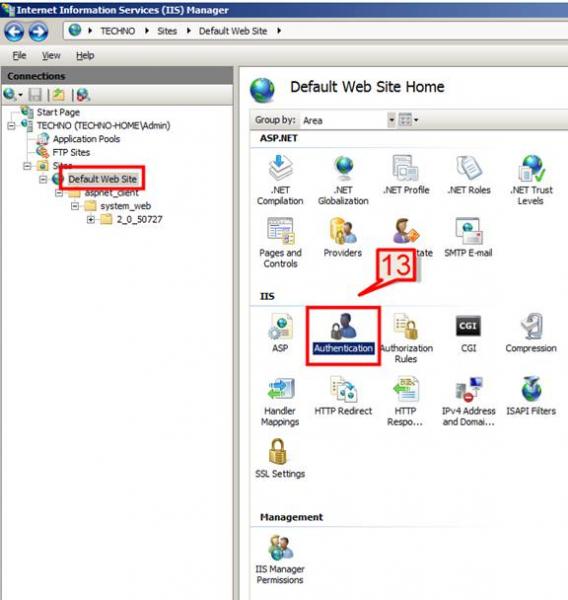
13. The next step is to make windows authentication enables in IIS.
Go to IIS console -> select default web site -> double click on Authentication.
14. Select Windows Authentication and on the Action pane click on Enable

15. select default web site -> double click on Authentication Rules
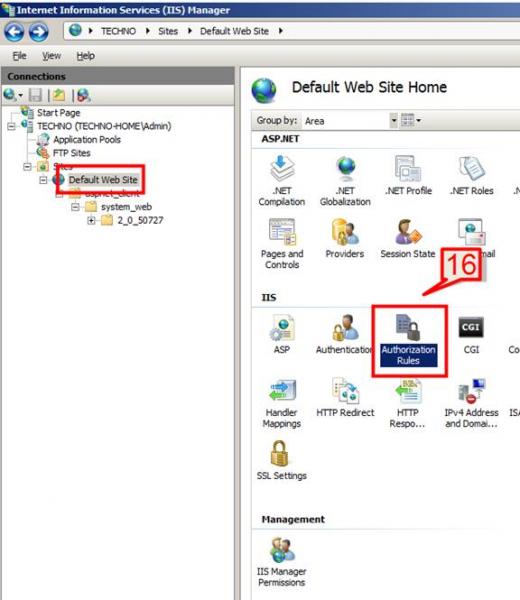
16. Make the mode as Allow for authorizing users.
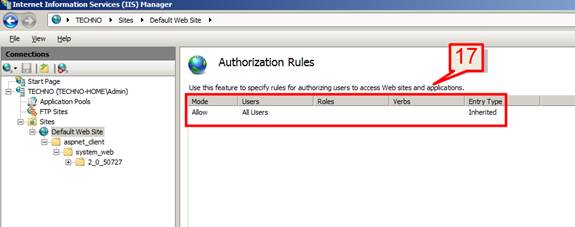
17. Then download the WebDav application from Microsoft site and install it. Once installed it will be available in IIS.
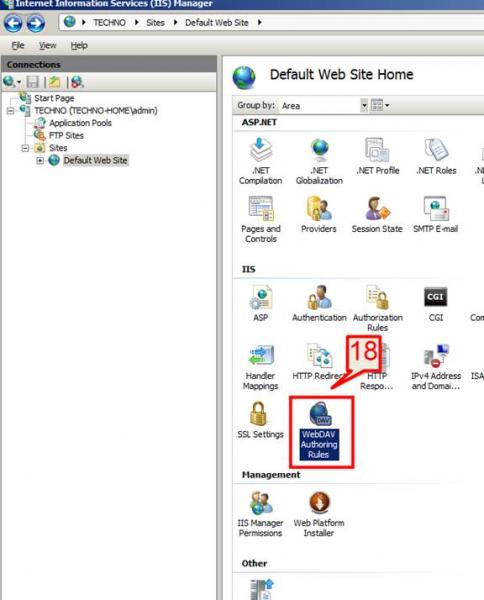
18. Double click on WebDav and on the alerts pane select Enable WebDav.

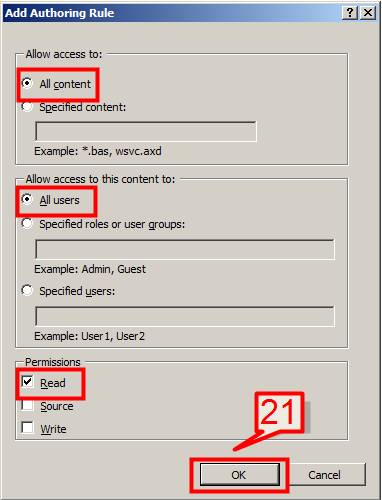
19. Once WebDav is enabled, click on Add authoring Rule

20. Select all content in Allow access to section; all users in Allow access to this content section; and Read permission in Permission section.
Click Ok to continue
21. Select WebDav authoring rule and on action page select WebDav settings

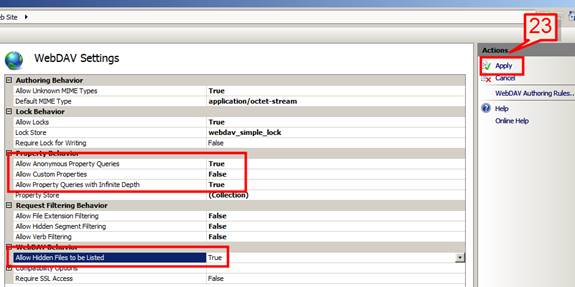
22. Change the following settings
- Change the setting to True for Allow Anonymous Property Queries
- Change the setting to False for Allow Custom properties
- Change the setting to True for Allow Property Queries with Infinite Depth.
- Change the setting to True for Allow Hidden File to be listed.
Once done select apply.
