Software Package Creation and Distribution
Software package creation and distribution requires the following
- Creating a package
- Distributing the package to distribution points
- Create the Programs for installation and uninstallation.
- Assigning the package to an collection
Creating an Advertisement and scheduling the advertisement for installation on client machine.
Create a Package
Let’s install the SCCM client setup which is required to be present on all client computers. Before deploying any package, please make sure that SCCM has discovered that client to its database and the client need to be present in any one of the collections. Also the client agents should be installed on the client machine.
1. Open Start Menu -> Programs -> Microsoft System Center -> Configuration Manager 2007 -> ConfigMgr Console
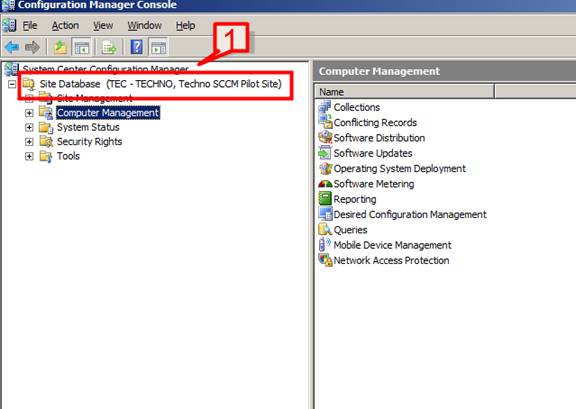
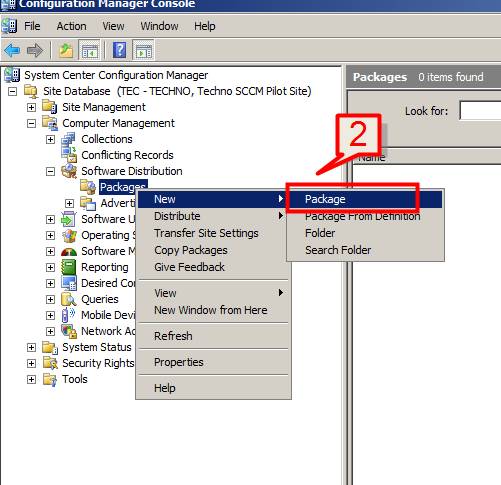
2. Expand Computer Management -> Software Distribution -> Packages
Right click on packages and select New -> Package
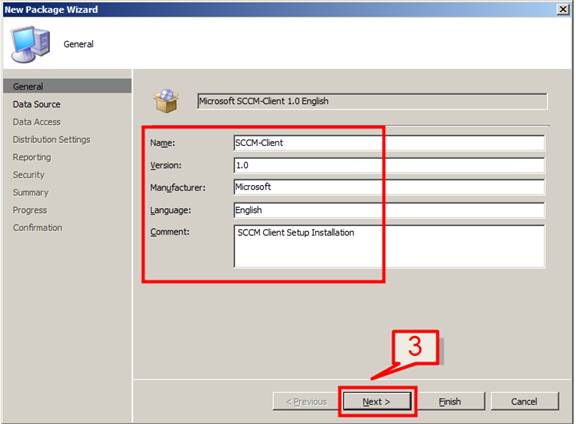
3. Provide Package name, version, Manufacture name, Language and comments on new package wizard and click next
4. Select this package contains source file option and in source directory browse and provide the source directory location. Select use a compressed copy of the source directory.
Click next to continue
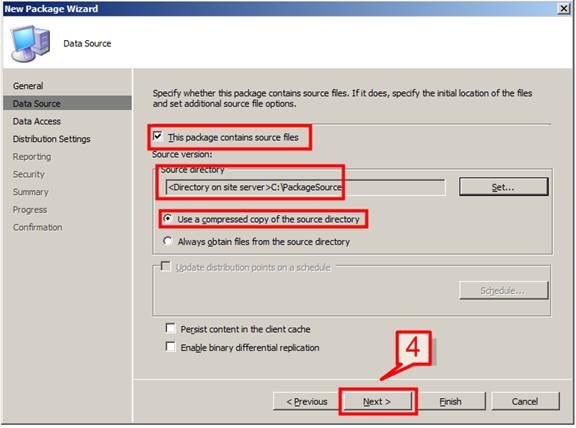
Note: The source location could be on site server or on the network location. It is best practice to share the source location so as to allow access to various SCCM site server administrators.
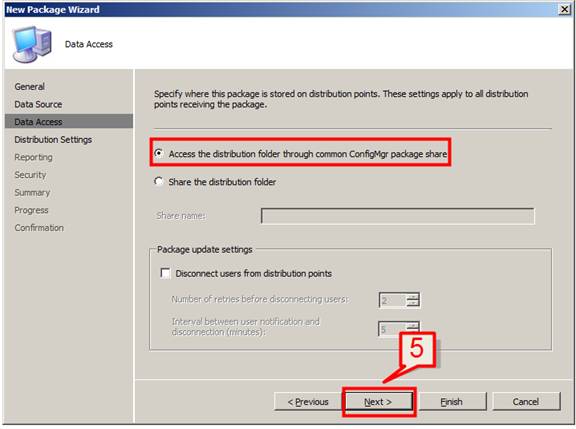
5. On next page, provide whether the package that is going to be distributed to distribution point (DP). You can also provide a DP share name by choosing the second option ‘share the distribution folder’.
Leave the default setting and click next
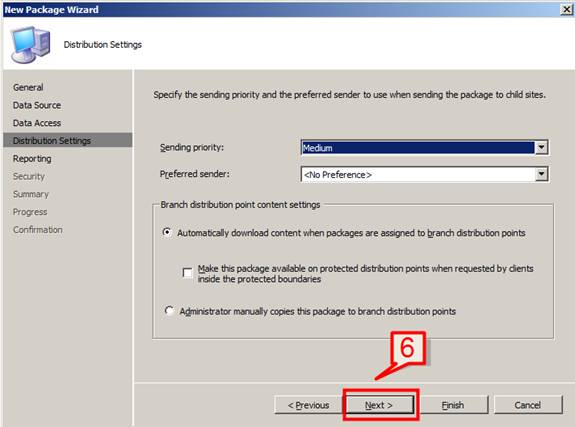
6. Next screen provide an option as on which priority (high, medium, low) the package need to be distributed to DP.
Leave the default settings and click next
7. click next on the reporting page
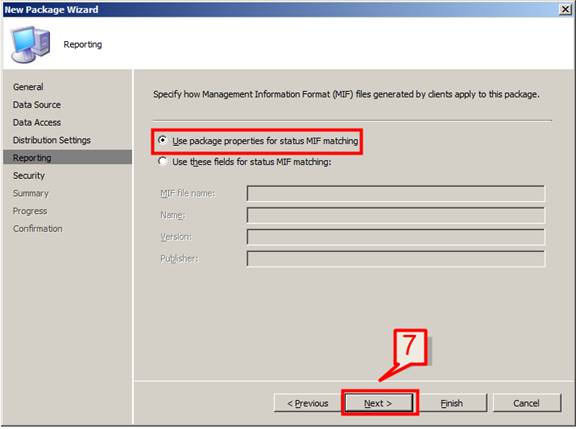
8. Leave the default setting and click next on security windows
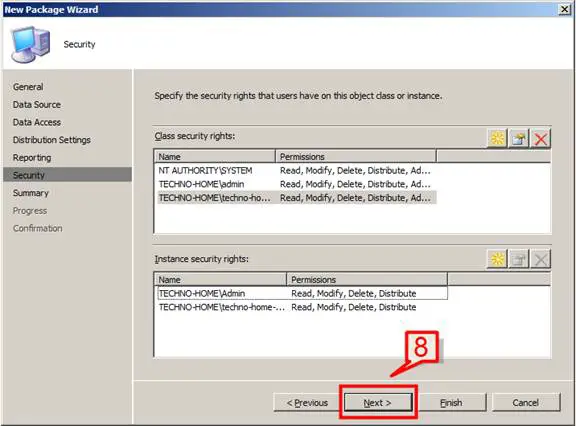
9. review the package settings on summary page and click next
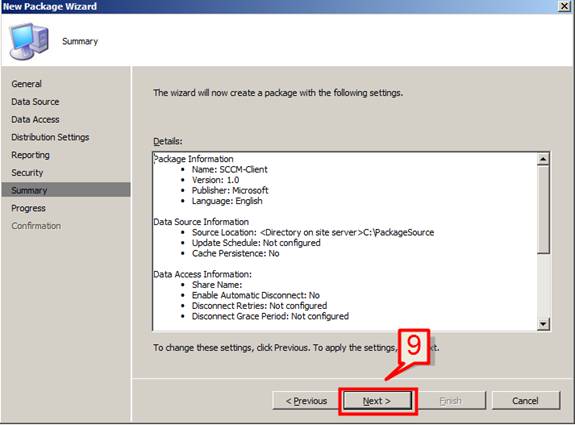
10. Click close to complete the package installation wizard.
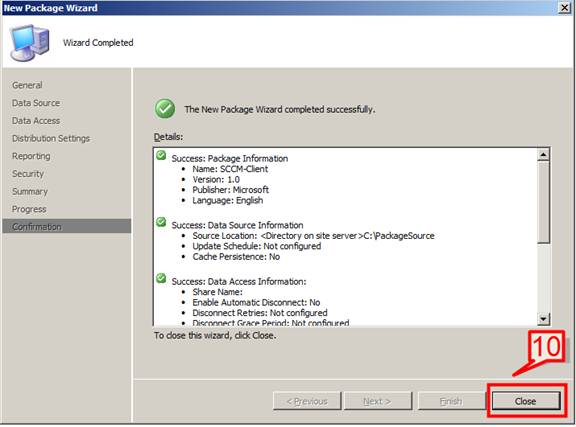
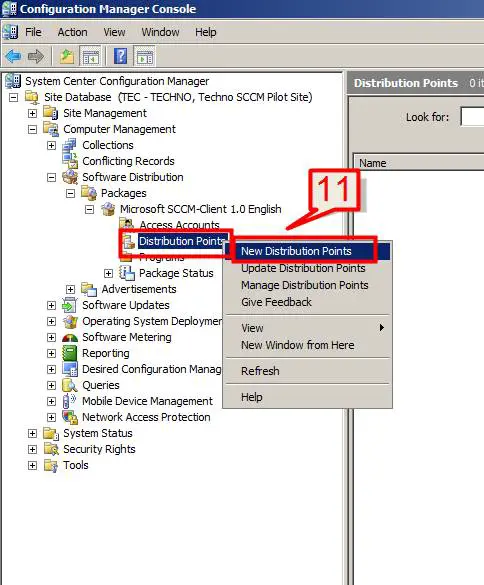
11. We will have now the package get added to the packages section.
Expand Packages -> select Distribution Points -> right click -> select new distribution point
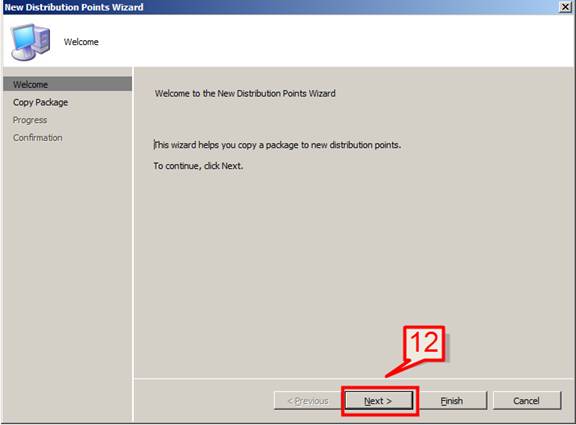
12. on the welcome page click next
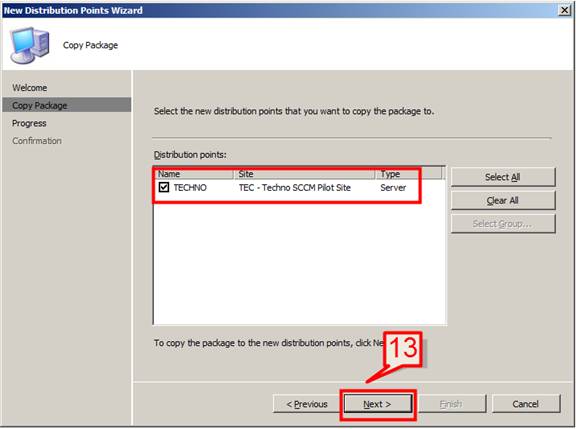
13. Select the distribution point server name and click next to continue
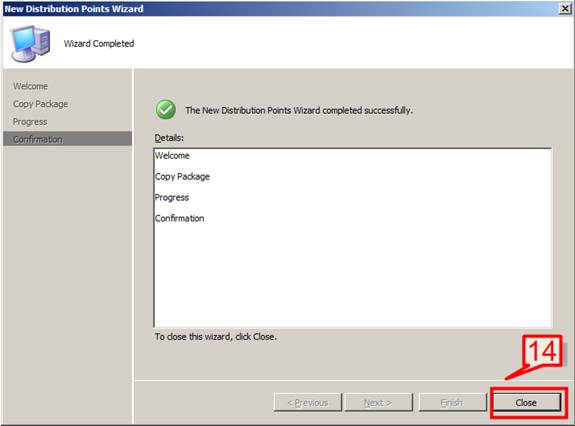
14. SCCM will then copy the package to selected distribution point server. Click close to complete the wizard.
15. Go back to distribution point, the select DP is now get added.
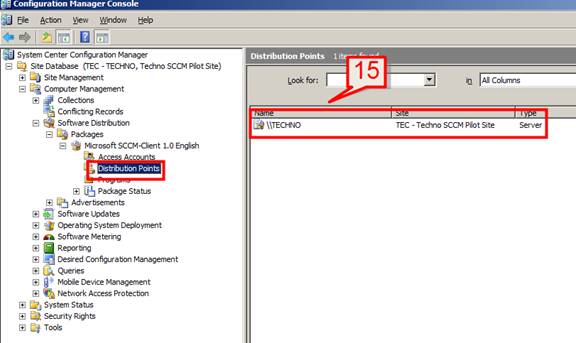
16. The next step is to create the required Programs for installation and uninstallation of the package.
Expand Software Distribution -> Packages -> expand the package that we have just created -> Programs -> right click -> select new program
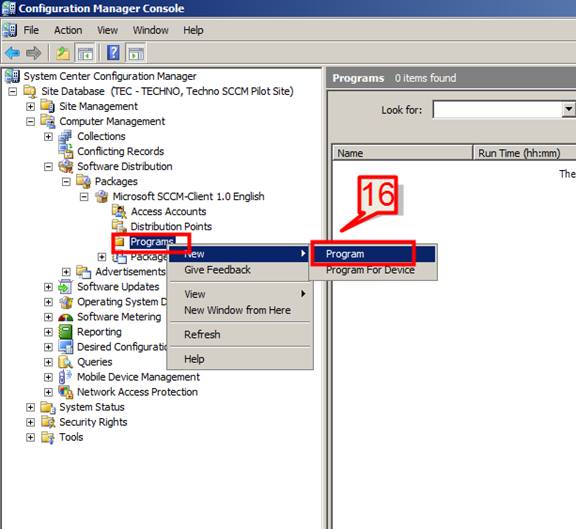
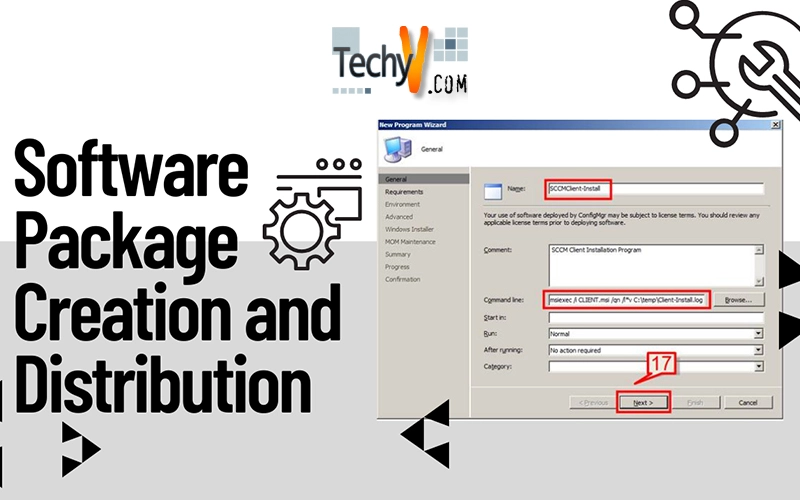
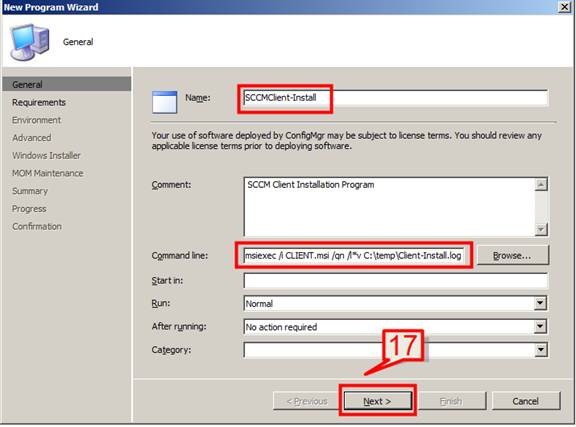
17. Provide the program name, command line parameter and other required setting and click next on new program wizard start page.
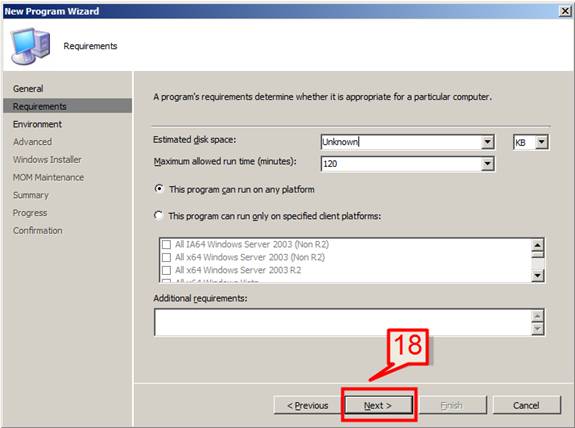
18. leave the default settings on requirement page and click next
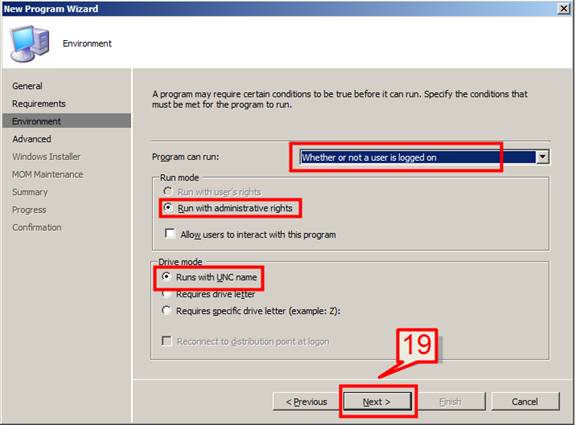
19. On the environment page, we have the option to select how the program will get installed.
Some options are
- Whether or not user is logging to the system: Program will run irrespective of whether the user is logged in or logout from system.
- Only when user is logged in: Program will only run when user is in login state on the system.
- When no user is logged in: Program will run when there is no user logon on the machine. This option will be useful in case of software patches installation.
We have the other option as whether the program requires interaction with user when installation and how the program will run (with admin rights or with user rights)
The recommended is to select whether or not user is logged in and run the program with administrative rights
Click next to continue
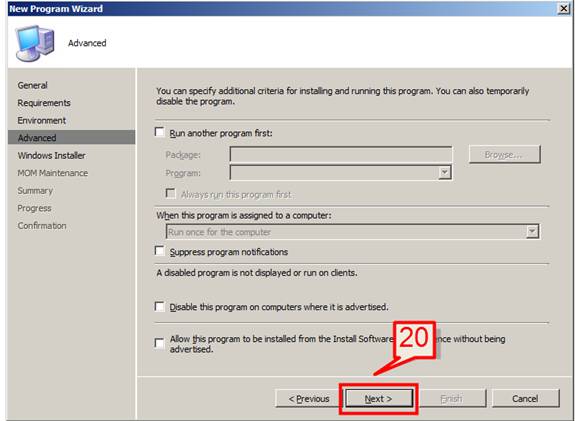
20.The advanced page will provide option to install a dependent package first. This also provides an option whether to suppress the program notification window that will get displayed on the client machine or not.
Leave the default and click next
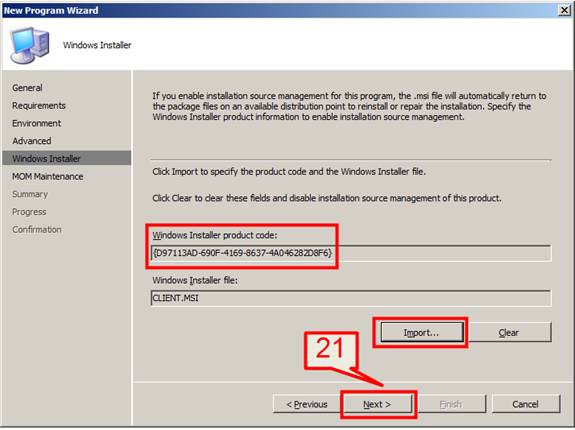
21.In the windows installer window, click on Import and select the installer file to import product code of the MSI package.
Click next
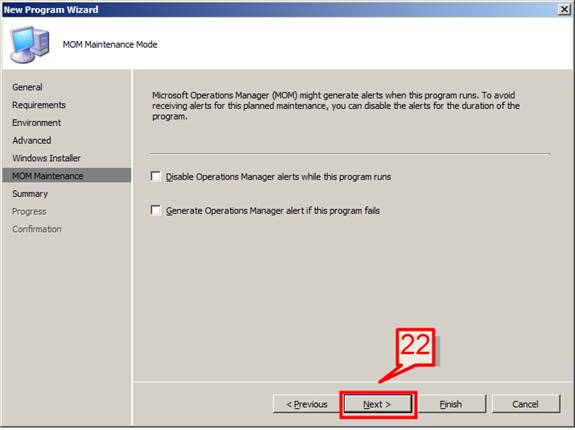
22.click next on MOM page
23.Review the program settings and click next on summary window.
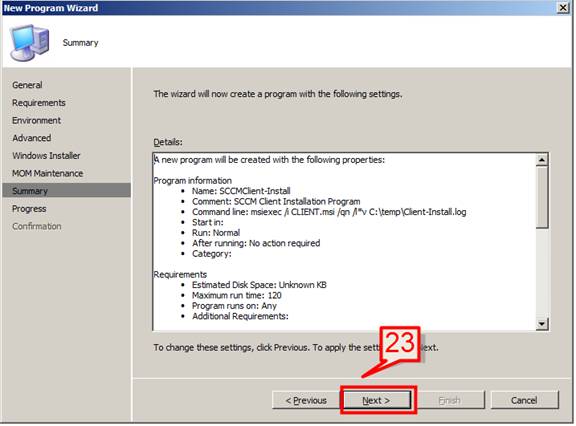
24.Click close the complete the configuration wizard.
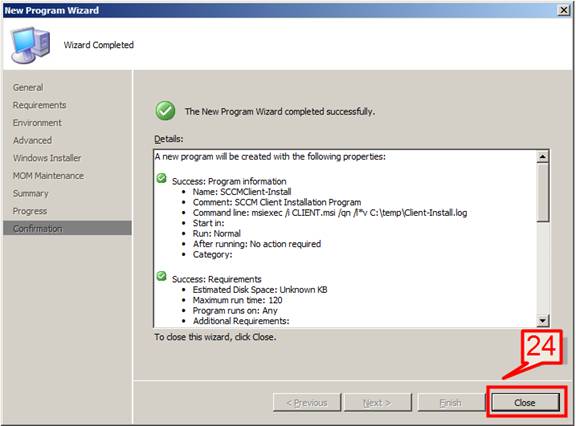
On the same way we can create a removal program for the package.
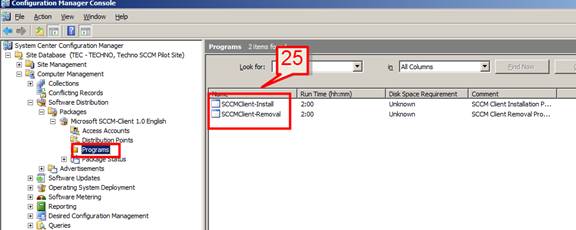
25.The installation and removal programs will now appear on the program section.
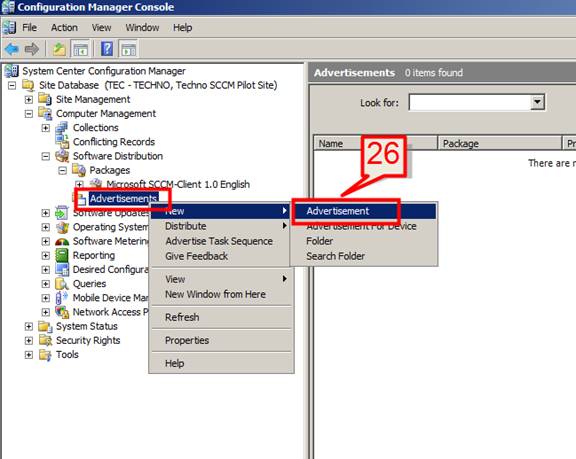
26.The next step is to create the Advertisement for the package and assign the programs and collection to it.
Expand Software Distribution -> Advertisement -> right click -> New -> Advertisement
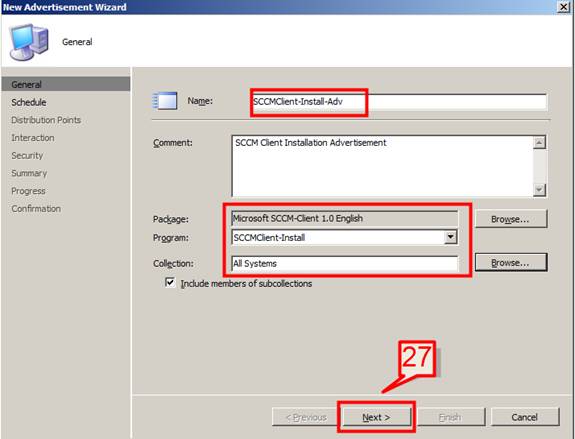
27.On the new advertisement wizard provide the followings
Provide the advertisement name
On the package section, browse and select the package that we have just created.
On the program section, select the SCCMClient-Install program
On the collection section, select All Systems collection.
Also select the option ‘Include members of subcollection’
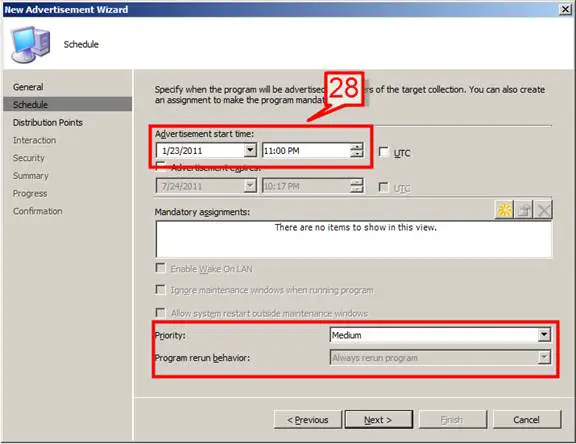
28. On the schedule page, provide the advertisement start time as when the package will install on client machines. We have also the option to expire the advertisement so that after the time expires the program will no longer execute.
Also select the advertisement priority and program rerun behavior and click next to continue
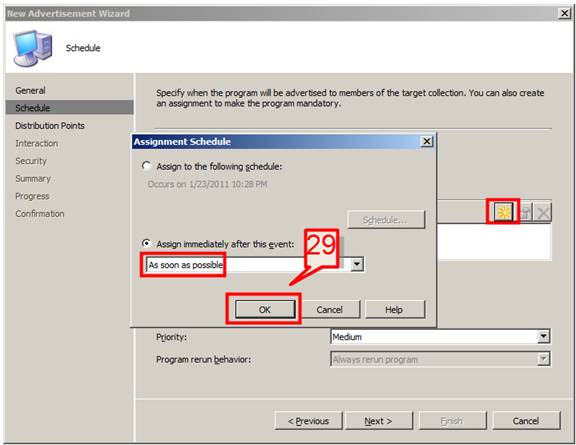
29. Select the * option under Mandatory assignments section and select As soon as possible under Assign immediately after this event section
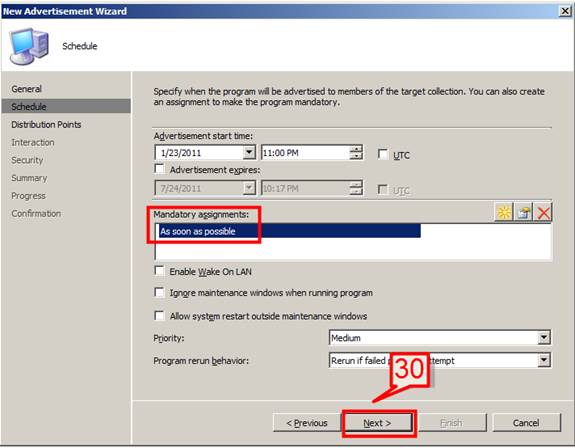
30. Click next to continue
31. On the distribution point page, select download content from DP and run locally and don’t run the program option.
Click next
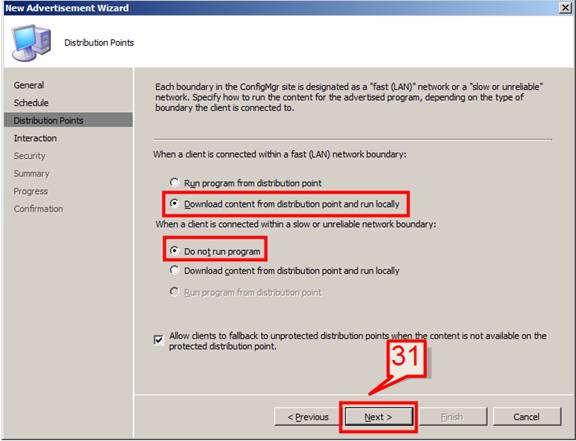
Note: If the package size is large enough then you can choose to run the program from DP so as to save disk space on client machines.
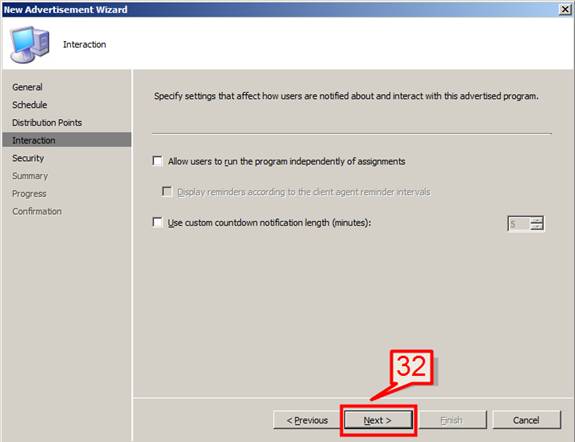
32. Leave the default setting on interaction page and click next
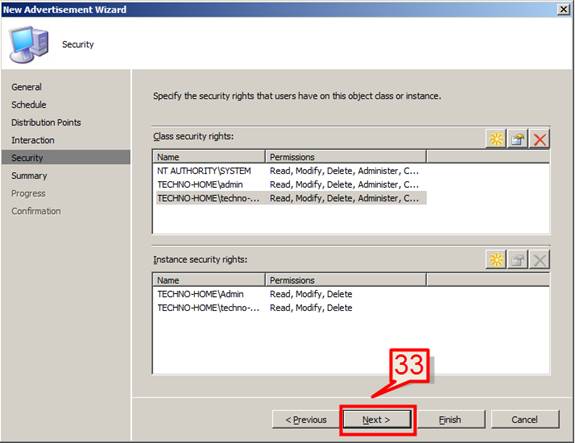
33. Click next on the security page
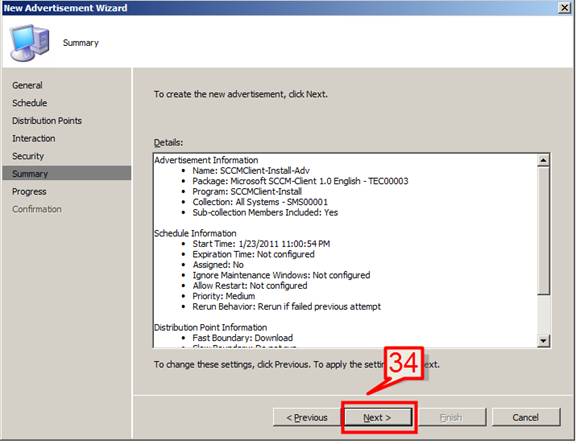
34. review the advertisement settings on the summary window and click next to continue
35. The advertisement will now get created, once done click close to complete the wizard.
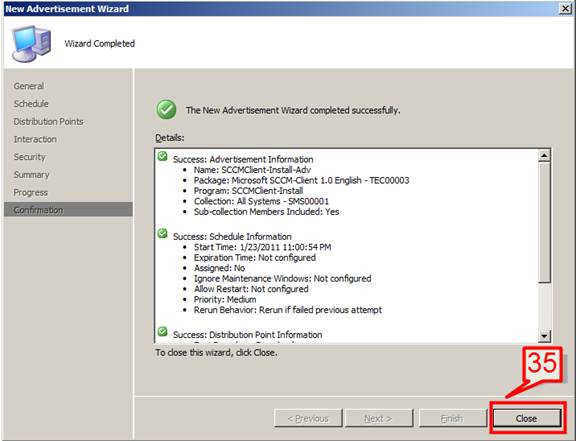
Same way we can create one more advertisement for removal program.
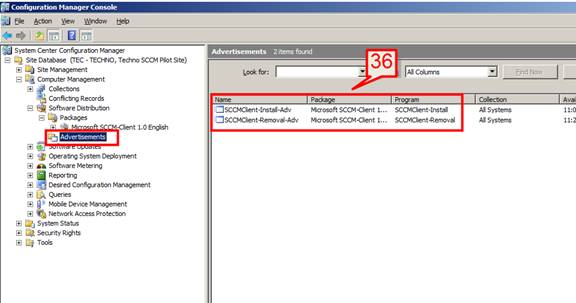
36. The advertisements will now appear on advertisement section.
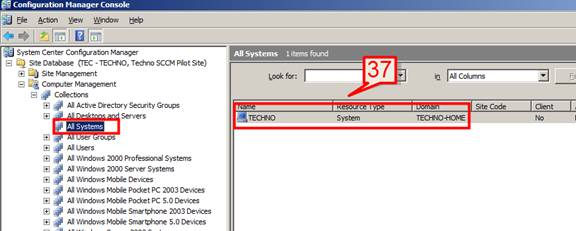
37. We can also verify under collection section as what programs and advertisements are assigned to that collection.
Expand Computer Management -> Collections -> All Systems -> Select a machine
38. Right click on Techno and select properties
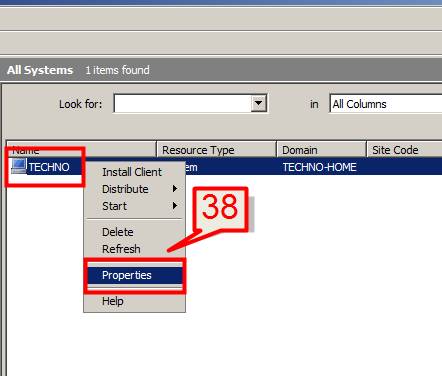
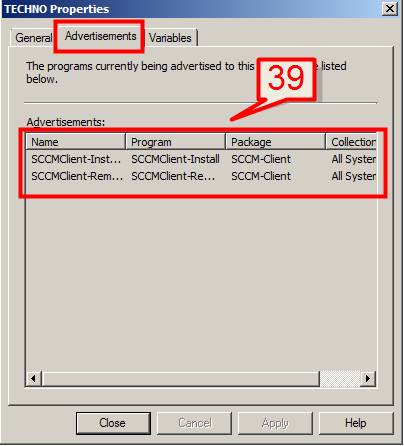
39. On Advertisement tab we can see the list of advertisements with program and package name assigned to that machine and collection.
