Step by Step Installation of the Visual Studio 6
Visual studio 6 is a computer software that is used in creating and running programs written in visual basic, C and C++ languages. Visual studio installation has several steps that need to be followed in order to work properly. Below is the explanation with images made easy to understand for its installation. It should be noted that the icons with a red mark are the required fields to be filled during the entire installation process.
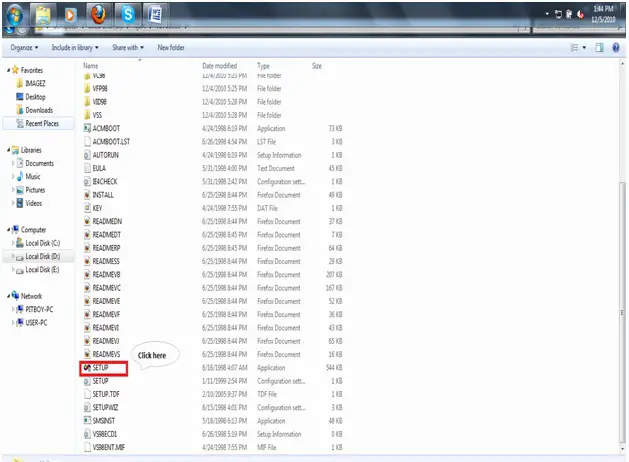
1. Run the set up of visual studio 6 software as shown below.
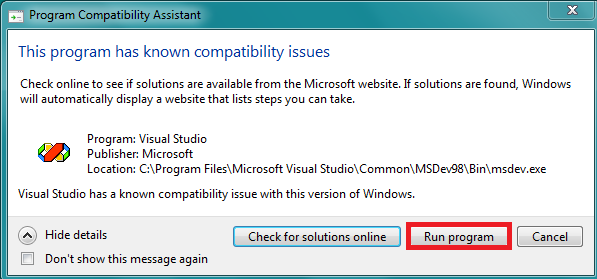
2. A dialog box will appear. Click on “Run this program “. It will take you to the next step. Below is a diagrammatic presentation of how to run the program.
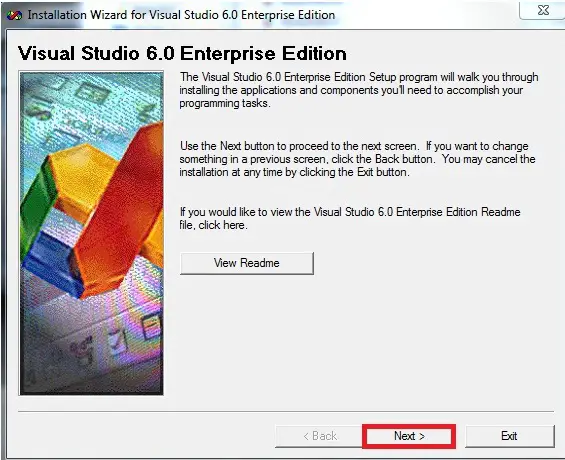
3. Click the next command button as shown below. After clicking this button, you will proceed to the next screen. You can go back or cancel the installation process at any time, just click the Back or Cancel button.
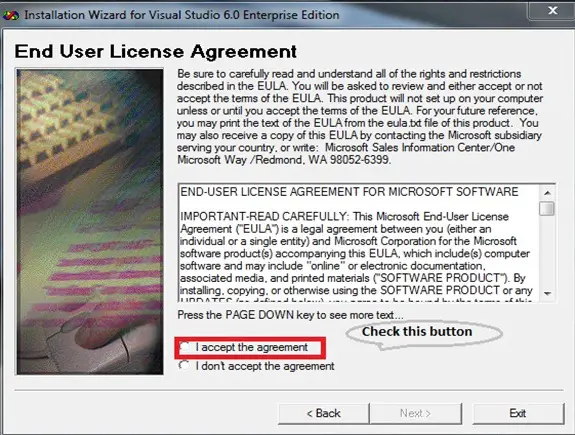
4. This screen contains the End user license agreement. If you are comfortable with the agreement check the “I accept the agreement” option button.
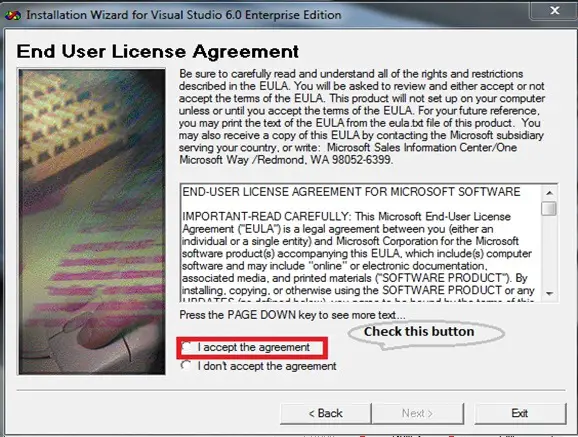
5. After checking the “I accept the agreement”, click on Next to go to the next stage of installation as shown below.
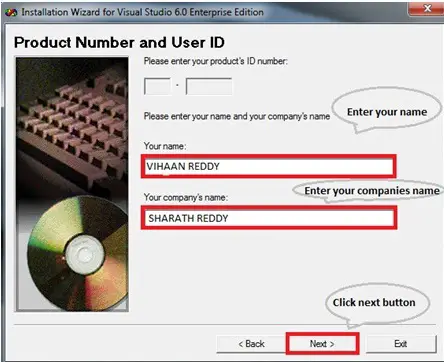
6. Fill the dialog box with your name and your company’s name as shown below and click on Next. You can leave the dialog box for company name blank.
7. The next step is to select the enterprise setup option. It is recommended that you choose “Custom” as it defines an integrated setup of both products and server applications for the workstation. Click on Next after selecting the enterprise setup option.

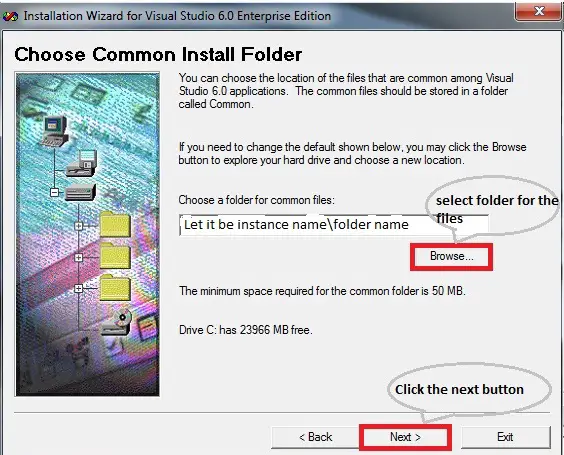
8. Select the folder in which you want the Visual studio to be installed. By default it installs in C:program filesMicrosoft visual studiocommon. You may change the default location if you wish by clicking on “Browse” and click Next.
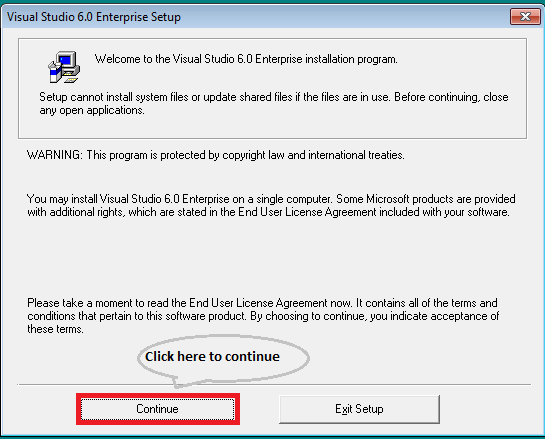
9. Click on “Continue” to go to the next step as shown below.
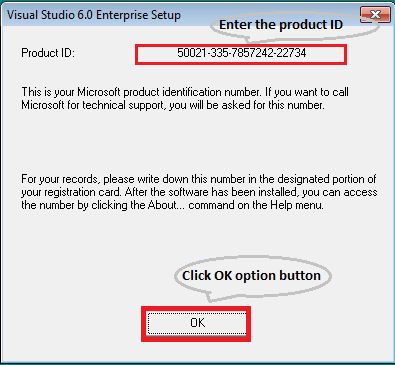
10. Paste the product ID provided to you and Click “Next” as shown below. Remember, the ID must be genuine.
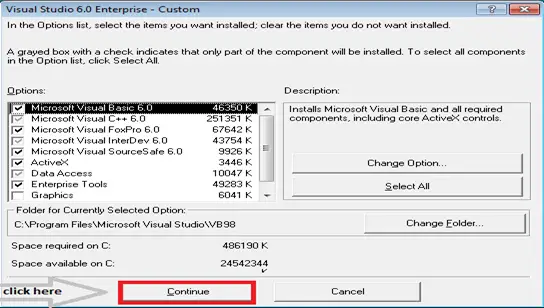
11. In the next step select the items you want to install and remove the items you don’t want to be installed. If you are a beginner select the default items. Click on “Continue”.
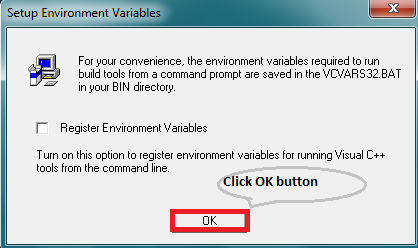
12. Register Environment variables which allow you to run Visual C++ tools from the command line. You can decide whether to register the “Environment” or not and Click “OK”.
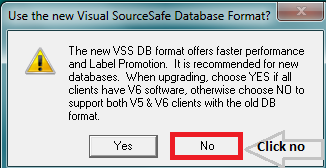
13. Now Visual basic setup will start and after the complete installation you will see a dialog box as shown below .Choose YES if all the clients have V6 software, otherwise select NO in order to support both the V5 and V6 software.
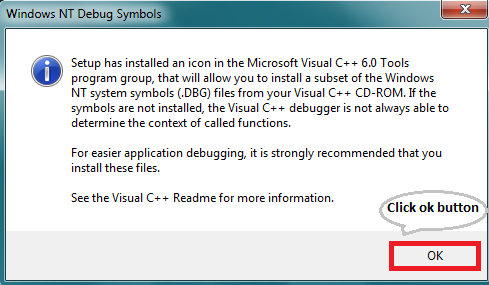
14. Now Windows NT Debug symbol will appear. It helps in simplifying the application debugging. You are required to click on OK as shown below.
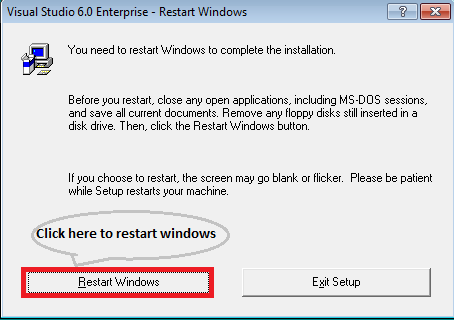
15. After clicking the OK button, another window will appear asking you to restart the computer to complete the installation. Click on “Restart windows”. Make sure to save all the data otherwise it will be lost.
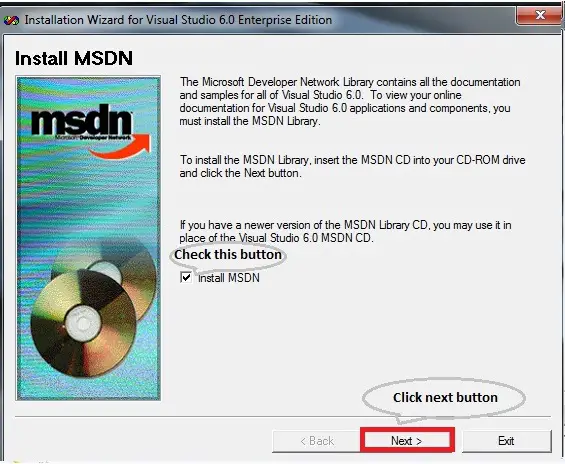
16. After it is restarted, install the MSDN library. This MSDN library allows you to view your online documentation for VS 6 application. Insert the MSDN CD in your CD drive. “Check” “Option” to install MSDN and then click on “Next” as shown below.
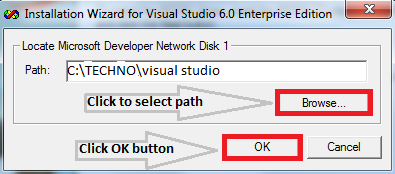
17. Select the path at which you want the MSDN to be installed. By default the path is normally where you have saved the VS6 software. You may select another path and then click the OK button as shown below.
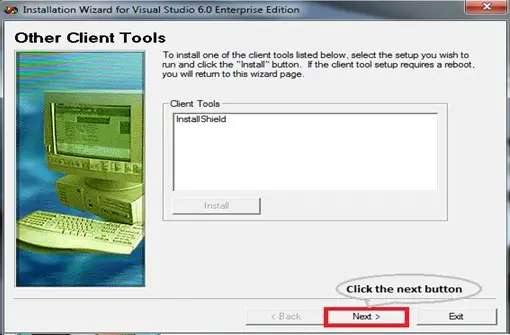
18. Window with a “Other Client Tools. ” Title will appear .Click on “Next” as shown below.
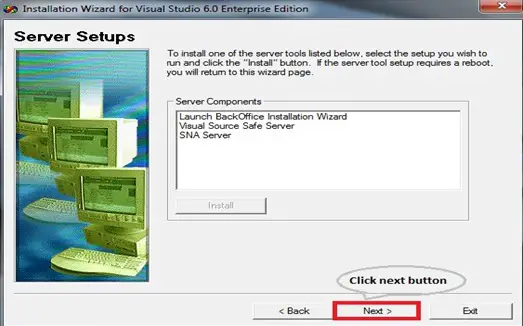
19. Select the server which you prefer and click on “Next”.
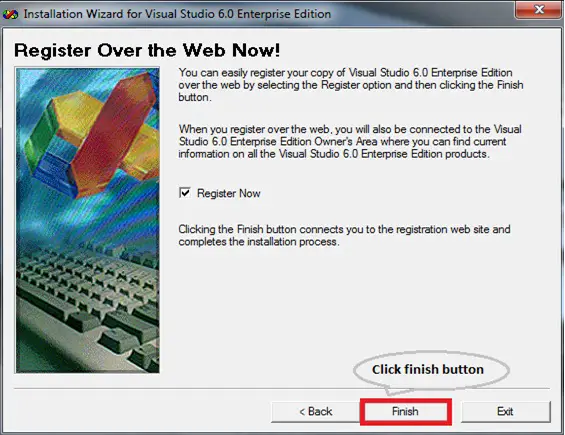
20. Finish the installation by clicking on “Finish” as shown in the diagram.
With the Visual studio 6 installed on your computer, you will be able to create and run applications that are written in C, C++ and Visual Basic language.


