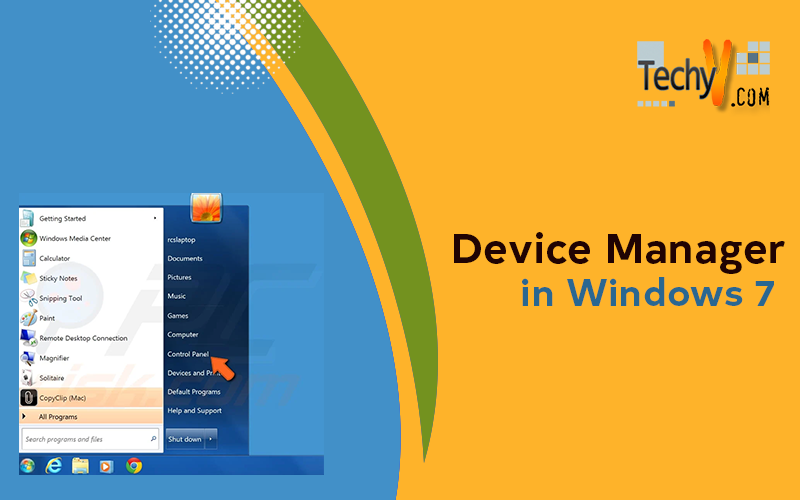
Device Manager
Device manager in Window 7 is used to graphically view all the hardware that is installed and connected to your computer. Device driver is actually software that allow window to communicate with specific hardware device. To use any hardware device drive must be installed.
Some of the properties of device manager are following
- Device manager is used to determine whether hardware on your computer is working properly.
- Device manager identify can identify the device drives that are loaded for each device.
- You can enable, disable and uninstalled the devices through device Manager.
- Device manger only works on the local computer. You can view the device mange of remote computer but you can’t modify any hardware configuration.
- Device manger also has some diagnostic feature to resolve the device conflicts and change the resources if required.
To view the device manger and to update the driver software following steps are require
Step 1:
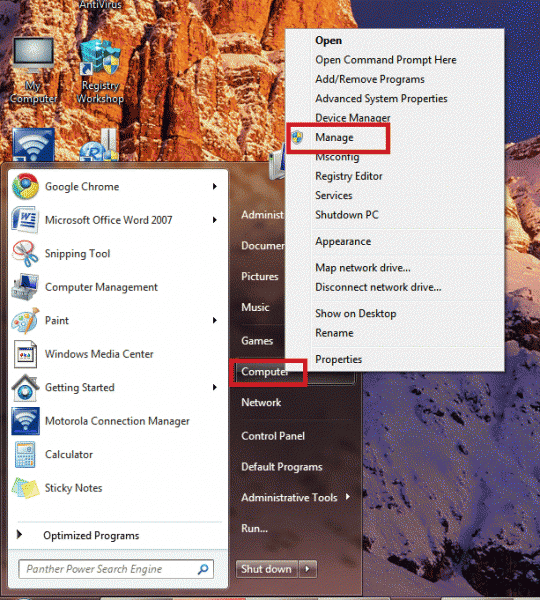
To open the device manger you must go to “ Computer Management “ console by Right click on the computer icon in start menu and then click on Manage
Step 2:
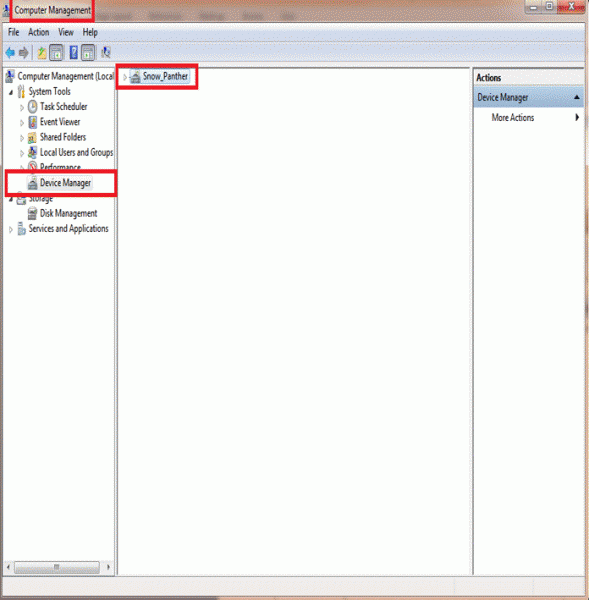
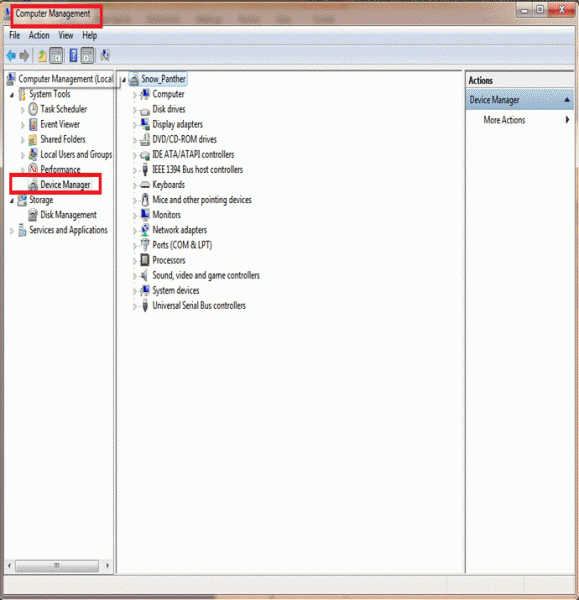
Following window of “Computer management” Console will open with different options of System Tools like Task Scheduler, Event Viewer, and Device Manger etc.
Click on the Device manager option on the console Tree of Computer Management.
Step 3:
To view all the drives that is installed on the computer Click on the button
“Snow_ Panther”. Following window will appear showing all drives that are installed in the computer
Step 4:
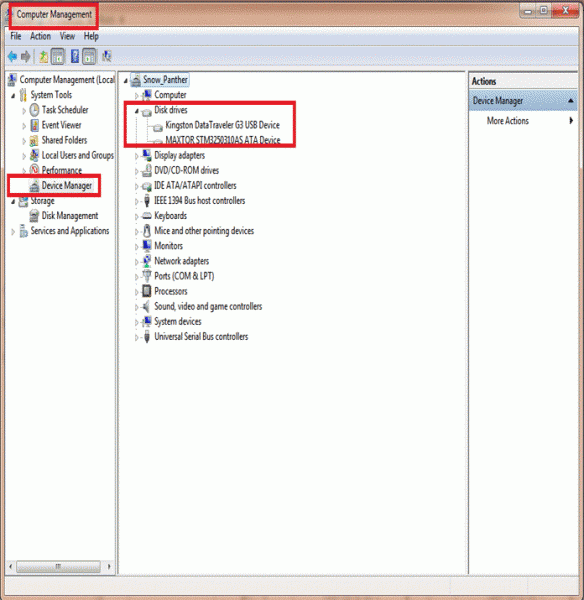
To update the Disk Drive click on the button of selected drive as shown
Step 5:
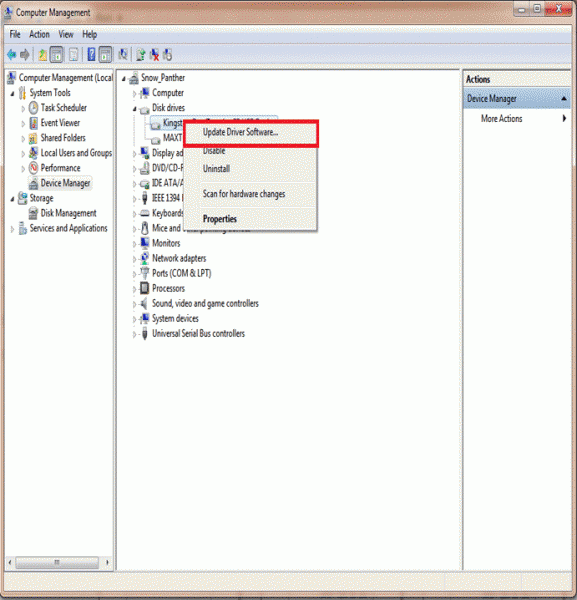
Right click on the device. An Option menu show different options i.e. Update driver software, Disable, uninstall etc.
Use the option according the requirement.
Services and Applications
Window 7 has many standard and extended services that are designed to serve connected drives, hardware and applications. Some of these services are essential for the working of core components of window and are designed specifically according to user requirements.
Like some other operating systems Window 7 also runs some unnecessary services that can low speed and performance of your computer. These services can be turned off without harming the operating system of your computer. So disabling the services that you do not require from automatically starting is an easy and fast way to boost your system performance and functionality.
Following steps are required to disable or stop some services of your window 7.
Step 1:
To disable the services, you must first go to “Computer management “console by Right Click the computer icon and click the Manage.
Step 2:
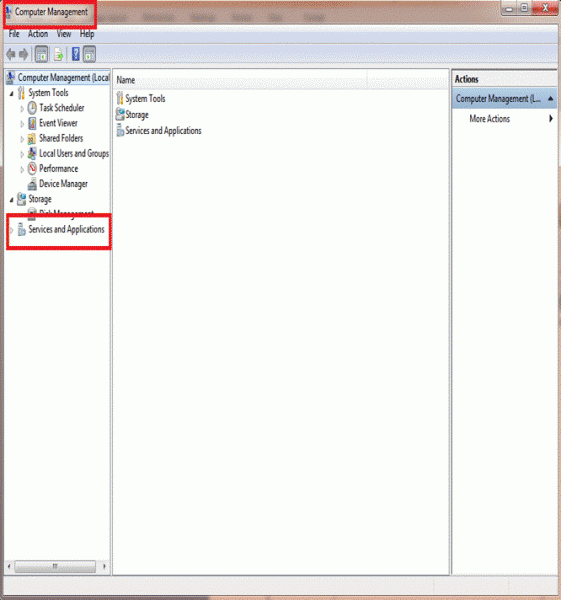
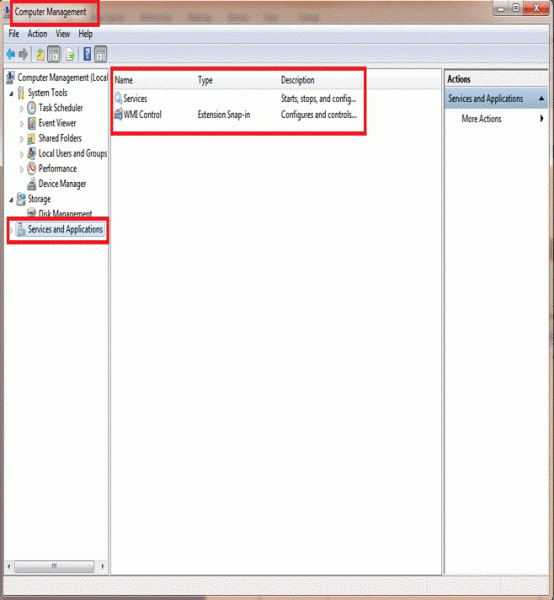
Following window will appear after step1.This is “Computer Management” console and contains the option “Services and application “on the console Tree.
Click on the option“Services” and Applications”
Step 3:
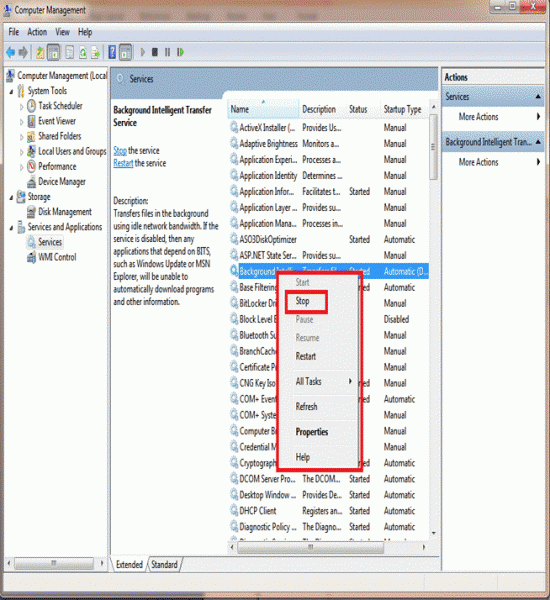
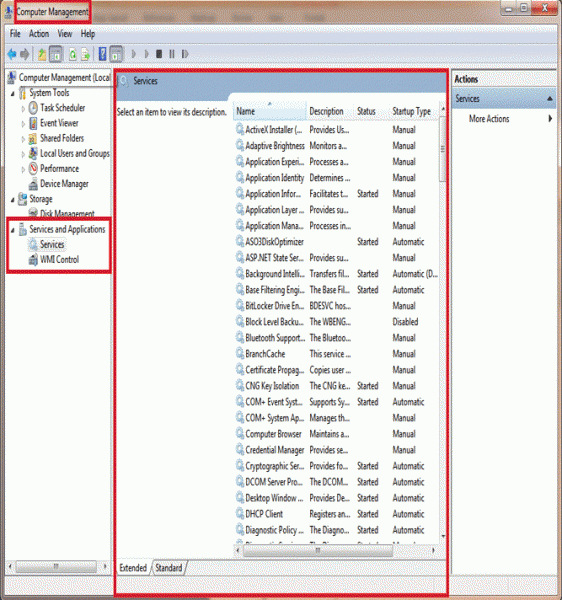
Following window will appear after step 2.To open the services available on the
Window 7 .Double Click on the Services option.
Step 4:
Right Clickthe service that you want to stop. An Option menu will appear with some options such as “Stop “Click on that option to stop the service.
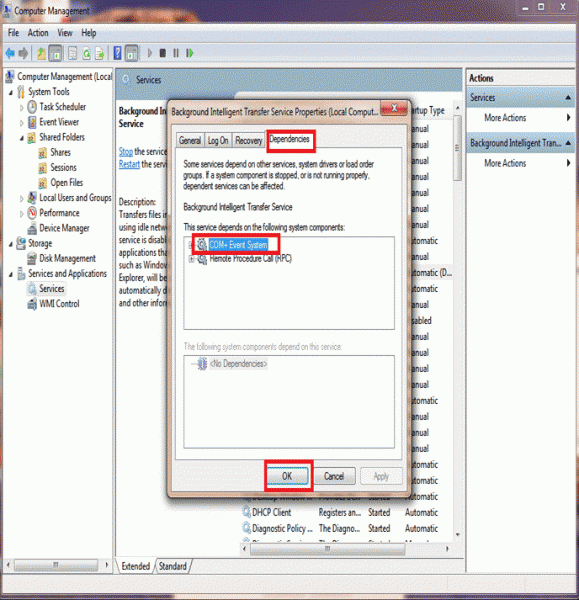
Some services depends on the other services so by stopping these services may affect the performance of some other services
To stop those services following steps are required
Step 1:
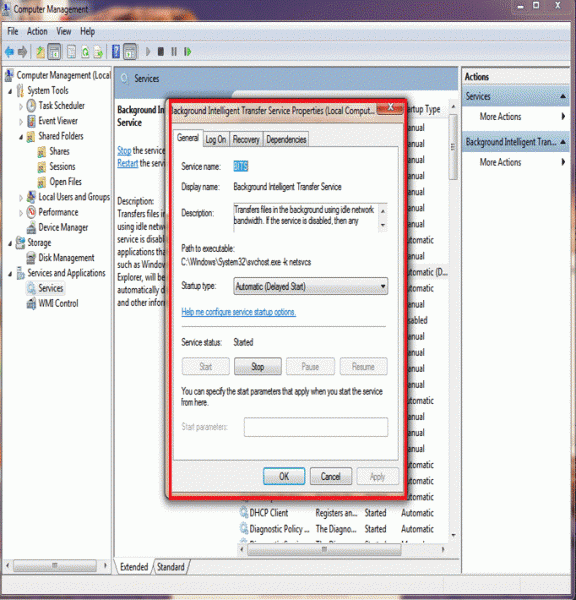
Double clickthe selected service.

Step 2:
After step 1 this window box will appear with different properties of service. Click on the “Dependencies” option on the top left side of the window box.
Step 3:
Select the dependent Service and click “OK”
