It can be frustrating when your Android device doesn’t connect to Wi-Fi automatically. We’ll walk you through every one of them so that the next time your phone isn’t connecting to Wi-Fi, you’ll know what’s wrong!
1. Use The Power Saving Mode
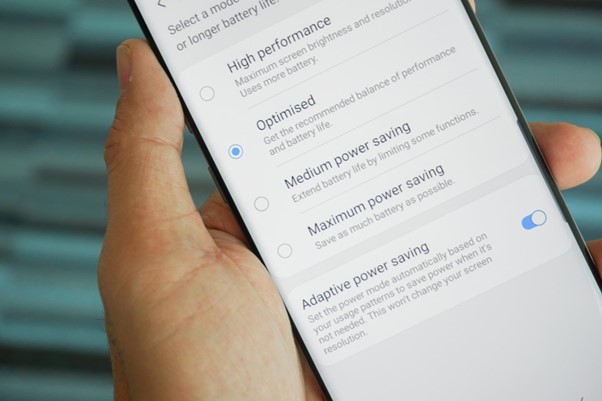
Turn on the Power Saving Mode on your Android device. To do this, go to Settings > Battery and tap the three-dot menu button at the top right corner of your screen. Then select “Battery saver” and turn on the toggle switch next to it. It will turn off features like background data, push notifications, automatic syncing and Wi-Fi scanning when you’re not using your phone or tablet to save power. Turn off the Power Saving Mode
2. Disable Smart Network Switch
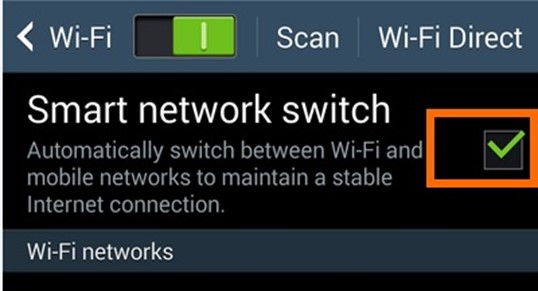
The Smart Network Switch is a feature that automatically turns off Wi-Fi when you’re on a cellular connection. It’s a good idea, but it can cause problems with your phone forgetting its Wi-Fi settings and not reconnecting when you get home or back in range of your router.
To Turn Off This Setting:
Go to Settings > Connections > Mobile Networks> Advanced > Smart network switch. Disable the “Turn on a smart network switch” toggle.
3. Forget The Wi-Fi Network And Reconnect
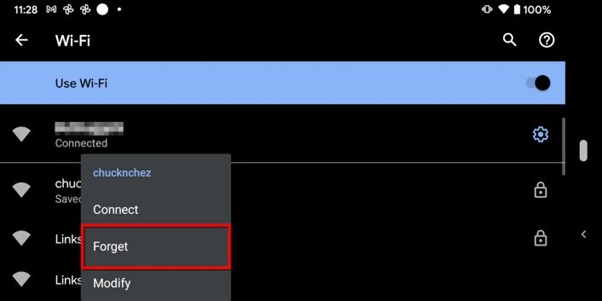
To Forget The Network, Follow These Steps:
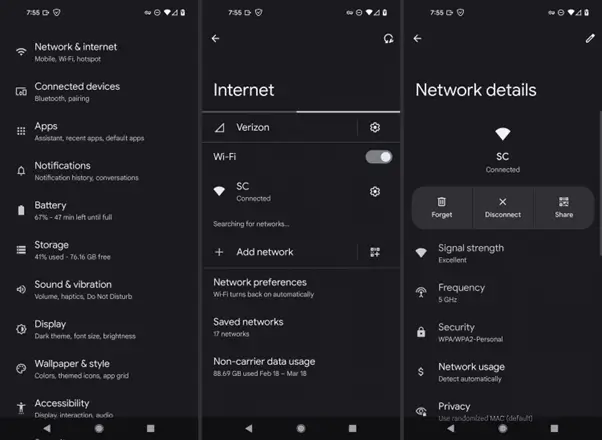
Open your device’s Settings menu. Tap Wi-Fi or Network & Internet, depending on your device. Tap the name of the Wi-Fi network you want to forget (if it still needs to be selected). Sometimes, these will be called “Wi-Fi networks” or “Connections.” Tap Forget and confirm by tapping OK when prompted.
4. Reset Phone To Factory Settings
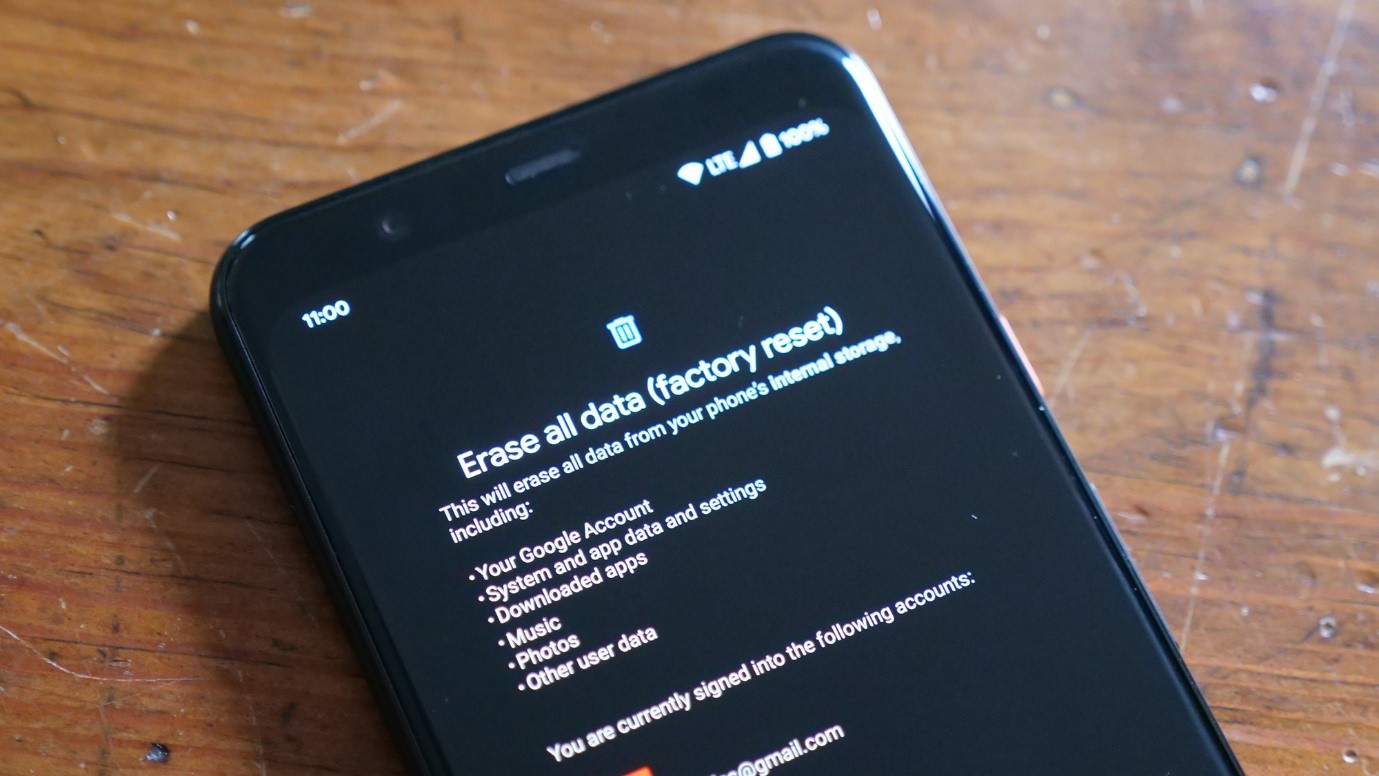
Resetting your phone to factory settings will delete all your data, including photos, videos and other files stored on the SD card. It will not delete any Google account information or apps you have downloaded from the Google Play Store.
To Reset Your Phone:
- Go to Settings > Backup & reset > Factory Data Reset (or similar).
- Confirm that you want to proceed with this action by tapping Reset Phone/Tablet and then Erase Everything.
5. Update Android OS
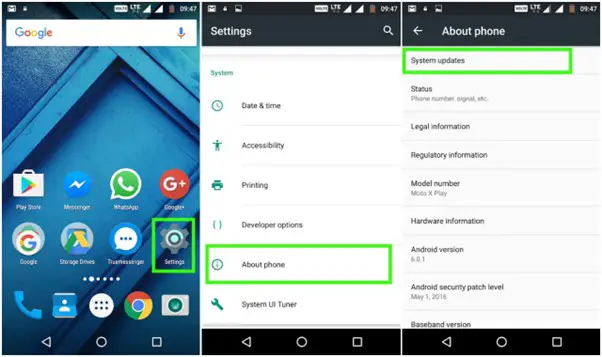
- Android users can update their operating system by going to Settings > About Phone or Tablet, then tapping Software Update. Follow screen directions for updates.
- The process will take a few minutes; after that, you’ll have all the latest features and bug fixes available in your device’s software version!
6. Adjust Wi-Fi Sleep Policy On Android
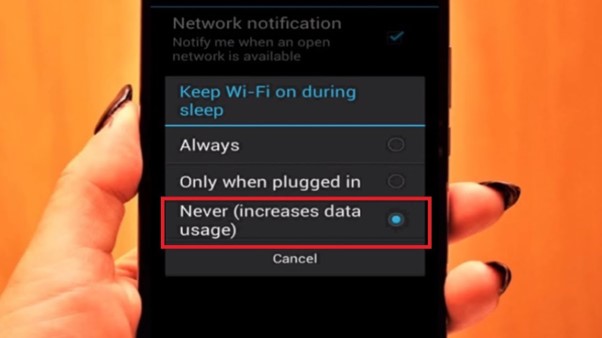
If you’re using an Android device, a few settings in your phone can help solve this problem. The first thing to check is the Wi-Fi sleep policy. This feature automatically turns off Wi-Fi after a period of inactivity and then turns it back on when you use the internet again. It saves battery power by keeping your phone from constantly searching for connections when there aren’t any available nearby.
7. Keep Your Network Connection Active With A Static IP Address
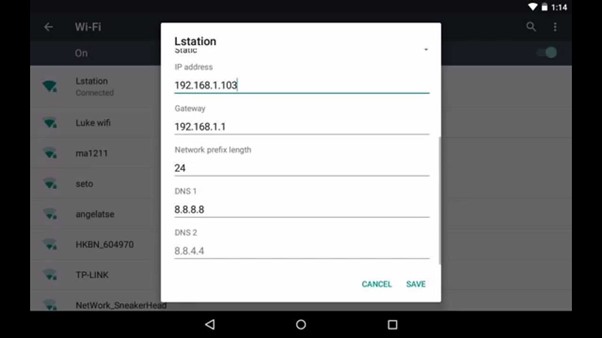
You’ll need a static IP address if you want to keep your Android smartphone online. Unlike dynamic IP addresses, static IPs do not change. Applications that benefit from a continual Internet connection include Voice over IP (VoIP) and video conferencing services. When machines on the same network, or “subnet,” use the same IP address, communication is accelerated, making static IPs popular in both home and business networks.
8. Inspect The Wireless Router Firmware
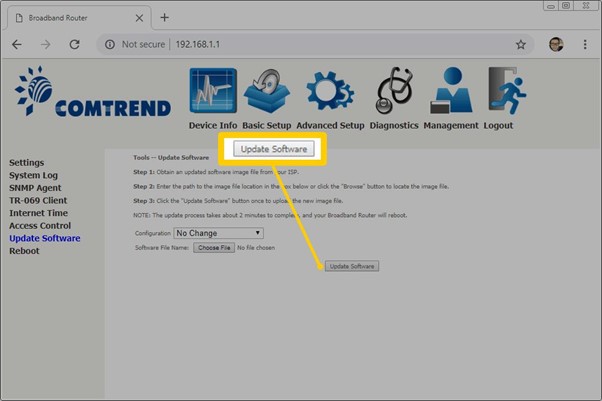
Upgrade the router’s firmware if your Android phone doesn’t connect immediately. To check if there are any new firmware updates available for your router, go to its manufacturer’s website and look for an option that says “Firmware Update.” If any new updates are available, download them onto a USB drive and plug them into your computer or laptop.
9. Update Router Firmware To Fix Wi-Fi Issues On Android
If your Android device can’t connect to Wi-Fi automatically, it may be time to update the firmware on your router.
There are two ways to update router firmware: manually and automatically. To manually update a router’s Firmware on Windows 7 Or Higher Systems, Follow These Steps:
- “Admin” and “password” are the default login credentials. See this:
- Click Administration in the upper left. Then click firmware upgrade from the dropdown menu next to the Upgrade button at the bottom right corner of the screen. Then select the appropriate file from the computer desktop by clicking Select File Button below the window showing available files.
10. Manually Connect To The Wi-Fi Network
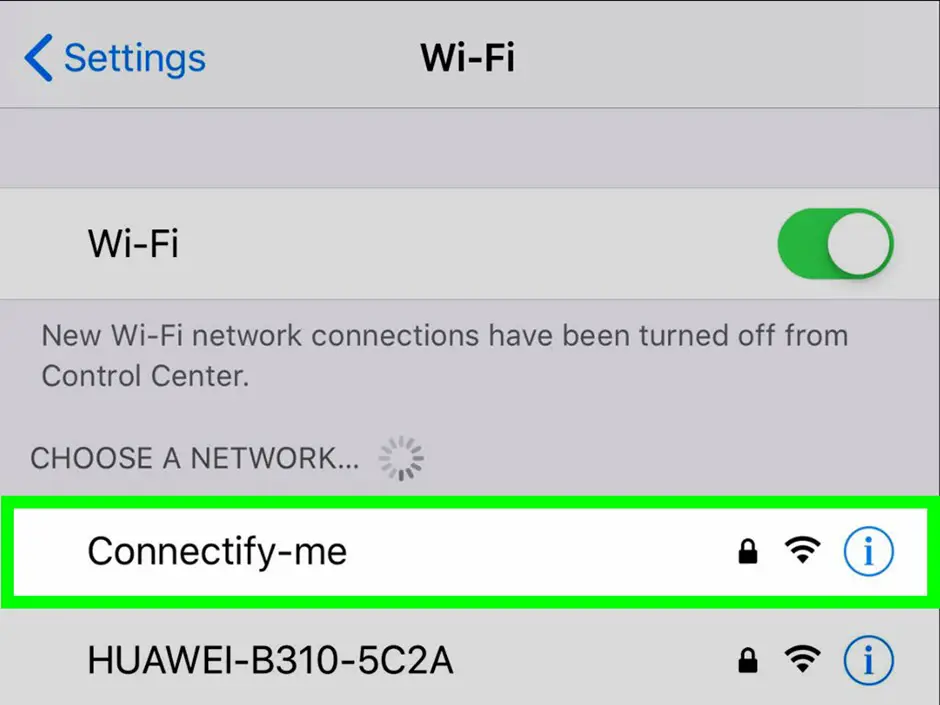
If the Android device is not connecting to the Wi-Fi network automatically, you can manually connect to the Wi-Fi network by following these steps:
- Tap the status bar Wi-Fi icon.
- Tap on the name of your preferred Wi-Fi network and enter its password if required (if any).
- Tap on Connect when prompted by a pop-up message on the screen that says “Connecting…”
Conclusion
Hopefully, you have found the solution to your Android Wi-Fi problem. Whether a software issue or a hardware one, there are many ways to resolve and get back on track with your life!


