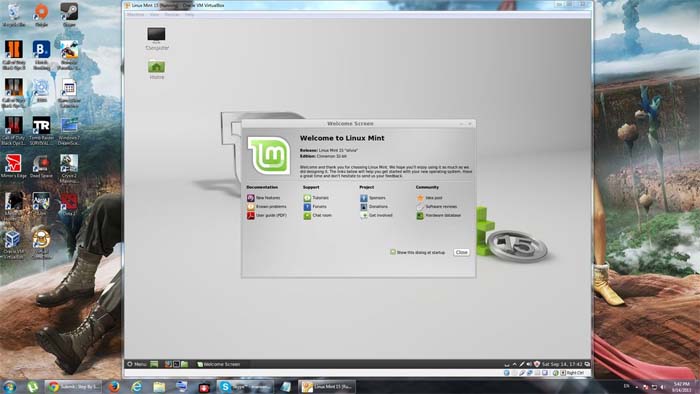
32-bit host OS (windows) not allowing to install 32-bit guest OS (Linux-mint)


If you are having a hard time installing Linux Mint on VirtualBox, here’s how to do it. But before you proceed, make sure you already have the ISO file for Linux Mint that will be used in installing the operating system. If you already have VirtualBox on your computer then you no longer need to download it.
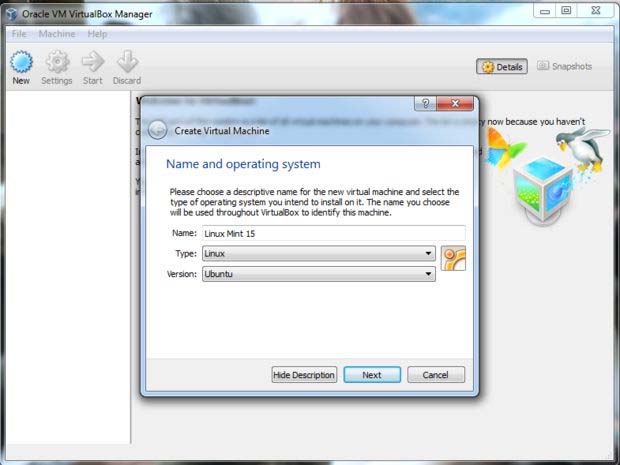
But for users who don’t have it yet, you can download it from VirtualBox Download. Once downloaded, install VirtualBox. Once installed, open VirtualBox then click New. In Name field, enter the name of the operating system like for example, Linux Mint 15. In Type, select Linux. In Version, select Ubuntu and then click Next. See image.
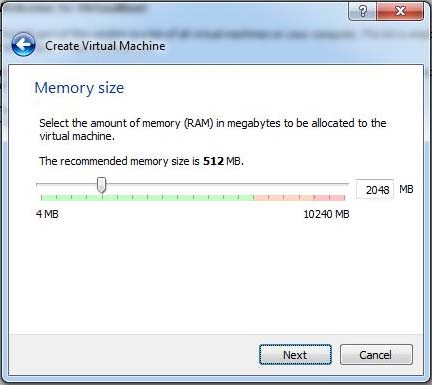
On the next screen, select the amount of RAM that should be allocated for Linux Mint. You can move the slider to adjust the memory or enter the value in the field. For example, 1024 MB = 1 GB, 2048 MB = 2 GB. Once finished, click Next. See image.
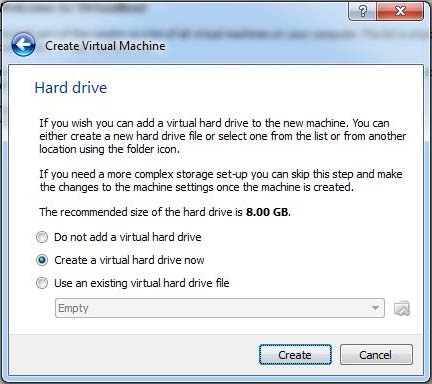
After that, select “Create a virtual hard drive now” and then click Next. See image.
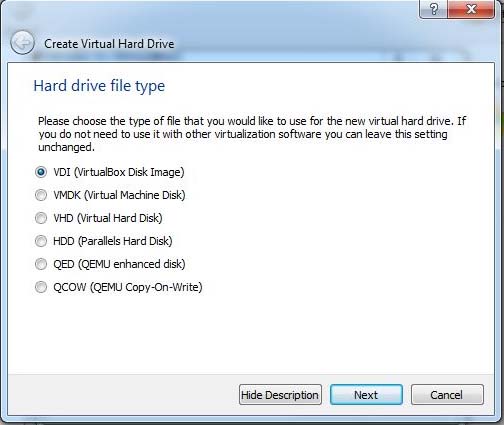
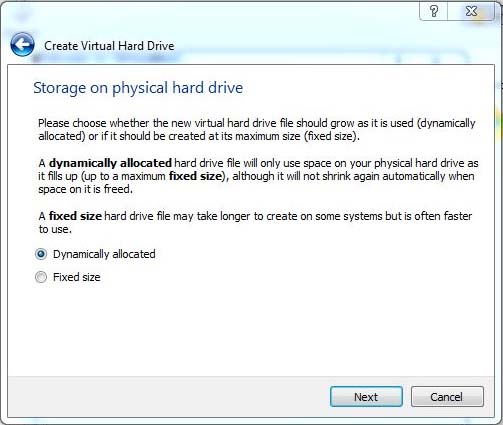
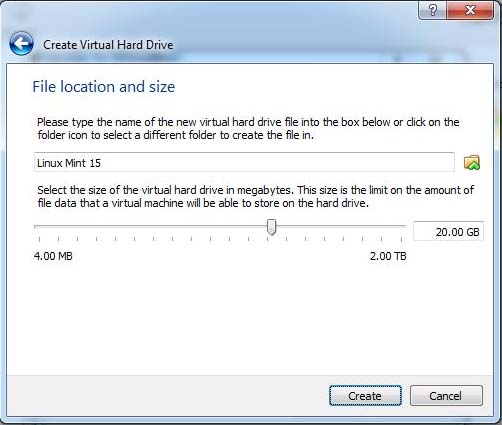
Next, select VDI (VirtualBox Disk Image) and then click Next. After that, select “Dynamically allocated” then click Next. On the next screen, select the amount of hard drive space that should be allocated to Linux Mint. This is similar to allocating the amount of RAM. When finished, click Create. See images.
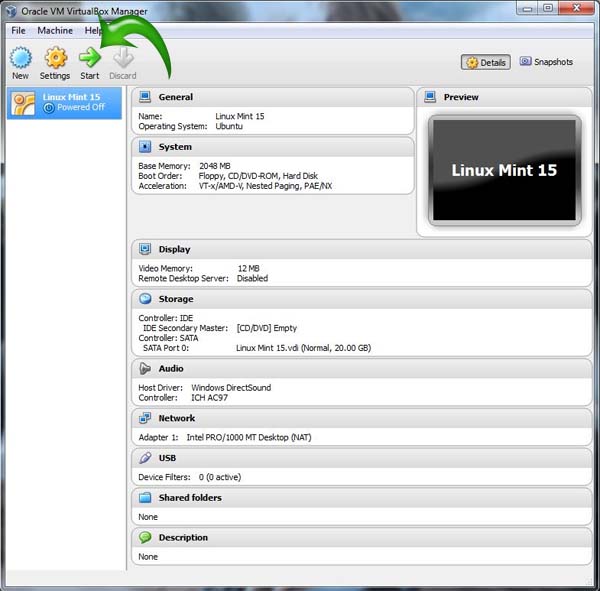
This finishes the settings for the hardware. To begin the installation or the setup, click Start located below the Help menu. See image.
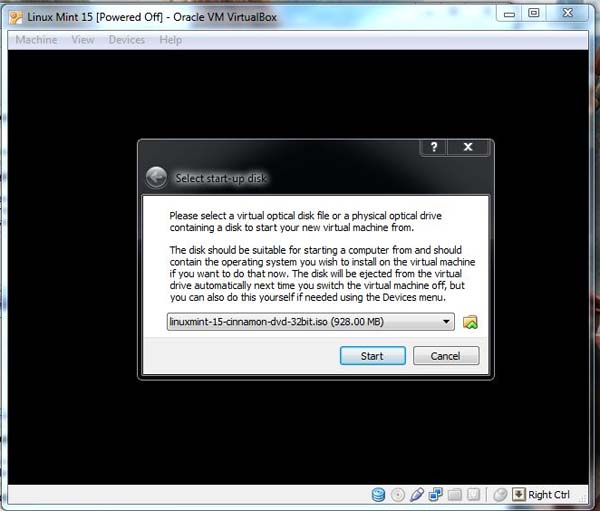
Select your Linux Mint ISO file and then click Start. See image.
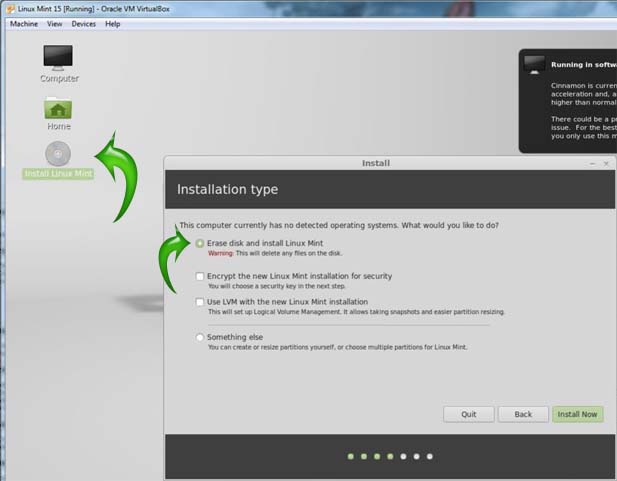
On the next screen, click Install Linux Mint on the left then select “Erase disk and install Linux Mint” and then click Install Now. See image.
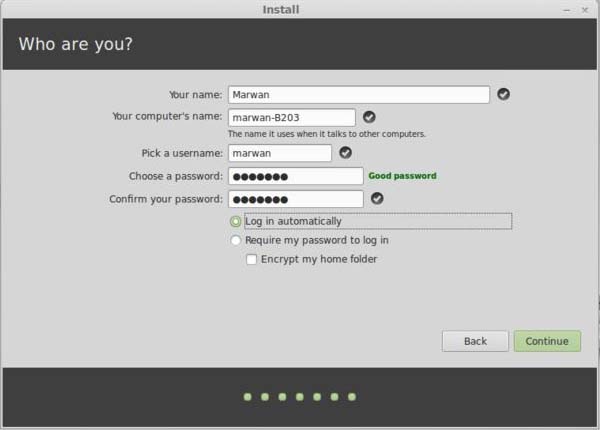
After that, create your account then click Continue. See image.
And finally, you now have a brand new Linux Mint on your Windows 7 running under VirtualBox. See image.
