Send & Receive Internet Mail using HUB Transport Server
Under Exchange Server 2007
Microsoft Exchange Server (ES) provides two main roles, HUB and Edge Transport server, to send and receive internet mail.
Former is configured to be more secure so doesn’t accept mail from untrusted sources while later to accept internet mail. By default, ES 2007 installs HUB server role but not Edge server role; so most people prefer to receive internet mail without installing Edge server role and that’s what we will do in this tutorial.
Before we go through the tutorial, let see few major messaging systems components:
- Categorizer
- Microsoft Exchange Mail Submission Service
- Pickup Delivery
- Store Driver
- Submission Queue
Categorizer, as the name suggests, picks up the message from Submission Queue and decides on its internal or external message delivery. Mail Submission Service runs on mailbox server roles to notify HUB transport server to pickup email message from senders outbox. If there are multiple HUB transport servers then this service load balances between them. Every transport server maintains a local Submission Queue to keep all messages until categorizer picks them for delivery. Before a message comes to submission queue, it is transferred to pickup delivery with proper format, rights and roles. This is helpful during mail flow validation.
Store driver picks up the message from senders outbox and places it in submission queue. This message is in MAPI format only to be converted into Summary Transport Neutral Encapsulation Format (S/TNEF) by store driver. On failure of doing so non-delivery report is delivered.
Send Internet Mail using Send Connector:
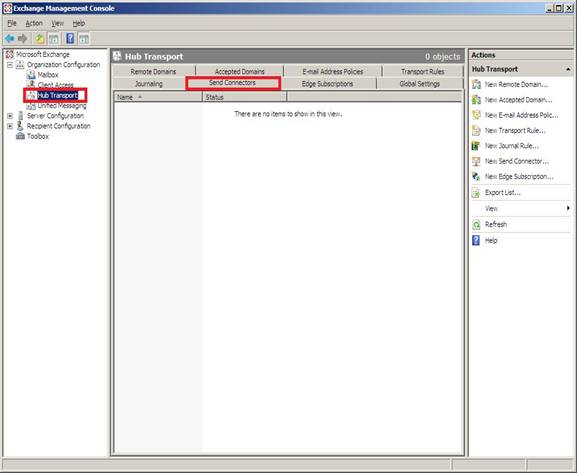
Open Exchange Management Console (EMC); select Hub Transport (HT) under Organization Configuration (OC). Click on Send Connectors tab under HT in the middle-pan, shown below.
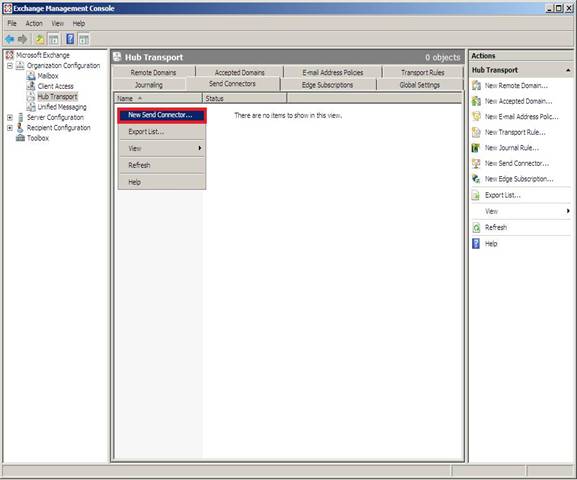
Right-click on the middle-pan sheet to select New Send Connector… follow figure below.
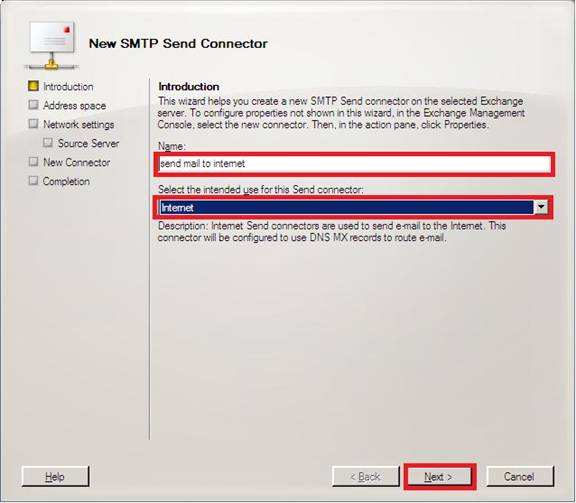
This will pop-up new dialog box with the name New SMTP Send Connector. Enter a suitable name of the send connector under Name then select Internet from list-box of Select the intended use for this Send connector. As per description of the Internet connector, there must be a DNS MX record for all accepted domains. Click Next.
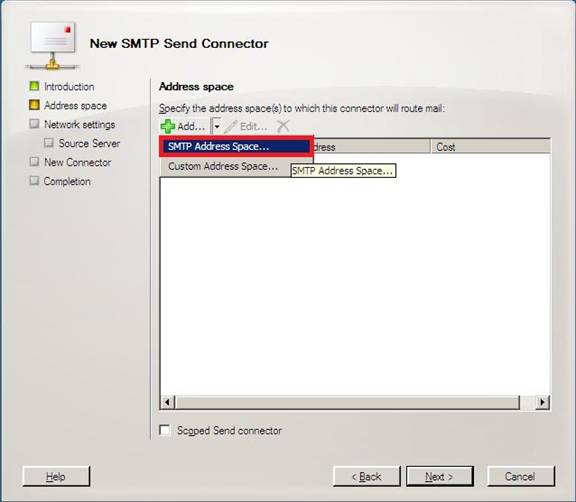
In next screen, define Address Space…, SMTP here, for the connector. To specify other than SMTP select ‘Custom Address Space.
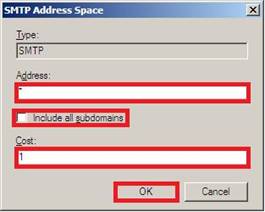
Popped-up dialog asks for SMTP address space to be specified. To support all enter * under Address. As per user requirement, we can also specify Include all sub-domains checkbox and Cost, we won’t. Click OK.
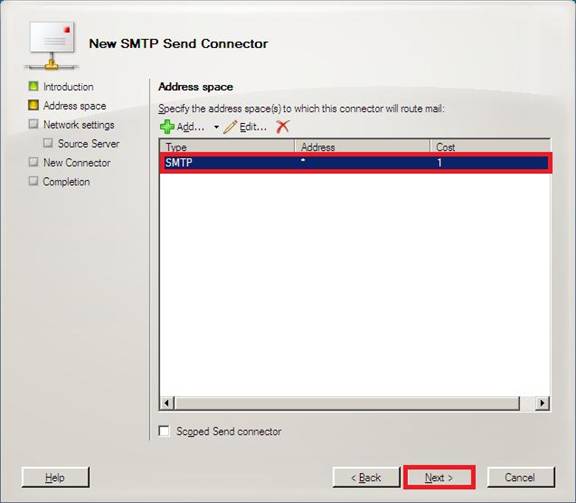
Entered Address space will show-up, shown below then click Next.
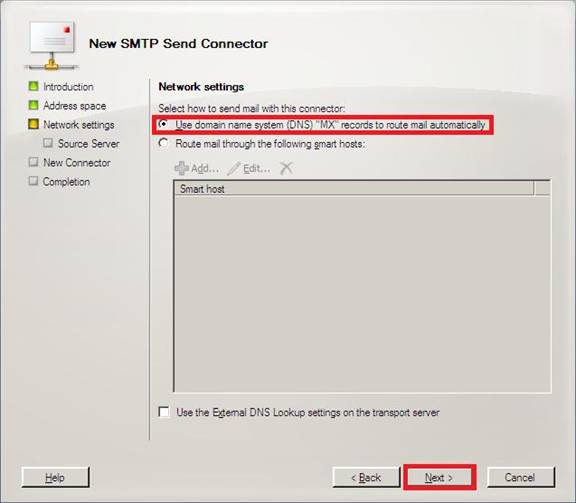
Under Network settings we can specify either to user MX record to route mail or Smart Host for forwarding. Select Use domain name system (DNS) “MX” records to route mail automatically and click Next.
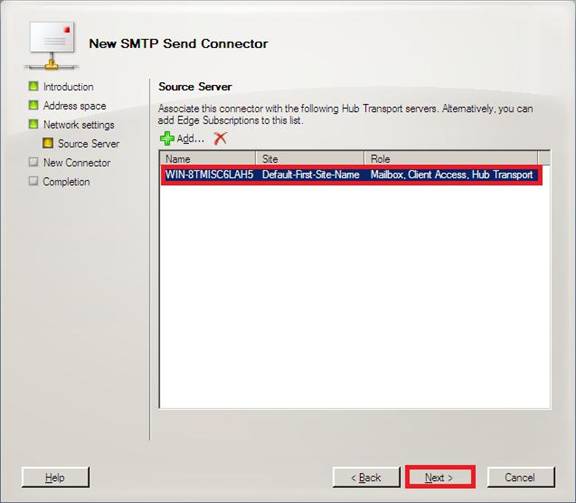
Time to select Source Server for intended Hub Transport Server. We own only server so will be using this but to add another select Add… otherwise click Next.
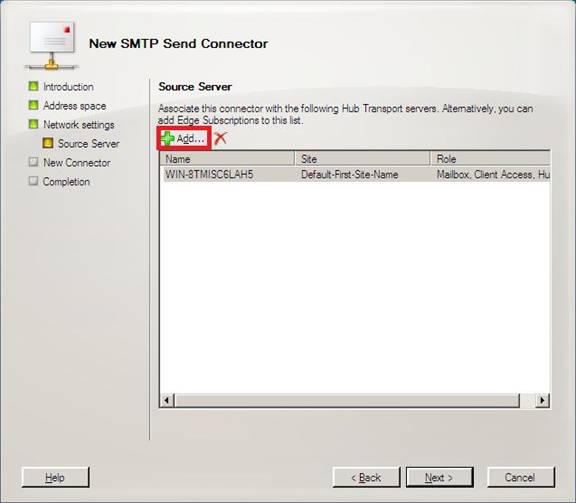
If we clicked Add button in last step, a new screen will surface, shown below, to allow us select Source Server. Click OK to move on.
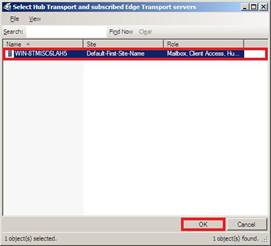
Selected Server will show-up on return. Click Next.
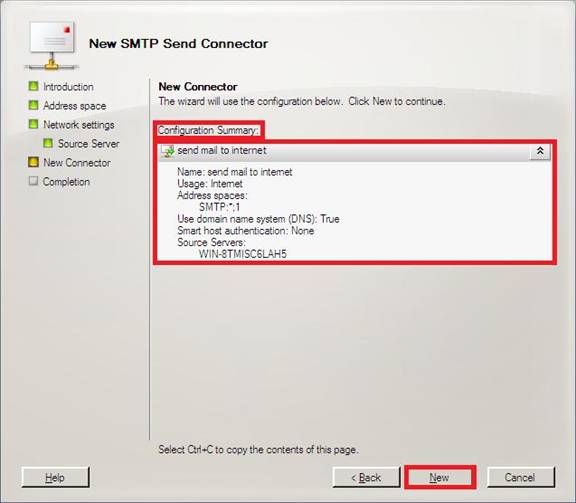
Now Configuration Summary of the intended send connector is shown for final look. If satisfied click New.
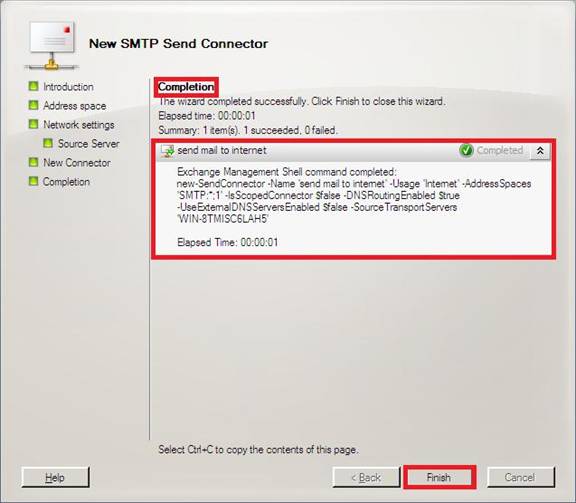
On successful Completion, a green icon will show otherwise red on some problem. Click Finish and use are done.
Created connector will show-up under Send Connector tab.
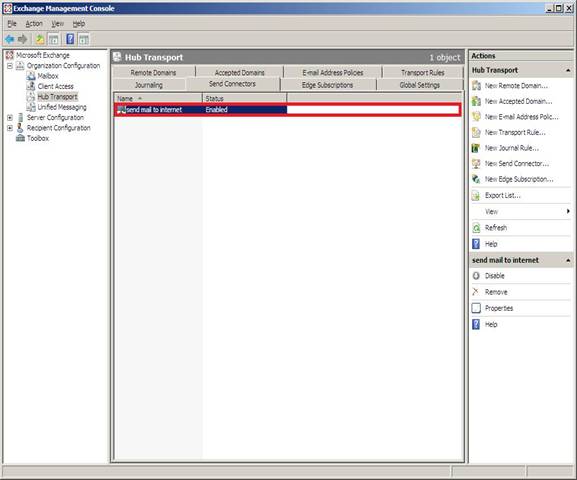
Receive Internet Mail using Receive Connector:
Expand Server Configuration to select Hub Transport. Locate Receive Connectors tab in the work pane then open Properties of the Default <server>.
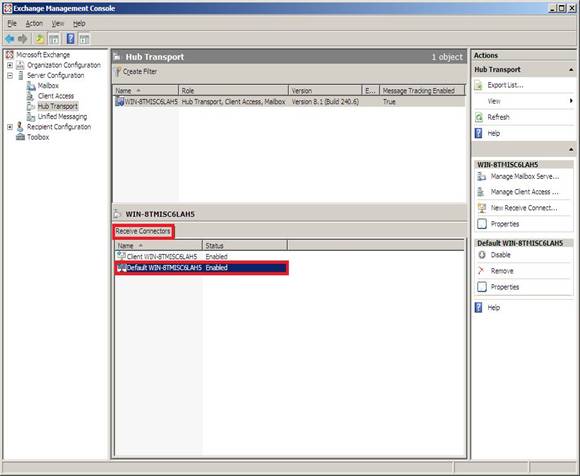
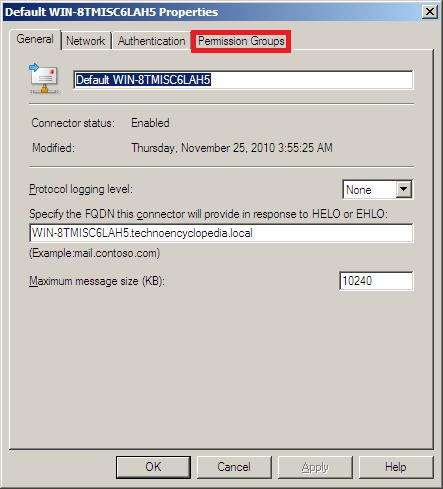
Opened dialog box will show General tab. By default, HUB Transport Server doesn’t allow to receive internet mail from outsiders. To do so, select Permission Groups tab.
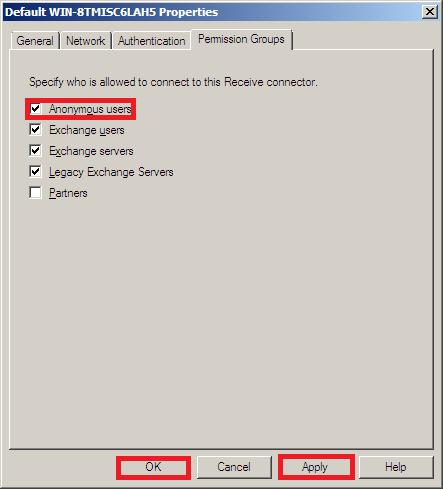
Check Anonymous users then click Apply and OK. By default Exchange users, Exchange servers and Legacy Exchange Servers are checked.
Sent & Received Email Screenshots
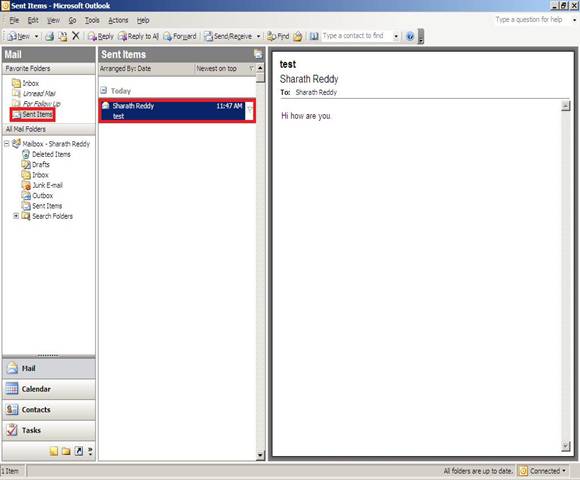
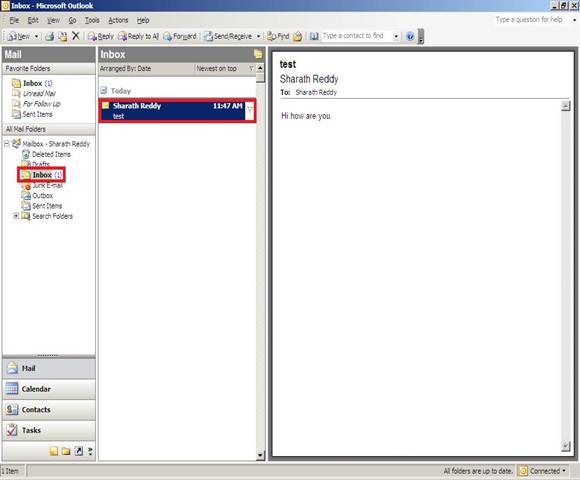
Conclusion: This tutorial walks through each step on how to use HUB Transport Server for sending and receiving internet mail in our domain. In order to have security against SMTP spams, we must add anti-spam feature to our server. We also must not forget to add DNS MX Record and transport on port 25 of firewall.


