Configuring Microsoft Outlook
Microsoft Outlook is an email client that is available as a separate application or is included in the Microsoft Office Suite. It is mainly designed in order to operate as an independent personal information manager or as an Internet email client. It can also be used with the Microsoft Exchange Server for group scheduling, task management and email. Microsoft Outlook is capable of managing email, tasks, to-do lists, calendars and documents or files stored on your hard drive.
Some other features of Microsoft Outlook include communication through email, group scheduling and phone support. Information can be also shared with the help of Outlook via forms, public folders and Internet connectivity.
Setting up Your Email Account in Microsoft Outlook 2003
The following tutorial will guide you through the steps to set up an email account in Microsoft Outlook 2003. The tutorial is only meant for Microsoft Outlook 2003 however these settings will work in the previous versions of Outlook as well.
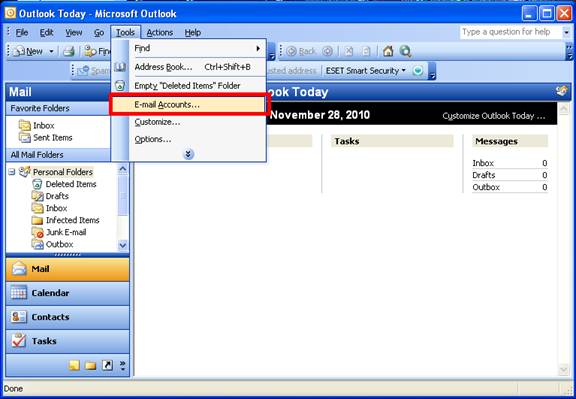
- Open Microsoft Outlook 2003. Select tools from the menu and select E-mail accounts.
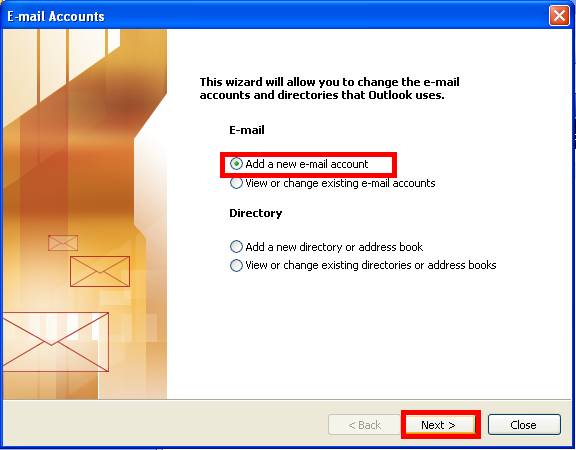
- Once the E-mail accounts wizard window is opened, select Add a new e-mail account, and then click Next.
- Depending on your server type, select POP3 or IMAP and then click Next.
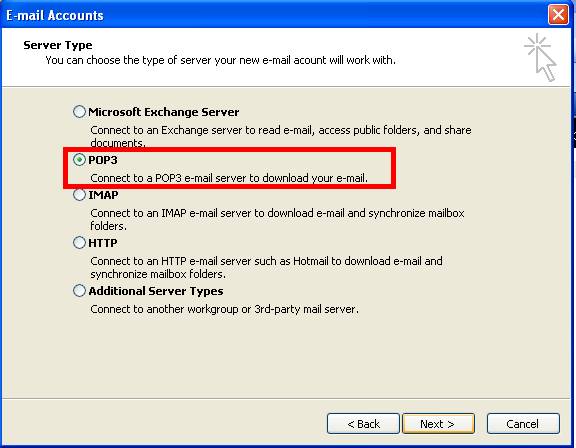
- On the Internet E-mail settings window, enter the necessary information:In the Your Name box, enter your name exactly as you want it to appear to your recipients.In the Email address box, type your email address.In the User Name box, type your account name.
In the Password box, type your password.
In the Incoming mail server box, type the name of your IMAP4 server. Eg.pop.gmail.com
In the Outgoing mail server (SMTP) box, type the name of your SMTP server.
Eg.smtp.gmail.com
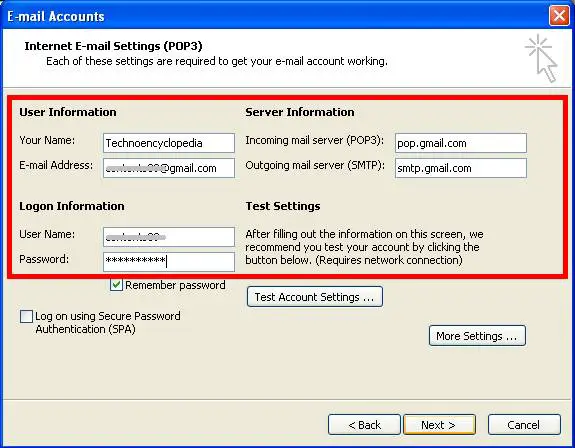
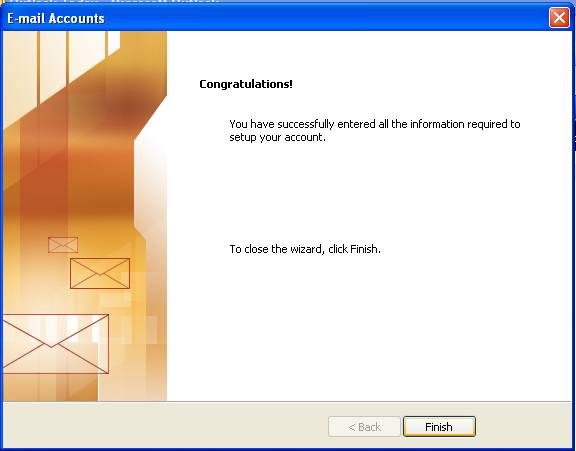
- Once you are done with the filling of all details, click Next and then on Finish.
Setting up Your Email Account in Microsoft Outlook 2007
Microsoft Office Outlook 2007 has some improved features with a slight difference in its appearance and some distinct settings as compared to Outlook 2003 or any other previous versions. Configuring an email account in Outlook 2007 is as easy as configuring account in prior version was. There is only a slight difference in the setup process. Follow the tutorial below and you will learn how to configure an email account in Outlook 2007.
- Start Outlook 2007. Select tools from the menu and select Account Settings.
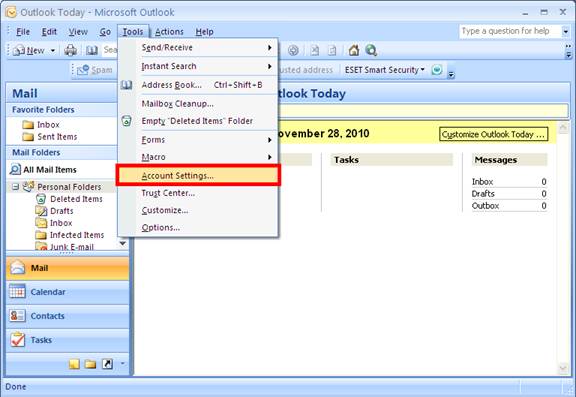
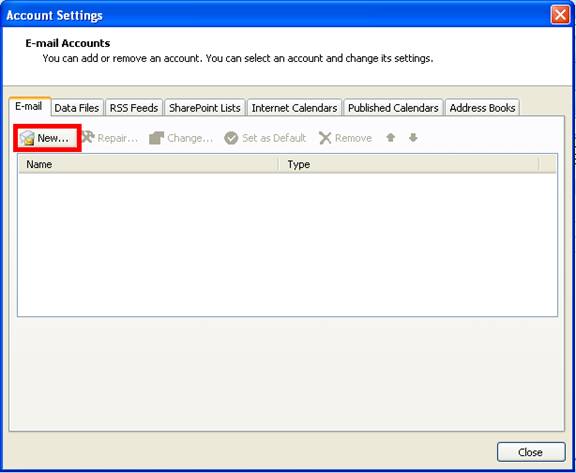
- Click New.
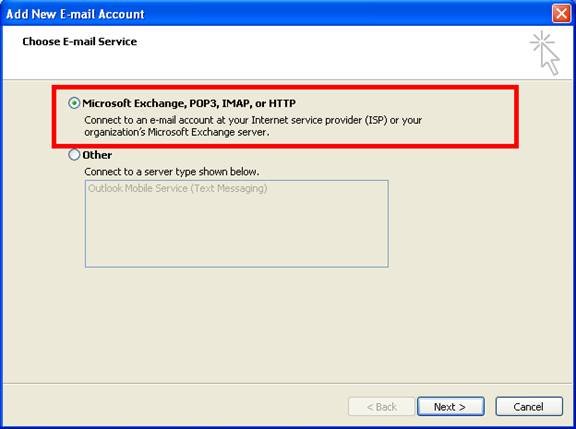
- Click on Microsoft Exchange, POP3, IMAP, or HTTP, and then click Next.
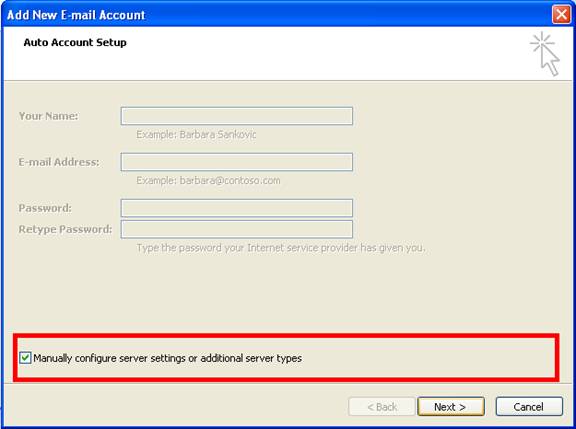
- Once the Auto Account Setup dialog box is open, click to select the manually configure settings or additional server types check box and then click Next.
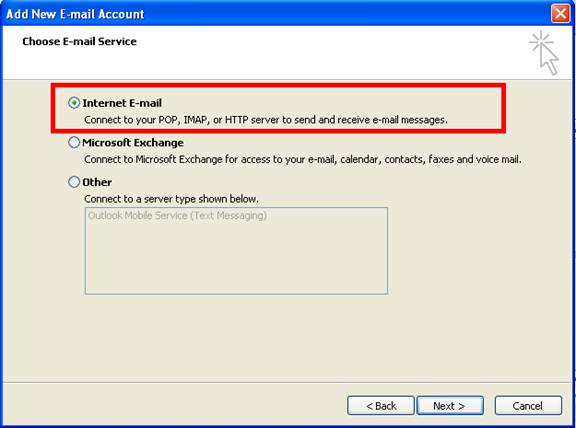
- Click on Internet E-Mail, and then click Next.
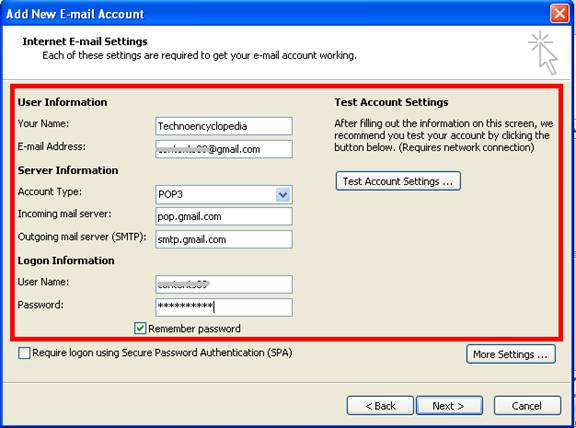
- In the Server Information section, select POP3 for Account Type.
- In the Your Name box, enter your name exactly as you want it to appear to recipients.
- In the E-mail Address box, type your e-mail address.
- In the User Name box, type your account name.
- In the Passwordbox, type your password.
- In the Incoming mail server box, type the name of your IMAP4 server.
- In the Outgoing mail server (SMTP) box, type the name of your SMTP server.
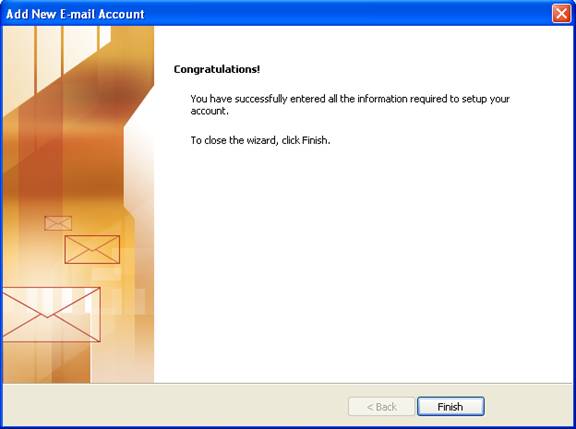
- Once you are done with the information of configuration, click on Next and then click on Finish.
Setting up Your Email Account in Microsoft Outlook 2010
Now that you have downloaded Microsoft Outlook 2010, you need to know how to configure your email account with it. If you have upgraded it from Outlook 2003, or 2007, then the settings will automatically be configured. If this is the first time that you are installing Outlook, you need to follow the steps given below:
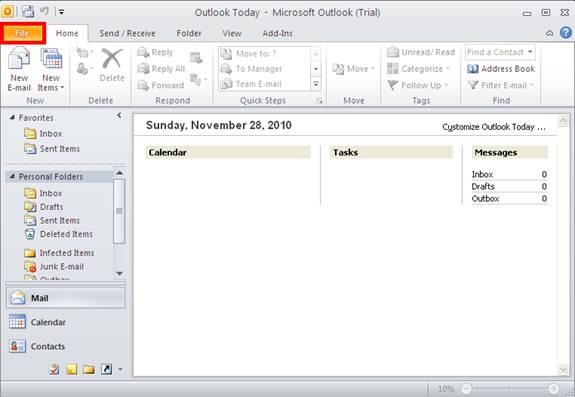
Launch MS Outlook 2010. On the File Menu, click on Info and then on Account Settings.
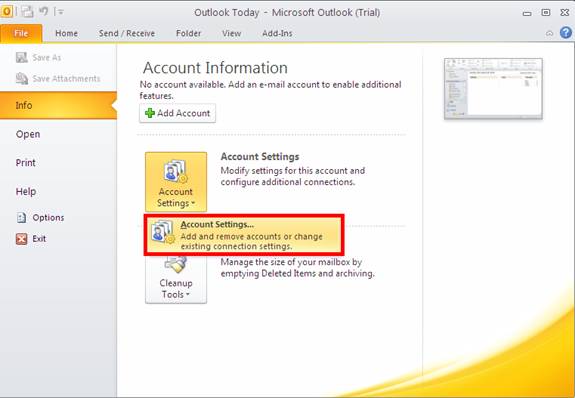
Then select Account Settings from the list.
Under the E-mail tab, click New and Select Email Account and then click Next.
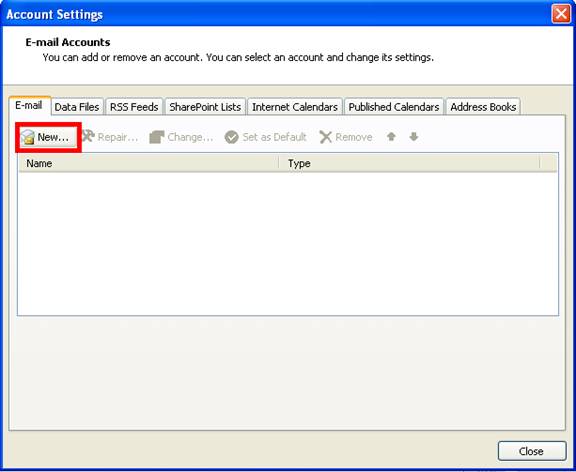
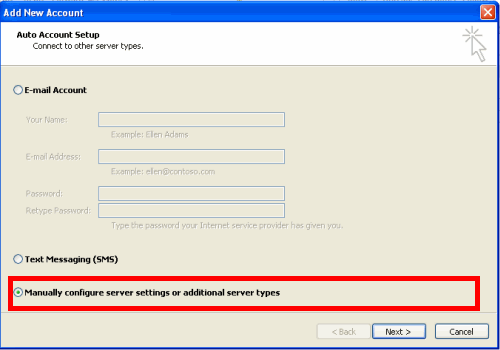
Click to select manually configure server settings or additional server types check box and then click Next.
Click on Internet E-Mail and then click Next.
In the Server Information section, select POP3 for Account Type.
In the Your Name box, enter your name exactly as you want it to appear to recipients.
In the E-mail Address box, type your e-mail address.
In the User Name box, type your account name.
In the Password box, type your password.
In the Incoming mail server box, type the name of your IMAP4 server.
In the Outgoing mail server (SMTP) box, type the name of your SMTP server.
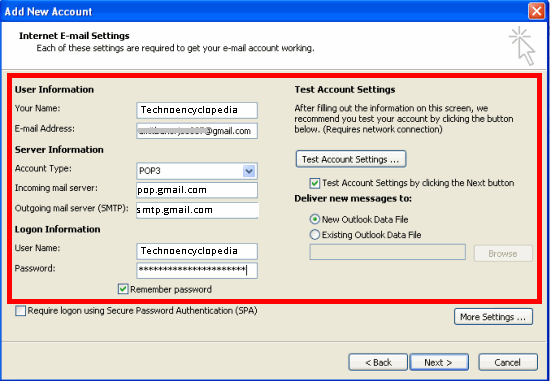
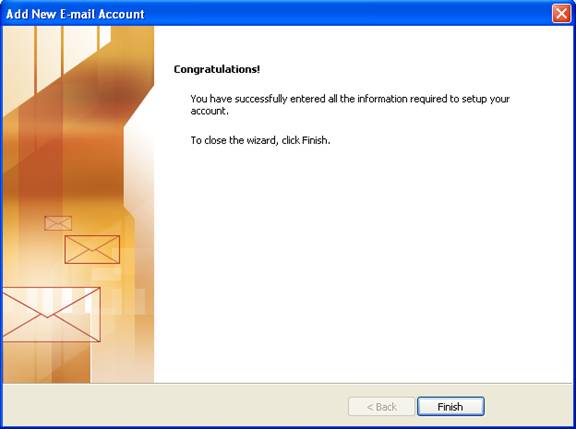
Once you are done with the information of configuration, click on Next and then click on Finish.
Although MS Outlook is very useful for corporate users, individuals too can enjoy its benefits with the numerous features available in it. Here are some of the benefits received as a result of using MS Outlook.
1) Sending and receiving Emails: Microsoft Outlook provides you a wide range of features for checking your inbox, filtering out junk mails and setting higher priority to important mails.
2) Tasks Management and Calendar: The Tasks feature in Outlook allows you to create a list of activities to be completed. The built-in calendar allows users to enter important appointments and meetings in it and also alerts them when an event is coming up.
3) Ability to Search: The built-in “Instant Search” in MS Outlook allows the users to find information by using dates or keywords without you having to search for it manually by going through umpteen emails, lists and calendar entries.
4) Interface with Cellular phones: This application allows the users to send text messages and picture messages to cellular phones with the help of Outlook Mobile Service Interface.
5) Share Information through Microsoft Server Exchange: Outlook is totally compatible with Microsoft Exchange Server, which allows you to share your personal calendar with your colleagues on the company’s computer network. This is possible if Microsoft Server Exchange is being used in the network.


