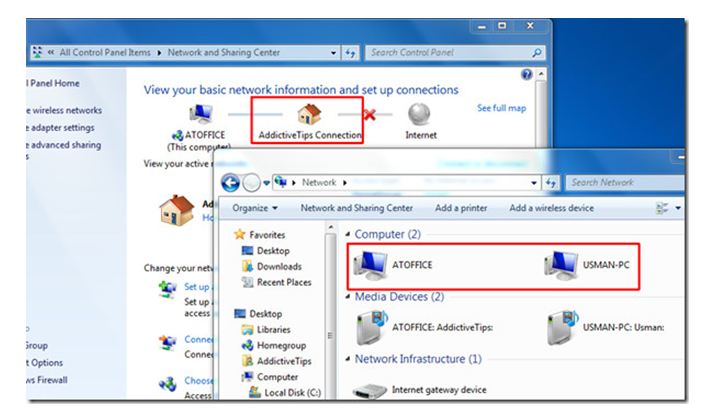
latest versions of Windows include Windows 7,8,10. Most of the computer users use Windows as their operating system . Sharing of files and folders is a common thing, to exchange information. How is file sharing on Windows 7 done?
How Is File Sharing On Windows 7 Done?

The following steps will guide you through the process of sharing files and folders between Windows 7 operated computers.
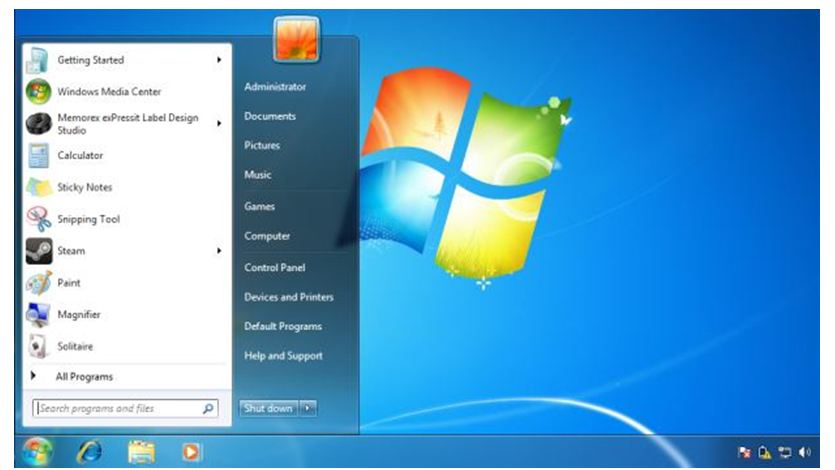
I) Go to start menu.Right-click on Computer and select properties.
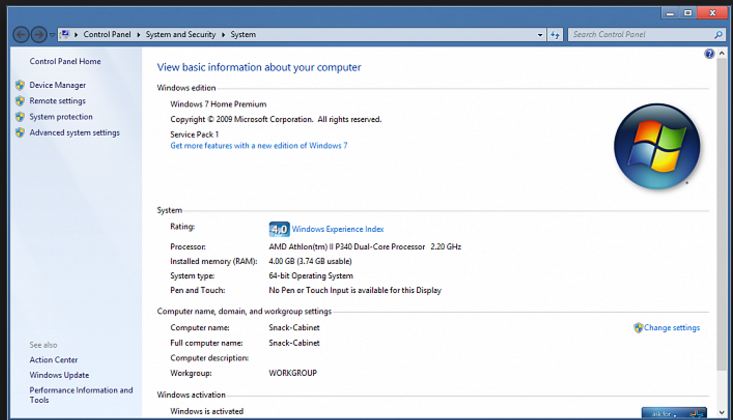
1) Our concern is with the part named-Computer name, domain and workgroup settings. Select change settings.
2) A toolbox will open, hit on change.

3) Fill out the computer name and workgroup. Do remember that the workgroup name should be consistent on all computers with whom you want to share files and folders.
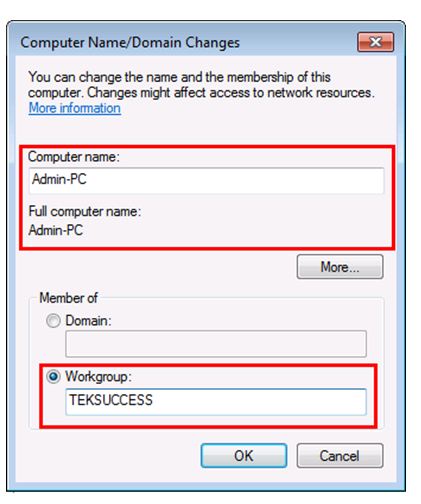
4) Click on cancel and then ok.
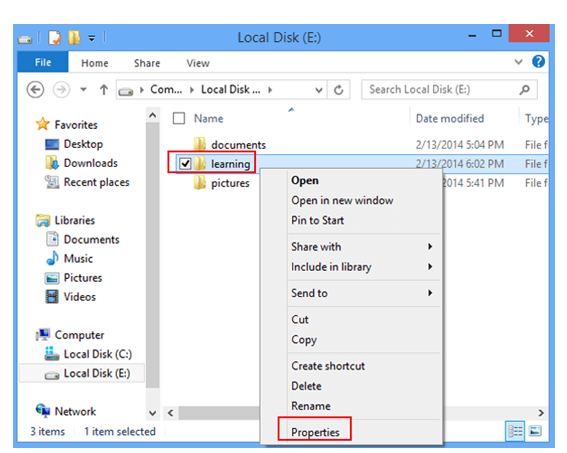
5) Select the folder to share, Right click on it and go to properties.
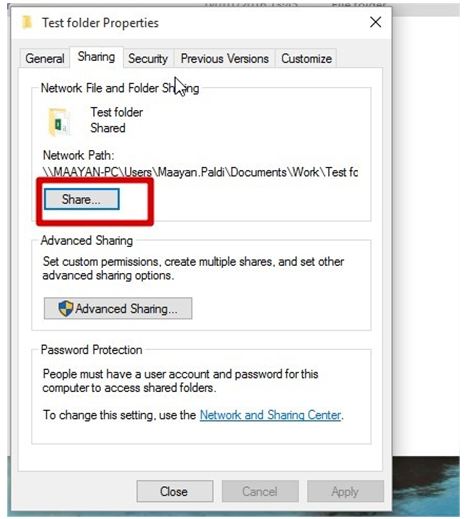
6) Select the sharing tab. Click on the share button.
7) Click on the drop box and select everyone.
8) You will see that they can only read the folder and not write anything on it. To make them able to read as well as write in the folder you need to change the settings.
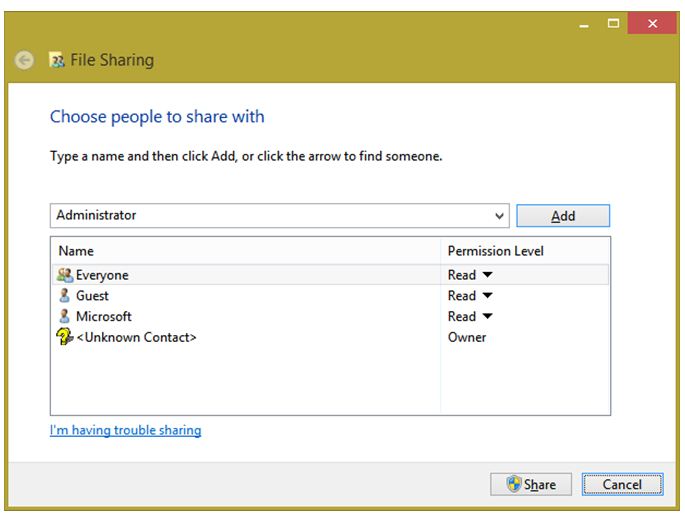
9) Finally, click on share and your file is shared.
II)Ad-Hoc Connection
1) Go to control panel and select ‘Network and sharing center’.
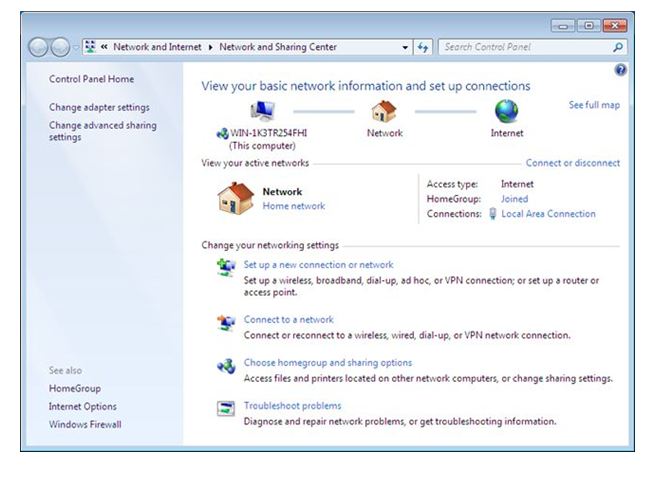
2) Click Setup up a new connection network. Click Set up a wireless ad hoc network and click next.
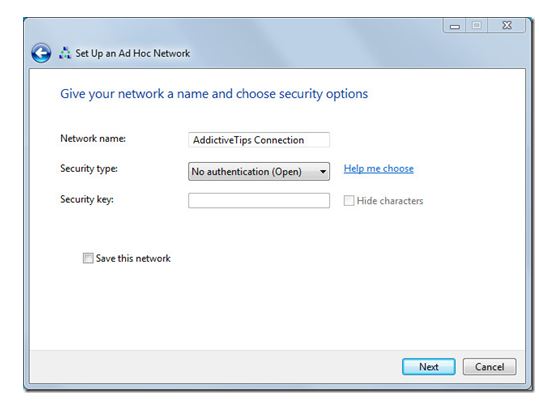
3) You can write a security key and further click next.
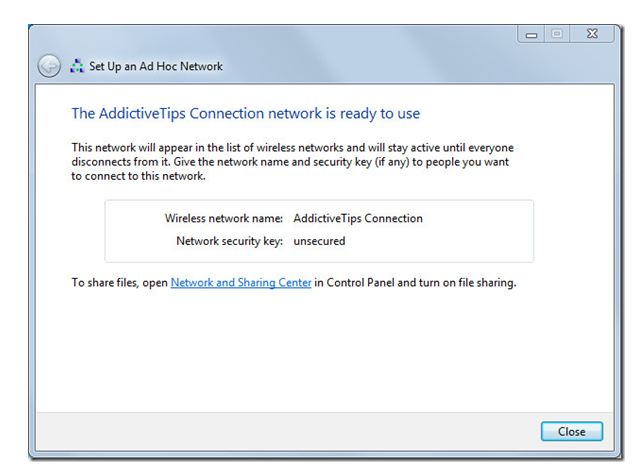
4) The ad-hoc connection is made.
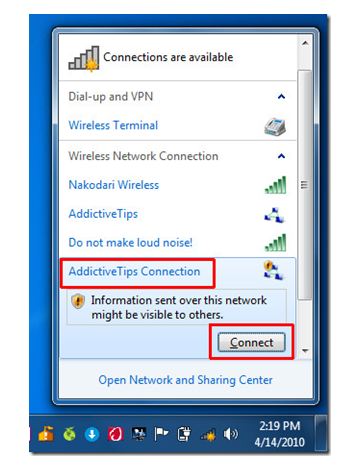
5) Go to wifi connections and select Addictive tips connections and select connect.
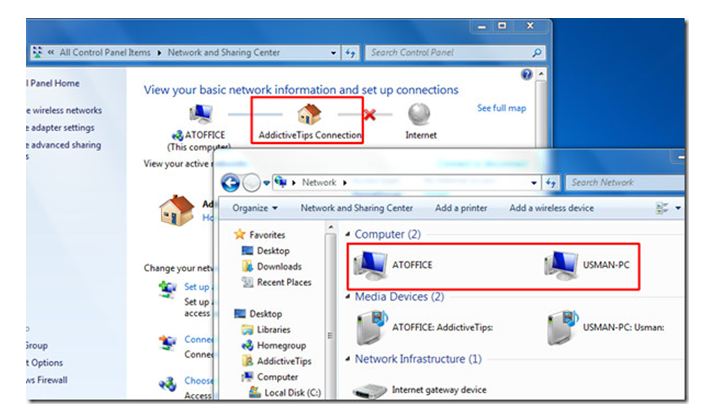
6) This way the computers will be connected, and now you can share your folders.
