Cloud Computing (IAAS)
How to create Window server 2008 machine in EC2 (Amazon)
Amazon started to provide service to online bookstores, after this it also started selling DVD, CD, Software, Electronics item etc. Now Amazon provides web service platform in cloud. It provides service in a cost-effective manner as we need to pay only how much we use and no upfront is required.
Secondly it is flexible as it gives facility to use any platform and programming model whatever you like. There are different types of products which Amazon provides like Amazon elastic commute cloud, auto scaling, simple DB, Amazon Fulfillment web services, cloud watch, simple storage device etc. Here we are going to talk About EC2. Thereafter in next articles I will cover on the other options.
Amazon Elastic Compute Cloud (Amazon EC2) is a web service that provides resizeble compute capacity in the cloud .Amazon is EC2 cloud provides a distributed environment through which a number of services can be used by a group of people separately. It also provides software as services, hardware as service and platform as a service. It designs effective algorithm of cloud commuting to provide the various services that is mentioned above. It provides facility like we create AMI (Amazon Machine Image), have application, data etc.
Amazon uses its own internal infrastructure and technologies and made them available to Developers. The virtual machines images are rented to the users are hosted in the cloud, or to be more accurate, on the grids of Amazon’s data centers all over the world.
Other features we can create volume, instance, snapshot etc. as per our requirement. Here we discuss how to make instance of Window server 2008 in EC2.
Step 1) Go to https://aws.amazon.com/
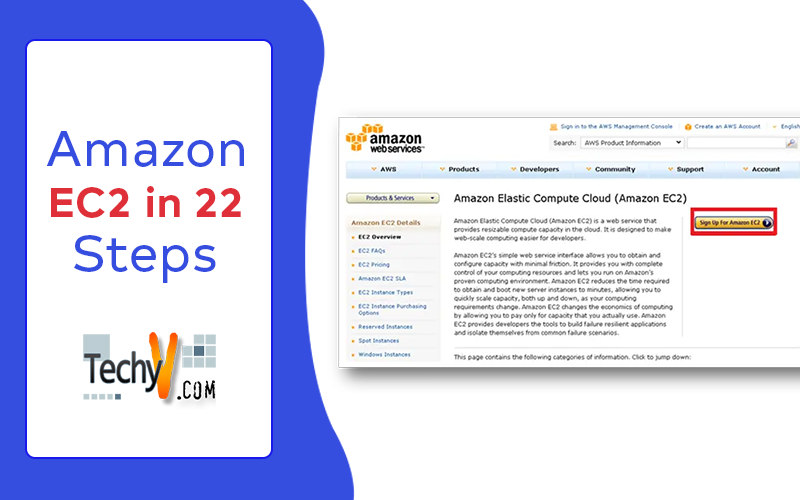
Then sign in as shown in figure.
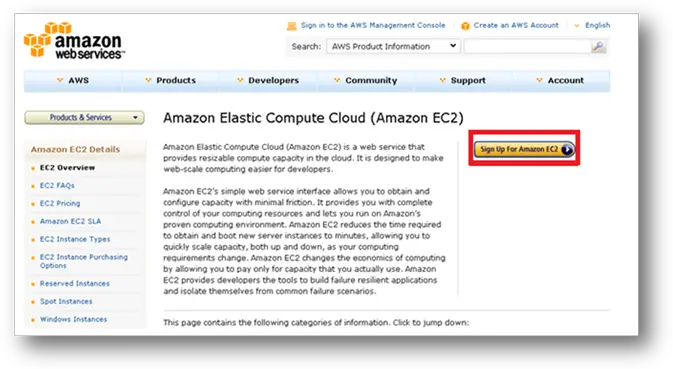
Go to sign for Amazon EC2 screen
Step 2) login page will appear.
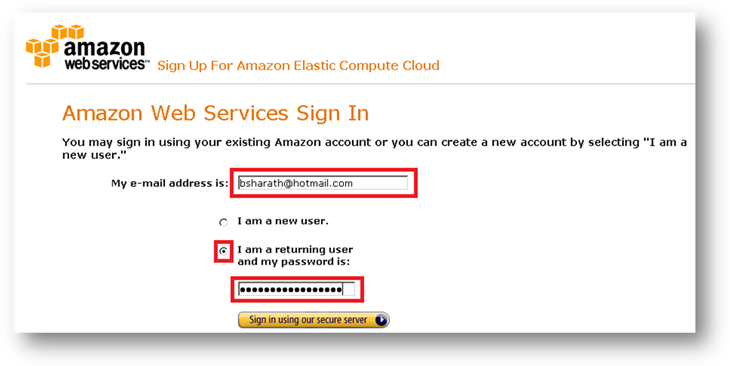
As shown in figure you need to enter email address and password as you already have an account. If you do not have a account just follow the simple steps on the registration and complete it. Note: Credit card is a must to proceed. To just test how it works for 2 days you might need to spend min 10$.
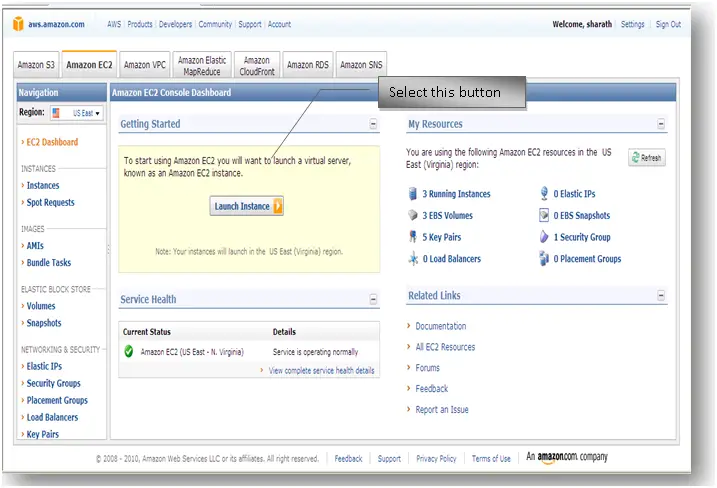
Step 3) now as the main screen open’s you see the launch instance. Click on it.
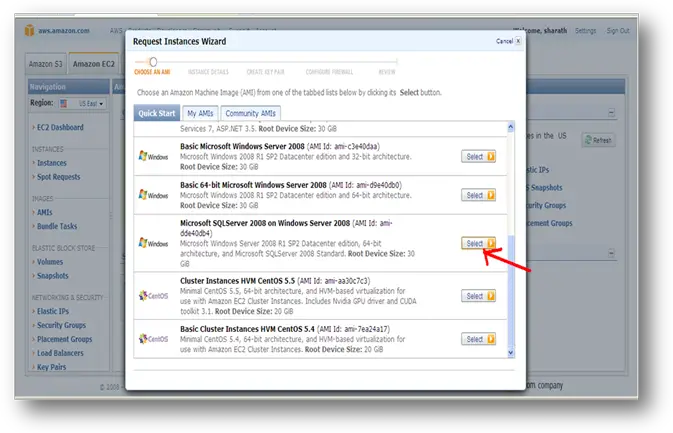
Step 4) It shows’ several prebuilt images of window. In that we choose window server 2008. You can select any of your choice as we are specific on Windows 2008 in this article.
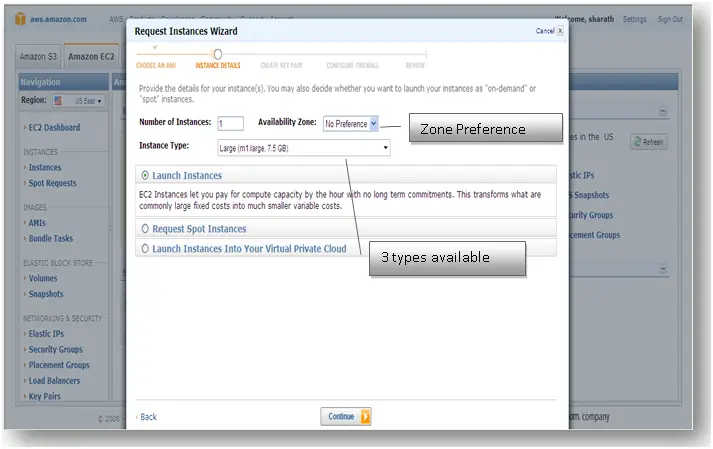
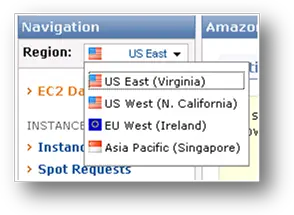
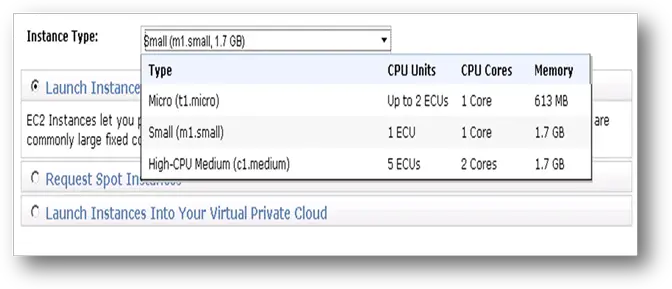
Step 5) now request window wizard open. Select number of instances, availability zone, Instance Type. You can check the Zones. As of now there are 4 Zones you can select which zone you want your machine to be available. This can be decided on the variation of your location. The closest Data center is suggested. If you don’t want you can leave it as default. Instance types also can be changed. Choose appropriate one and click continue.
As discussed above here is the screen of the Zones
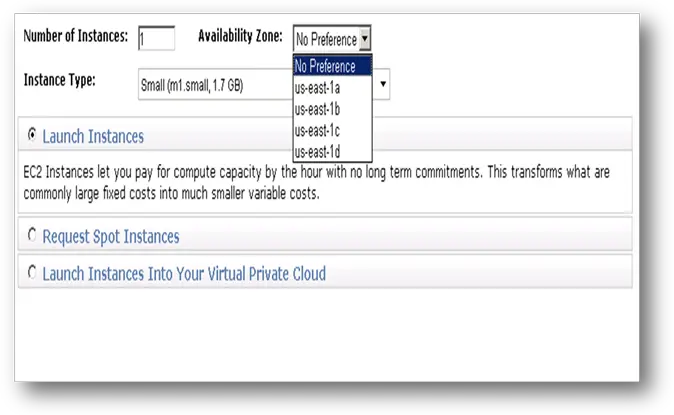
These are the 4 Regions available
Also would like you to know the available instances in Windows 2008.
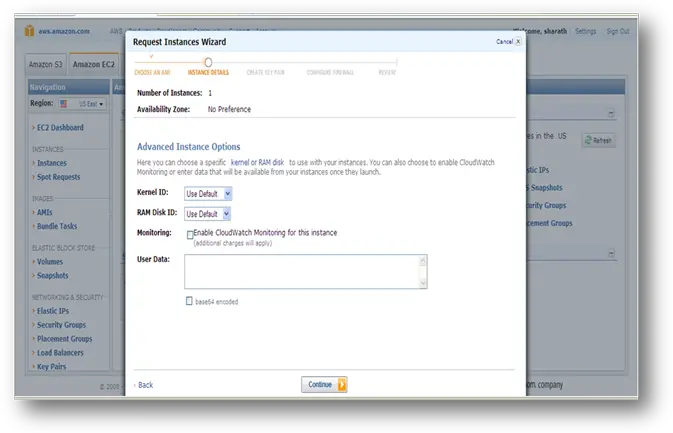
Step 6) advance instance option has these selections kernel id, RAM disk ID, monitoring (We need to pay extra as we increase the configuration) user data and click continue
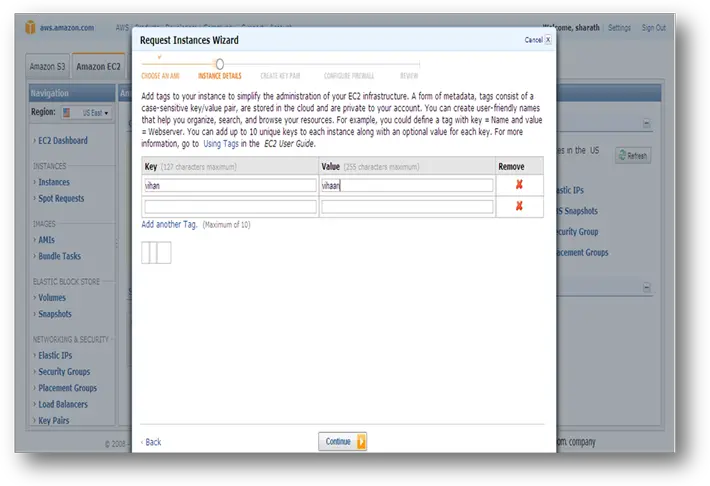
Step 7) give the key name and value name and click continue. It’s just to ease administration and is explained on screen.
Step 8) choose a security key. Enter any name you desire and select the “Create & download your key pair”. It’s always good that we create the key pair here. Note: It’s important that your popup blocker in your Internet explorer or any other explorer is off. Else you will have issues downloading the Encrypted file.
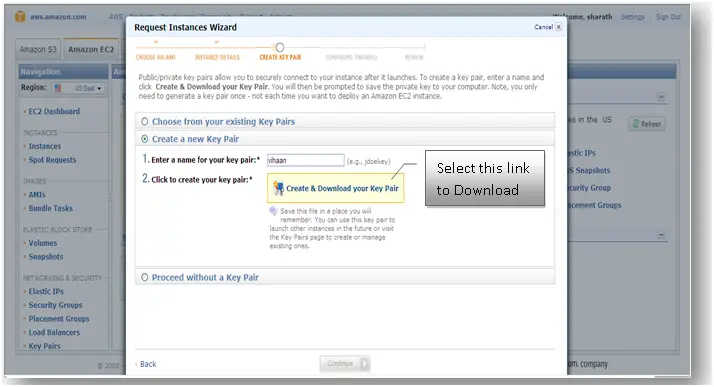
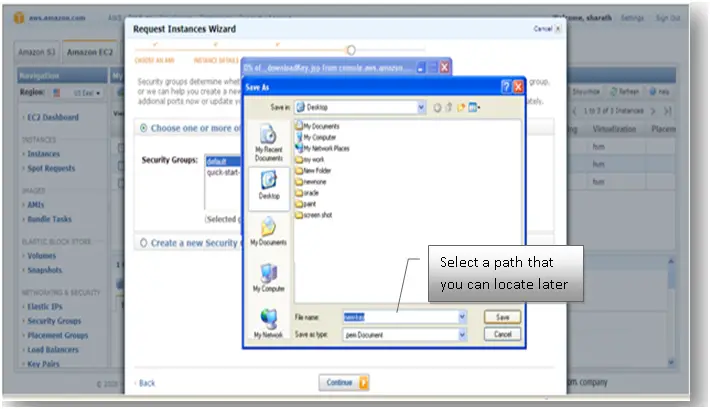
Step 9) now that you need to download. Select a location and keep the key safe as this is required later to decrypt and login to the machine.
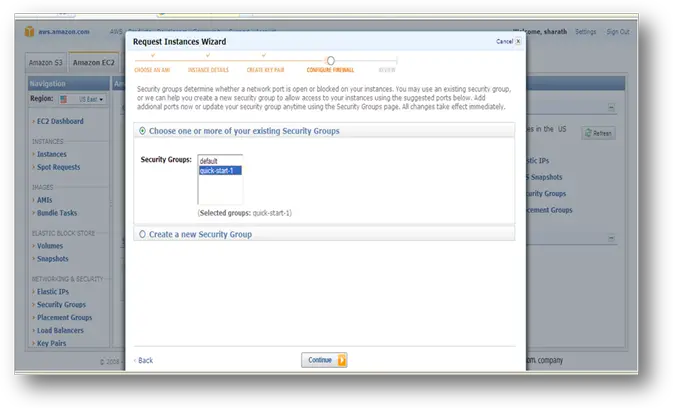
Step 10) now choose security group and then click on continue. Select the default as this is recommended for new users. Later you can create groups of your choice with restrictions. We can talk about these in-depth in next articles.
Step 11) now it will show details of your instance and click on launch. Check if all the settings that you have selected are correct.
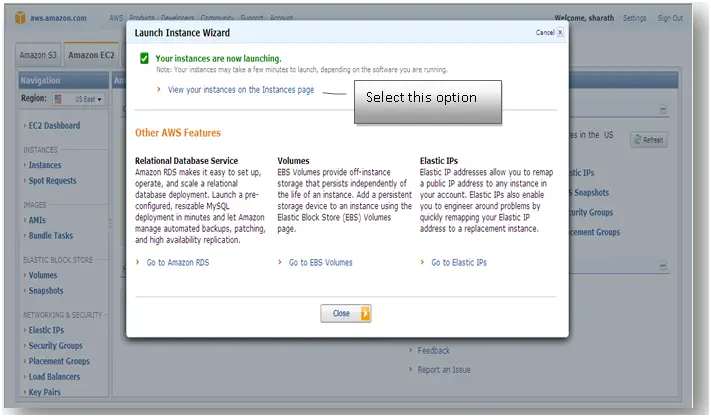
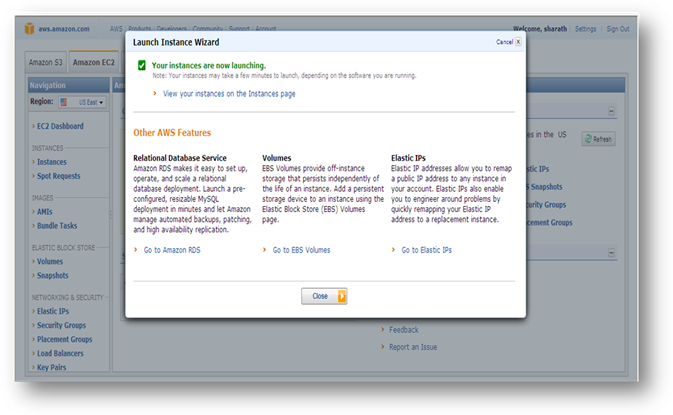
Step 12) after this you will notice the instance has launched. Select the first link (View your instances on the instances page)
Step 13) after clicking “View your instances on the instances page” you will see the below screen. You will only see one in your screen as I have created multiple instances you can see many.
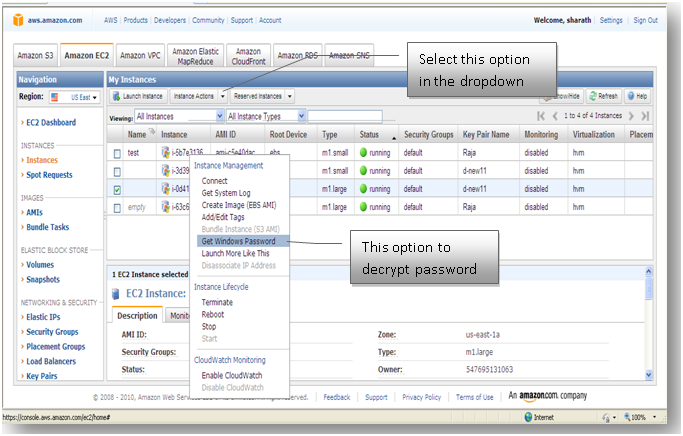
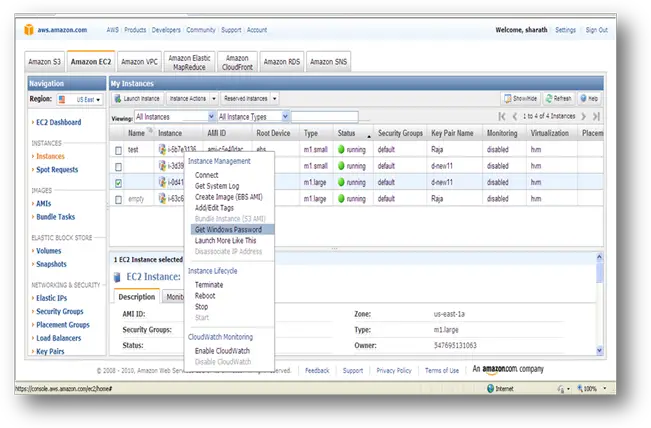
Step 14) after this click one of check box that you created your instance. Then go to instance action and click get window admin password.
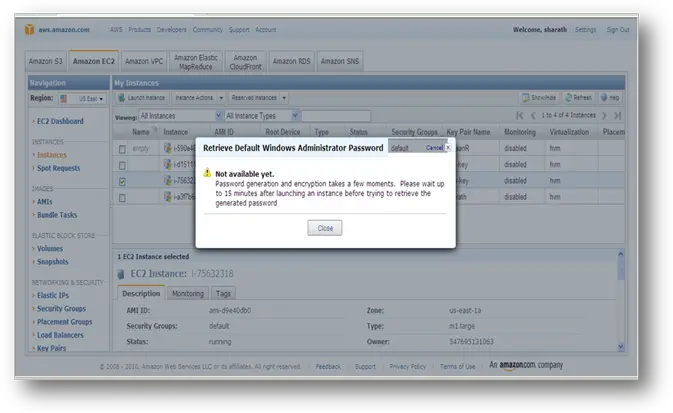
Step 15) it will open a window stating it takes 15 minute for generating the password. It’s mostly faster than it states and sometimes takes even an Hour to get you through.
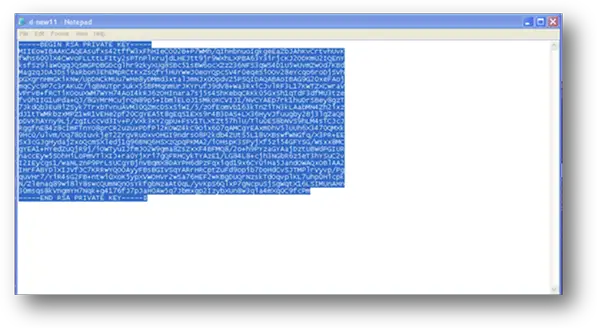
Step 16) open the Key file that you downloaded. The file can be opened in notepad or any text editors and will be with a file extension “PEM”
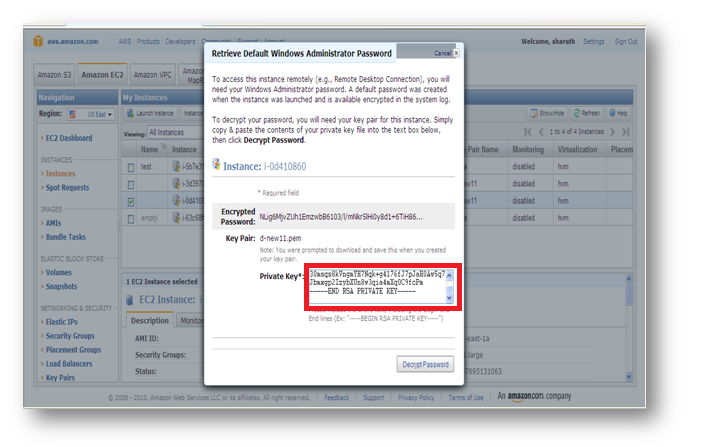
Step 17) after 15 minute this windows open’s when you click the “Instant actions” and select the “Get windows password” as mentioned in (Step 14) in which you have to enter key value which you just opened in notepad.
The file that you saved with extension “.PEM” has to be opened and copy the full content along with start and end lines and paste it in the “Private Key” box. Select the button “Decrypt password”
Step 18) when you decrypt it will show a message like this. It’s nothing but it needs a lot of resource to do the action. Select “No”.
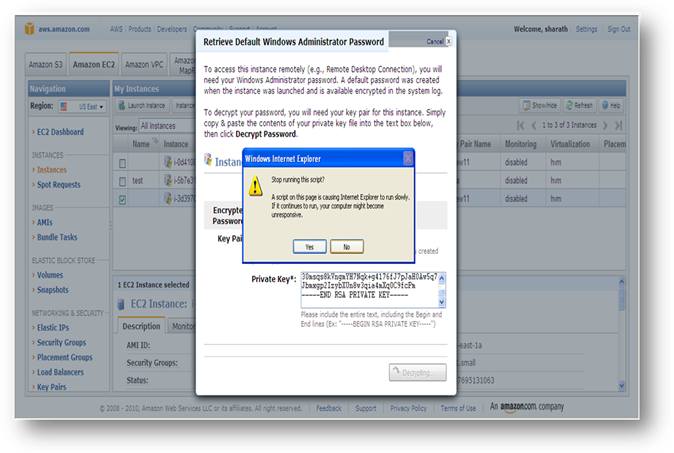
Sometime may ask repeatedly. Click “No” always.
Step 19) as shown below you get the password to login.
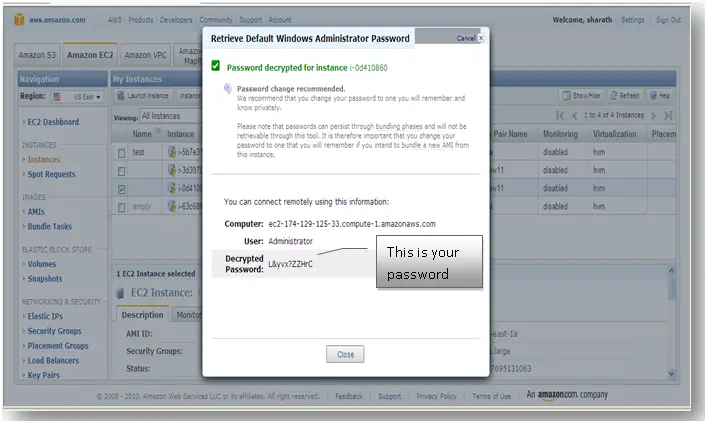
Now you have the password. Store it safely.
Step 20) select that “Instance actions “In the dropdown select “Connect”
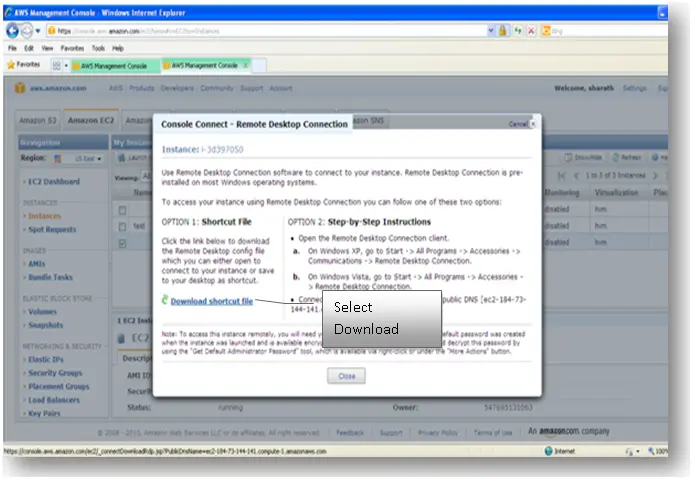
Once selected you get a window as shown below. Download the shortcut as it has the settings as well as the Ip address of the instance you just created.
Step 21) now as you downloaded the shortcut file Double click the file and select connect so the remote desktop computer will open like this.
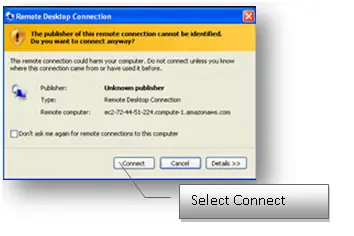
Now when you have connected you will be asked for the user name and password Enter “administrator” and then provide the decrypted password. You are all done creating a machine and logging into it.
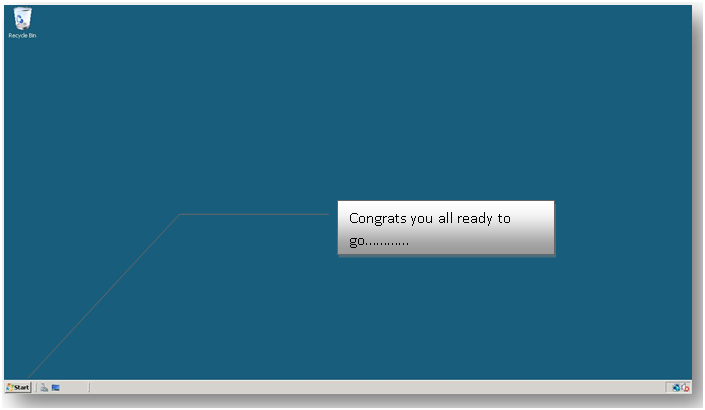
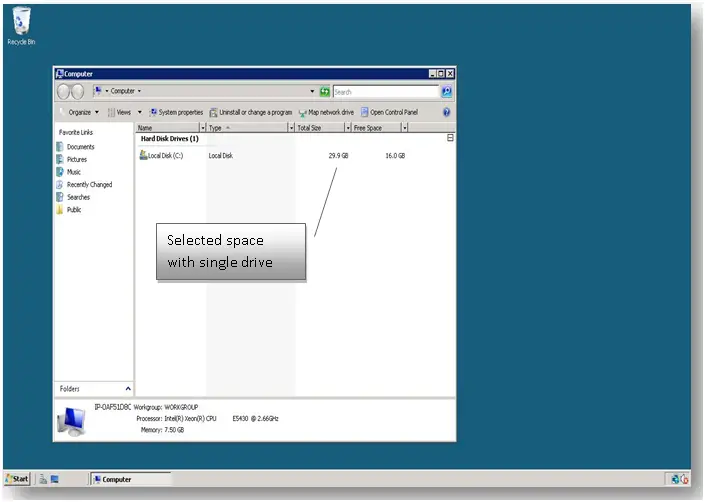
Below is the Desktop and default drive shown with size.
Similarly we can create another instance as per requirement like Linux platform, window server, sql, .net etc. It provide on demand services in cost effective manner.
After this Instance let’s talk about AMI
AMI (Amazon Image machine) it’s a virtual image hosted. It’s usually stored in Amazon S3 file system containing certain piece of software. The process of creating and saving an AMI is called bundling an AMI. It contains all the necessary information boot instance of your software.
EC2 bundle task provide facility to minimize bandwidth using compress image and gives information about image part with checksum. We can create, cancel bundle by using bundle id, instance id, status.
Elastic Block Sore: It’s a type of storage which creates volume and snapshot. Amazon provides 100 volumes or 20 TB in total volume storage. We can create, delete, attach, and detach volume as well as take snapshots too. The use of EBS is to fault tolerate means suppose one EBS volume failure we can detach it and create new one and attach it. We can launch new volume using a snapshot which we have taken before. By creating a volume we can perform batch processing job for a large dataset by running an instance periodically.
Elastic IP: Elastic IP address especially designs for cloud computing. It provides static IP address.
The user has complete control and can decide to which instance the address actually should be mapped. When one instance fails, it is possible to re-assign the Elastic IP Address to another instance within seconds without having to wait for DNS to propagate the new address.
Security Group: It gives information to which network traffic delivers to instance networks traffic will be discarded. We can create, describe, delete, authorize and revoke security group.
Load balancing: It divides load between all instances which are running. Using load balancing we can reduce fault tolerance by putting instance in multiple zone and also provide facility to auto scaling in which suppose we give 2 instances to use traffic which are able to tolerate traffic etc. If we want to use load balancing it costs per hour.
Key pair: Using key pair it provides security.
In EC2 cost affect’s in two ways first creating instance and using it and second as per data transfer.
For instance which options we select like on demand instance depends upon how much we use, which hardware we use etc.
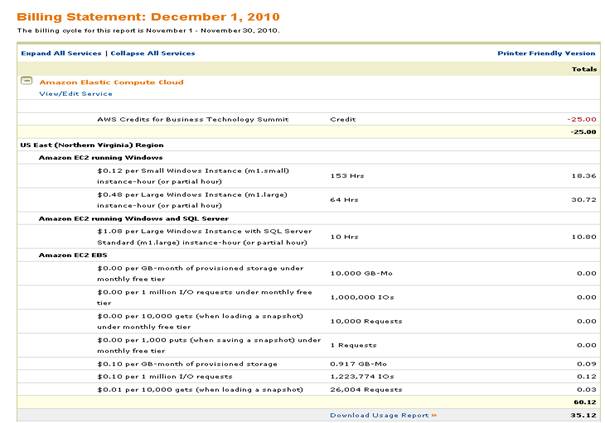
For example for small instance and window use per hour its charge $0.12 likewise it varies upon size of instance and hardware. Data transfer it depends upon region, for different available zone in same region it costs $0.01 per GB data transfer. If you want a facility like cloud watch, load balancing you need to pay extra as per their terms. Cloud watch will be covered later and soon it would be free to use by Amazon
When you see your bill it shows like the below it’s done per month.
Step 22) The below shows us about the usage in each step.
EC2 = Elastic Compute Cloud
By following all steps you can create a machine on the cloud and start working on it
Below screen shows how to terminate a machine. Terminate means (Delete). Select Instant actions > Terminate

Billing calculation can be done here: – http://calculator.s3.amazonaws.com/calc5.html
Some more help from my website : http://sharathreddy.com/registering-for-amazon-web-services-and-using-the-ec2-elastic-compute-cloud-service/


