Amazon Virtual Private Cloud
Amazon Private Virtual Cloud (VPC) is providing facility to use our individual resources which are isolated in the Amazon Cloud. Using Amazon Virtual Private Network (VPN) we can connect our resources to the isolated computer in the cloud. Amazon VPC integrated with Amazon EC2, Amazon Elastic Block Storage (EBS), and Cloud Watch. Amazon VPC provides security such as DNS, LDAP etc., reliable, scalable and cost effective.

Before we start lets discuss some important terms in Amazon VPC.
- VPC is a remote section of cloud. We need to provide IP address space which we select range. To create VPC we need to provide IP address in the form of CIDR (Class Less Inter Domain Routing).For a single assigned block VPC can contain IP address range from 16 to 65,536.
- A subnet is a part of VPC IP address. To create subnet you need to provide VPC IP and CIDR. A subnet block is same as VPC’s CIDR. When we create subnet we get unique id which is assign by Amazon VPC, subnet current state which may be pending or available, number of IP address available in subnet etc. Subnet connected with a star topology with a single virtual router.
- A VPN (Virtual Private Network) have two endpoints, one is Customer Gateway and other is VPN Gateway. Customer Gateway is used to pass information about customer machine to AWS. It may be physical device or software application. To create Customer Gateway you need to provide IP address, BGP ASN. A VPN Gateway used to maintain connectivity. To create VPN connection we required VPN Gateway ID, Custom Gateway ID, type of connection, VPN connection use, industry standard and IPSec tunnel mode to authenticate the gateway of each other and protect your data .Resources which are define in VPN connection are only up to you. They can’t be use outside connection and also not direct connection with the internet.
- Now time to launch instance as you know some basic concept. To launch an Amazon EC2 Instance use Run Instance Operation for that provide IP address, subnet mask and VPN connection and gateway information. If you want that your exiting EC2 instance in VPC cloud then create EC2 instance AMI (Amazon Machine Image).Here are information different from Normal EC2 instance as it give private IP address, Subnet ID and VPN ID. You can also define your IP address to do but it will match some criteria as below.
Specify one IP address per instance, IP address must be in Subnet CIDR, only specify the IP address at the time of launch and can’t change if it started.
- VPC works only two availability zone i.e. US-East, US-West region.
- You can use VPC using these three ways. 1) Command line interface. 2) API.IT is supports Query API and SOAP API. 3) AWS Management Console.
- In this section below shows how to launch EC2 instance in cloud.
Step 1) Sign up in Amazon VPC which is similar to EC2 sign up. Go to sign up page for VPC and insert email id and password. Then after signing in go to the AWS Management Console and click the Amazon VPC tab. It appears like this.

Figure 1: Main VPC window.
In the main window of VPC you can see the first step to create isolated resource option in middle one. Click on Creates Option to create Virtual Private Cloud.
Step2) After this, create VPC dialog box Open here. Give CIDR block format to specify VPC’s contiguous IP address. For example, we select 11.11.0.0/24. After doing this click on Yes.
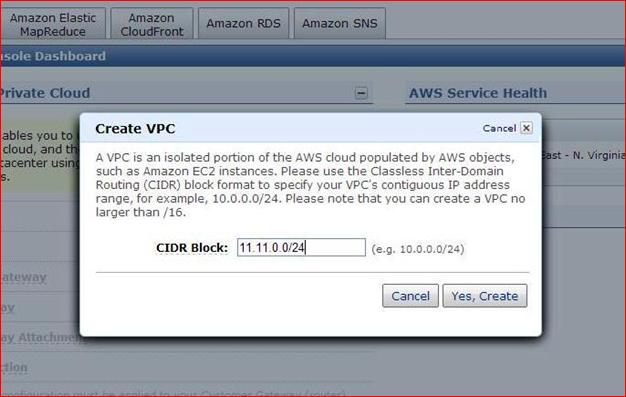
Figure 2: VPC wizard.
Step 3) As you create VPC, it shows in VPC Console Dashboard. Now next step is giving subnet. Click on Create in Subnet.
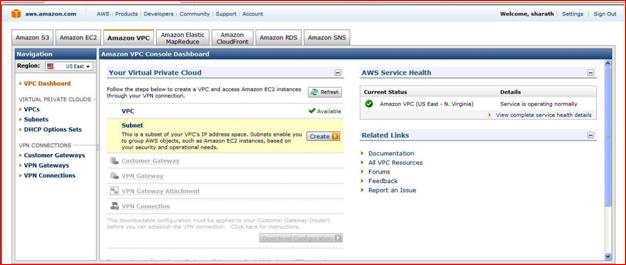
Figure 3: Show VPC create and go for subnet.
Step 4) Create subnet dialog box appear like this.
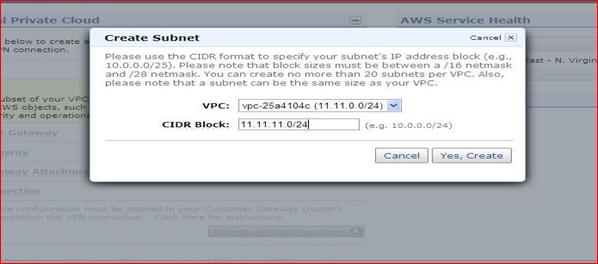
Figure 4: subnet dialog Box.
Select VPC which is created before and give CIDR block range. Click on Yes Create.
Step 5) As you see Subnet is available in Dashboard. Now create Custom Gateway. To do this, click on Create button on Custom Gateway as shown in the figure below.

Figure 5: VPC Dashboard shows subnets is available and go for Custom gateway.
Step 6) Create Custom gateway dialog box.
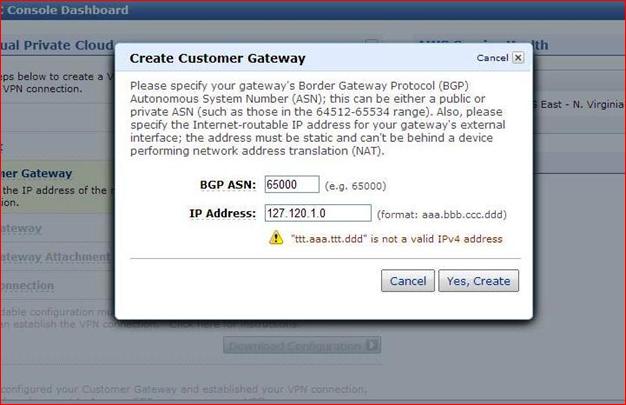
Figure: 6 Create Customer Gateway dialog box.
Here in first text need to feel BGP ASN number which is Border Gateway Protocol Autonomous System Number in the range from 64512-65534. Here, we have given 65000 and provide IP address. After doing this click on Yes, Create.
Step 7) As shown in the figure below, Custom Gateway created and it’s available.
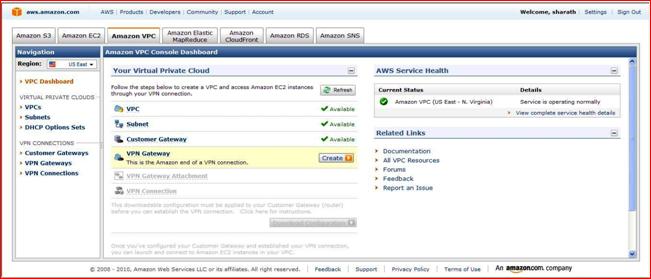
Figure 7: VPC Dashboard shown Custom Gateway created and go for VPN gateway.
Step 8) To create VPN Gateway click on Create option shown in the figure above then Amazon automatically create VPN gateway.
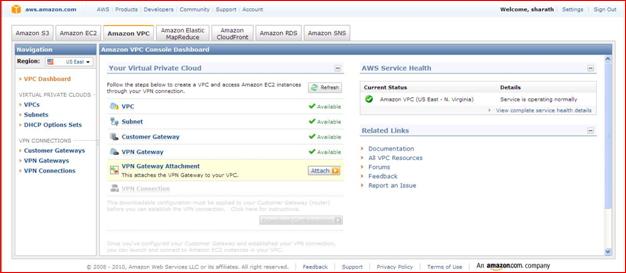
Figure 8) VPN Dashboard shows that VPN gateway is created.
Step 9) Now click on Attach to attach VPN gateway attachment.
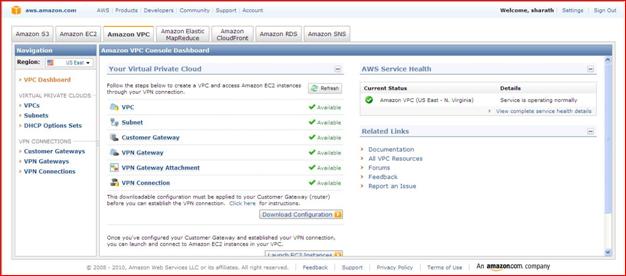
Figure: 9) VPN Dashboard shows that VPN connection created.
Step 10) After doing all this time to launch EC2 Instance. Click on Launch EC2 Instance as shown in the figure below.
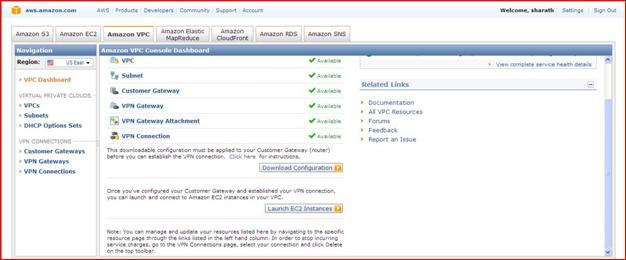
Figure 10) Launch Instance.
Step 11) After, click on the EC2 window Open Here. Click on Launch Instance.
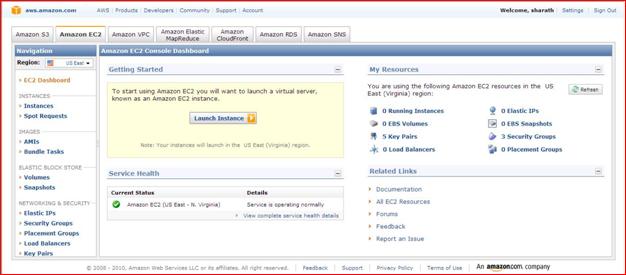
Figure 11: Launch New EC2 Instance.
Step 12) Next is to select AMI. as in the figure below. Here in our case we select window basic server and click on continue.
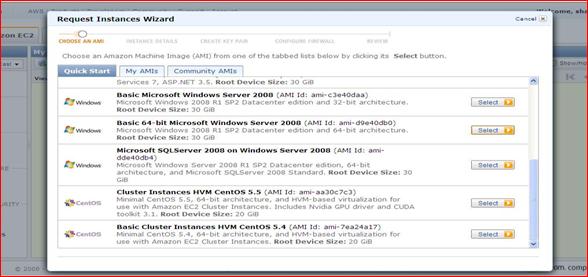
Figure 12: Request Instances Wizard.
Step 13) Now Request Instance Wizard to open. If you want to launch normal EC2 Instance then you select Launch Instance but the difference is that as we are creating this instance for our Virtual Private Cloud so select Launch Instance into Virtual Private Cloud option.
And click on Continue.
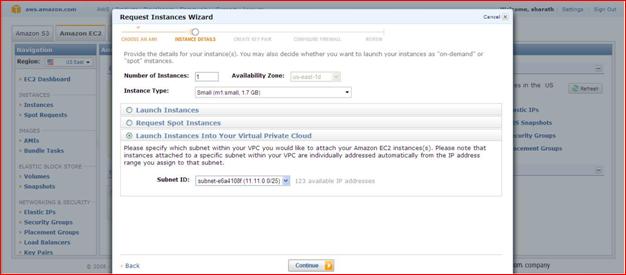
Figure 13: Request Instance Wizard.
Step 14) Select Default Parameter in instance detail and click on Continue.
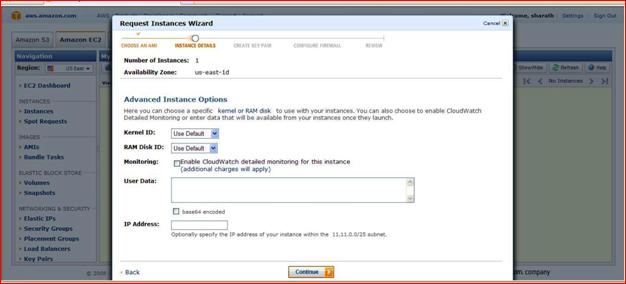
Figure 14: Instance Detail.
Step 15) After this want to give key name then give. Then click on Continue.
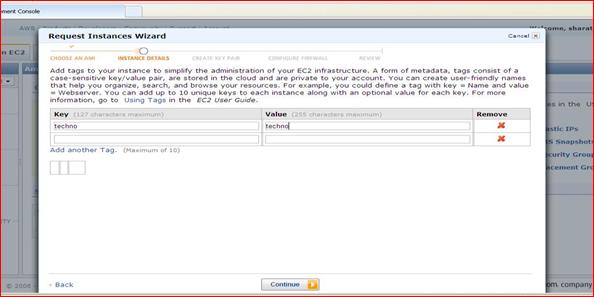
Figure 15: Give key name and value. Here, we have given techno key name and value key name.
Step 16) Now choose your key pair. As we created before dd-new 11 we are not creating new one right now. Click on Continue.
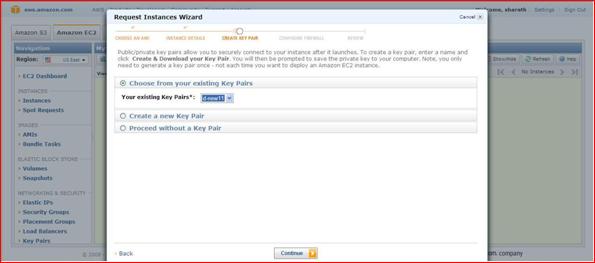
Figure 16: Create Key Pair.
Step 17) Next is Firewall Configuration. Here click on Continue.
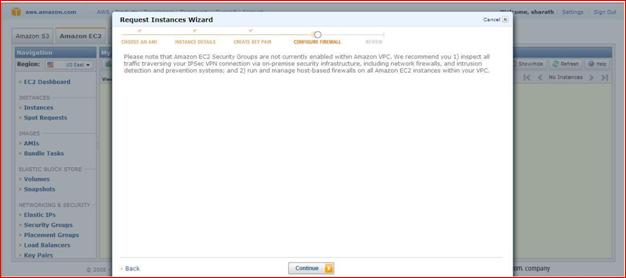
Figure 17) Firewall.
Step 18) Check and review your instance and click on Launch.
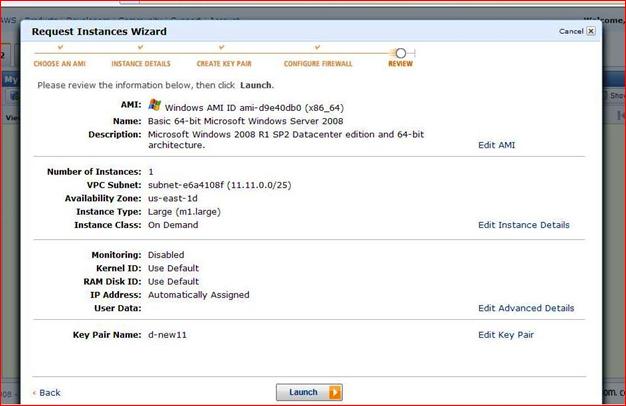
Figure 18: Review of Instance.
Step 19) After, open Launch Instance Wizard. It will give message that Instance launch. Click on view your Instance on the instance page.
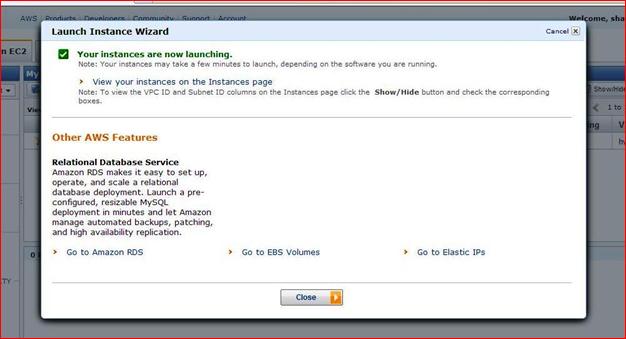
Figure 19) Lunch Instance Wizard.
Step 20) The main EC2 Window shows that our Instance is created.
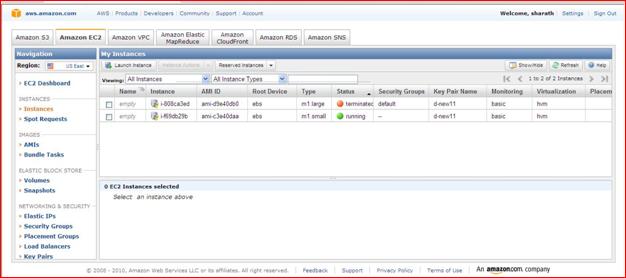
Figure 20) Show Instance is running.
Step 21) Select your Instance and get private IP address which it provides for further work.
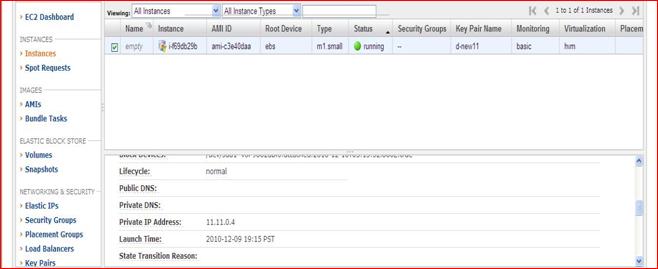
Figure 21: Show Private IP Address.
Step 22) Completing your work in VPC terminates this instance and cleans the entire field in VPC.
So here we shown how to Launch EC2 Instance in Virtual Private Cloud using API.


