Backup Databases with ES 2007 SP2
The ES 2007 has launched a new feature in Windows Server Backup, among many, in SP2 to do exchange backup. It takes backup snapshots using the Volume Shadow Service (VSS) which makes a backup of the whole volume containing exchange data and not ES application itself. In this article, I will show you the installation and configuration of Window Server Backup under Window Server 2008.
Window Server Backup Installation:
– Open ‘Server Manager’ then expands ‘Features Summary’ then select ‘Add Features’.
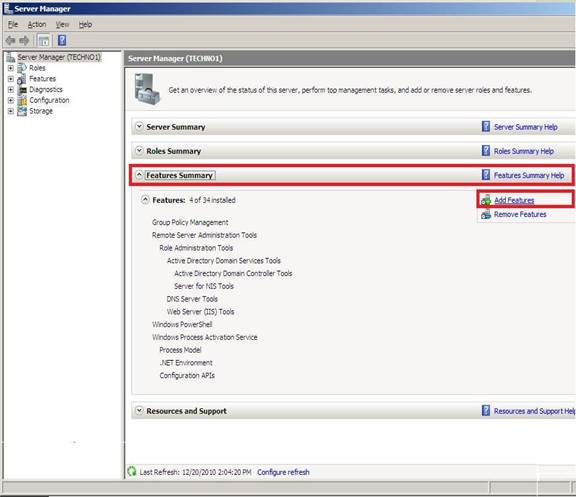
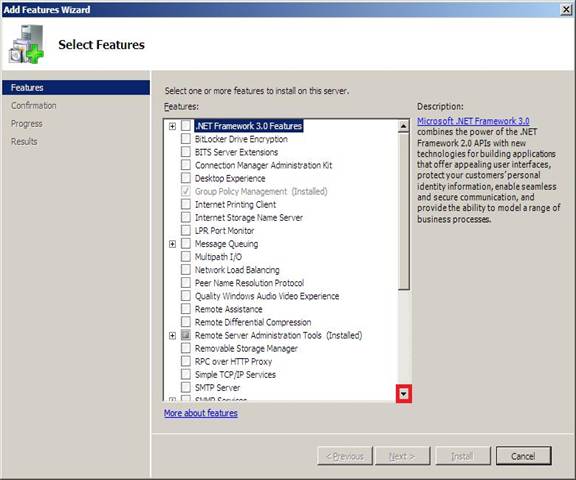
– The new feature wizards will look like this. Scroll down and select the ‘Window Server Backup Features’.
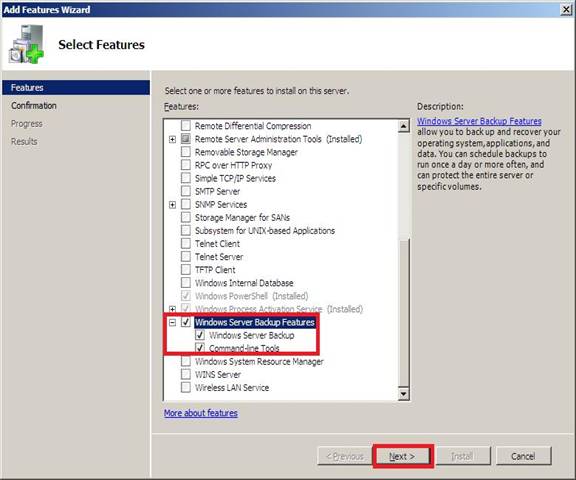
– Check both the ‘Windows Server Backup’ and the ‘Command-line Tools’ and click ‘Next’.
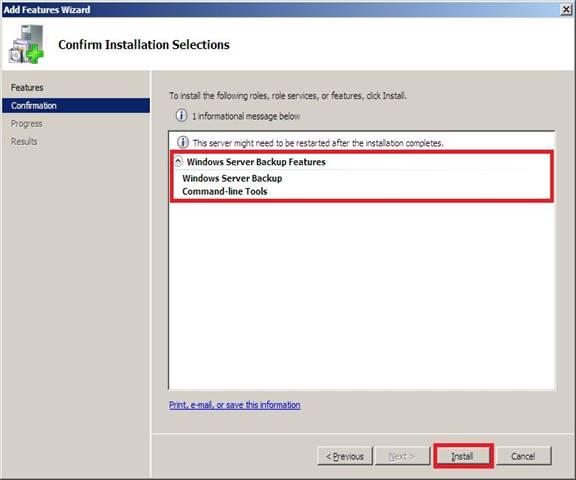
– The Confirm Installation Selections will show the features selected for installation. Click ‘Install’.
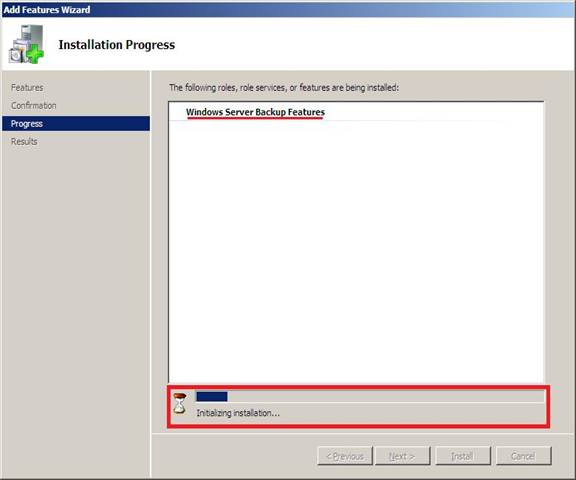
– See Installation Progress.
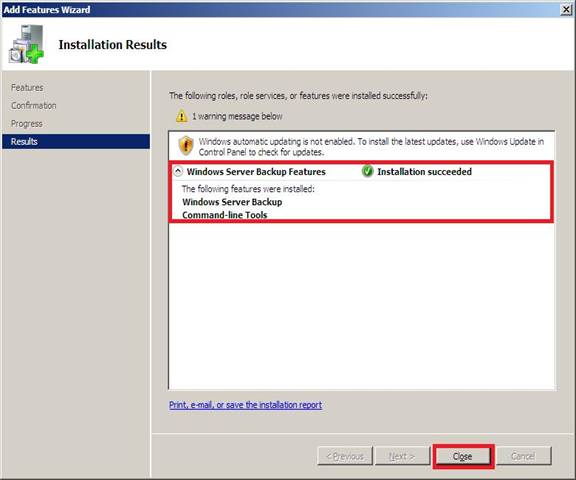
– Once successful installation is done, click ‘Close’.
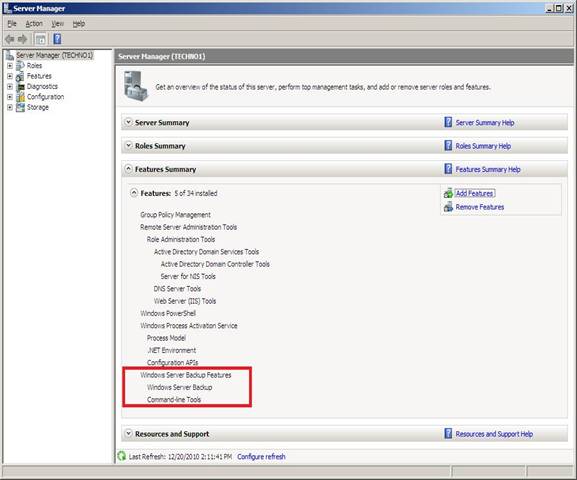
– The Server Manager console will show the new features added to the server. You can verify that under the Features Summary or look for Windows Server Backup under Administrative Tools.
Window Server Backup (WSB) Configuration:
As I said earlier, WSB can only take volume snapshots; but it is aware of ES databases which will be checked for consistency and their log files will be maintained. There will be times when you would only like to back up databases only, maintained separately, so we don’t have to back up all other files.
– Now start ‘Window Server Backup’ console under ‘Administrative Tools’.
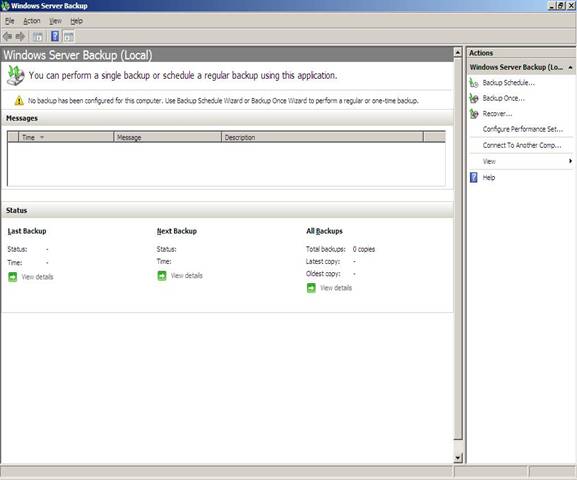
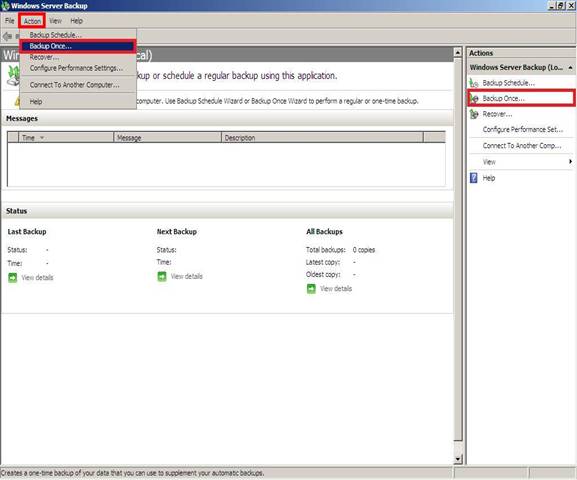
– The WSB provides two options: either to schedule the backup or to do it now. We will go through each. To do a backup now, select ‘Backup Once’ from the Action menu tab on right-pane.
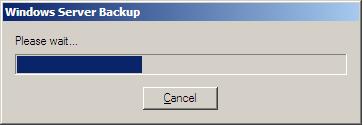
– A WSB progress bar will appear. Wait for its completion.
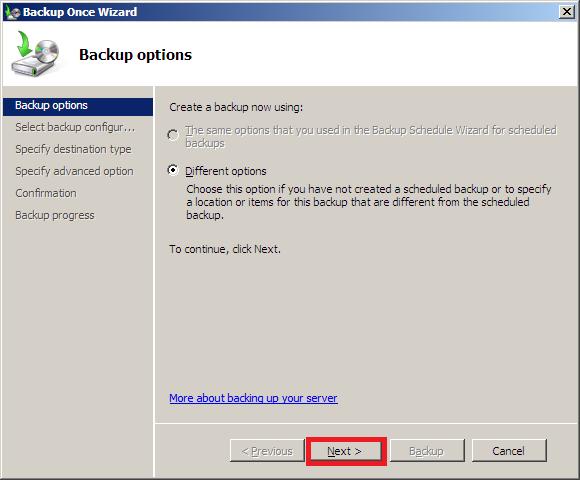
– Click ‘Next’ with the default option of ‘Different options’ under ‘Backup Once’ wizard.
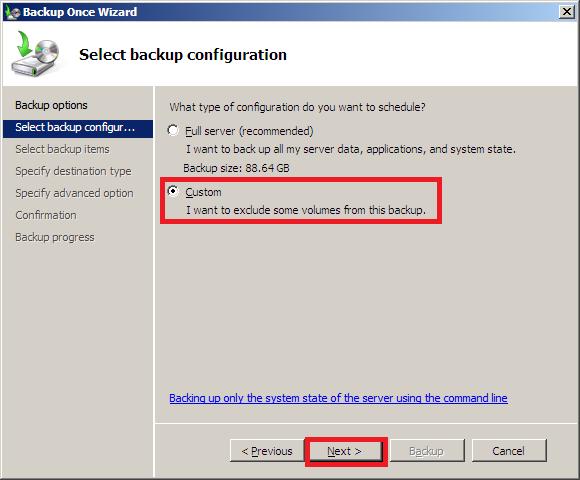
– This wizard gives two choices, either of Full server or Custom backup. Select ‘Custom’ and click ‘Next’.
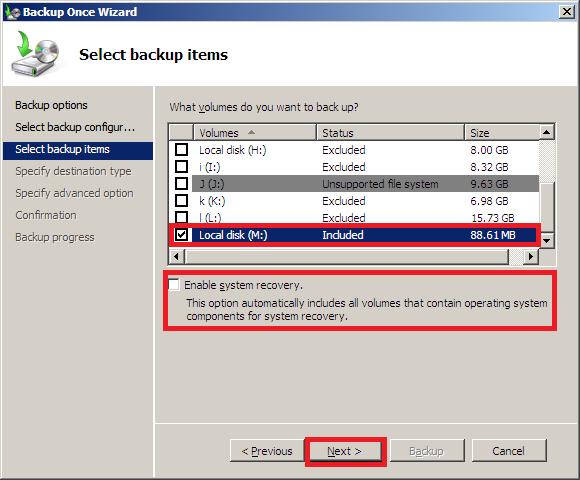
– By default, all drives with exchange data are selected with ‘Enable system recovery’ checkbox.
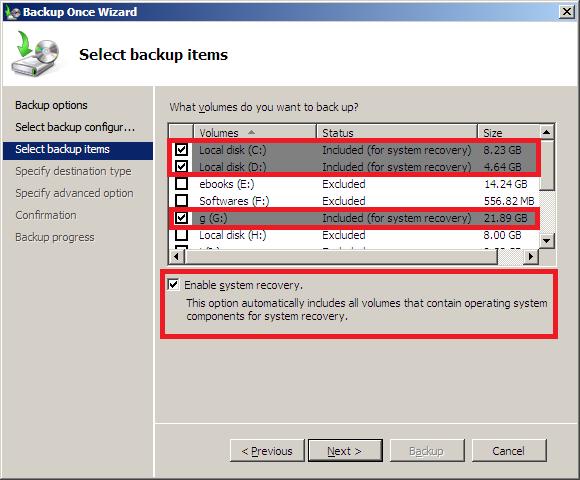
– In this article, we will only backup volume with ES databases so uncheck ‘Enable system recovery’ to select a volume with only databases. Click ‘Next’.
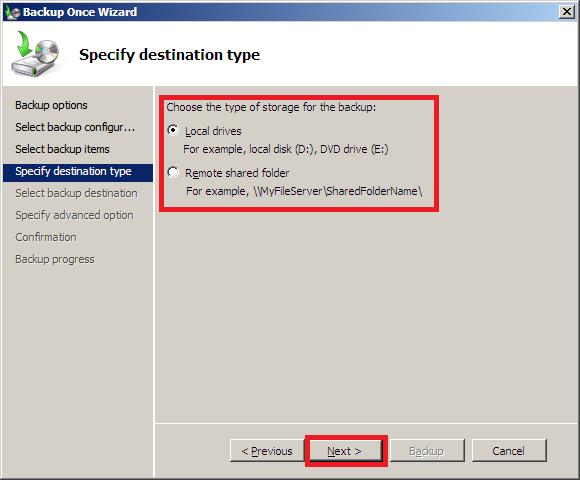
– The ‘Specify destination type’ wizard will ask for a local or remote backup storage option. Select ‘Local drives’ and click ‘Next’.
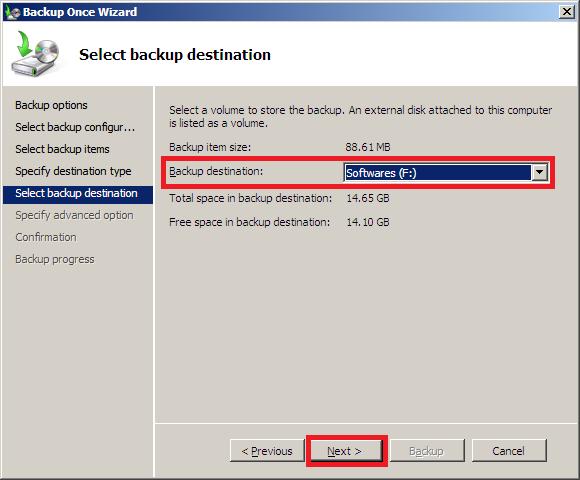
– Now for the exact backup destination, specify the drive where you want to maintain your backup then click ‘Next’.
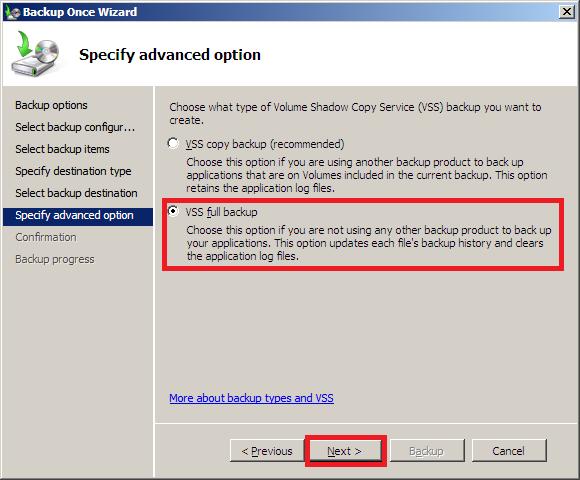
– Both types of VSS backup are self-explanatory. Select ‘VSS full backup’ then click ‘Next’.
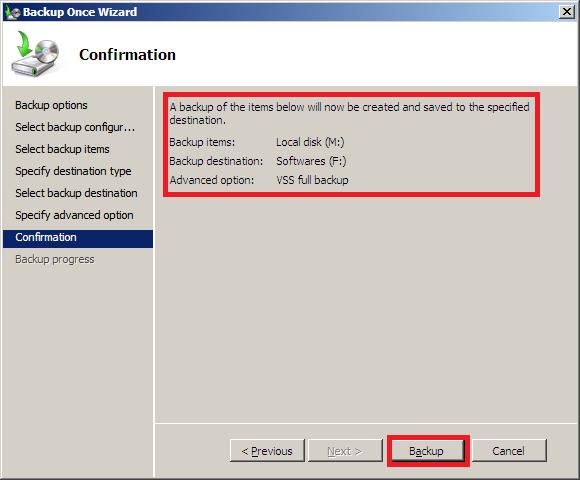
– The summary of the options selected will be presented on confirmation. Analyze. Then, click ‘Backup’.
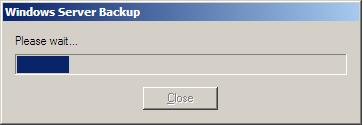
– Wait for the progress wizard to complete before starting back up.
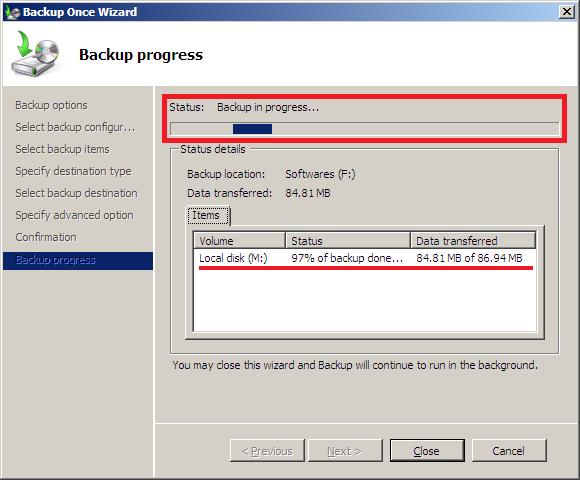
-The Backup progress of the volume will start to back up.
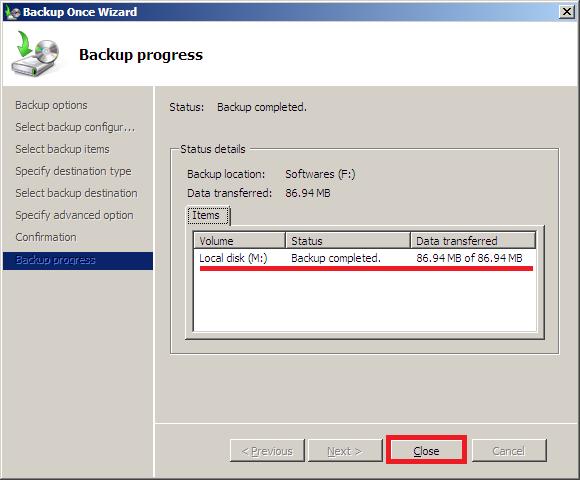
– Once done, close ‘Backup Once’ wizard.
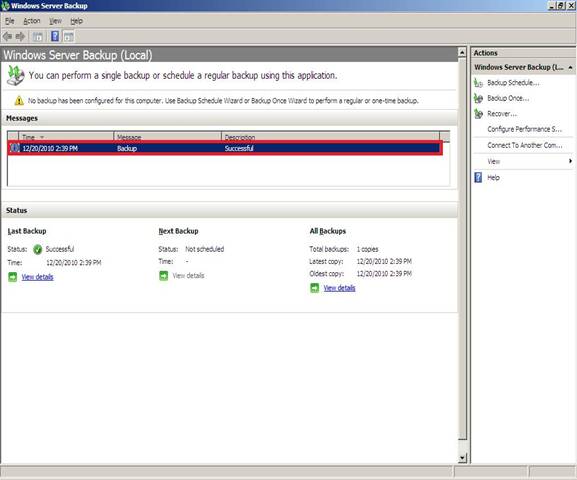
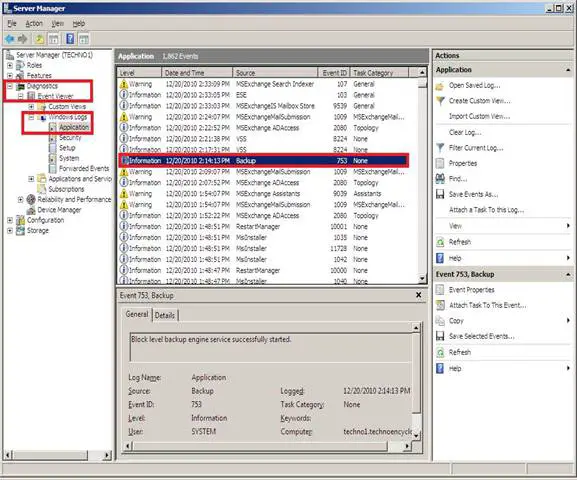
– The result of the backup can be seen in the main WSB console. The Progress and result of the backup can also be verified in the Applications menu of the Event Viewer.
– To do so, open ‘Server Manager’ consoles, select ‘Applications’ under Event Viewer of Diagnostics. Information can be seen in the details of Event ID 753 of ‘Source Backup’.
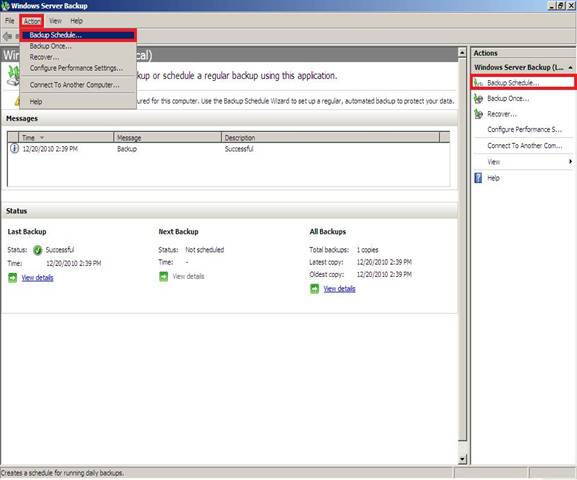
– I mentioned earlier about going through the ‘Scheduled Backup’ so this is the time. Start ‘Backup Schedule’ wizard by selecting ‘Backup Schedule’ from the Action menu tab or from the right pane of WSB console.
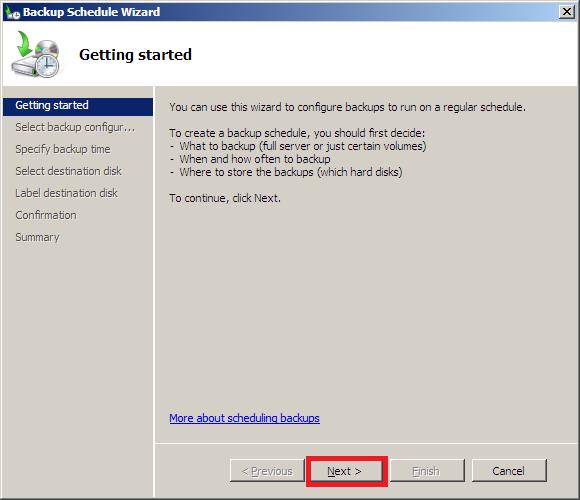
– Then click ‘Next’.
– The ‘Backup configuration’ options are self-explanatory. Click ‘Next’ after selecting ‘Custom’ option.
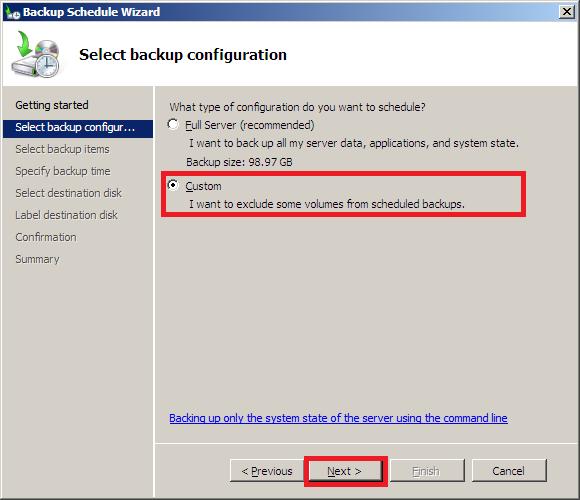
– Select volume with exchange database and click ‘Next’.
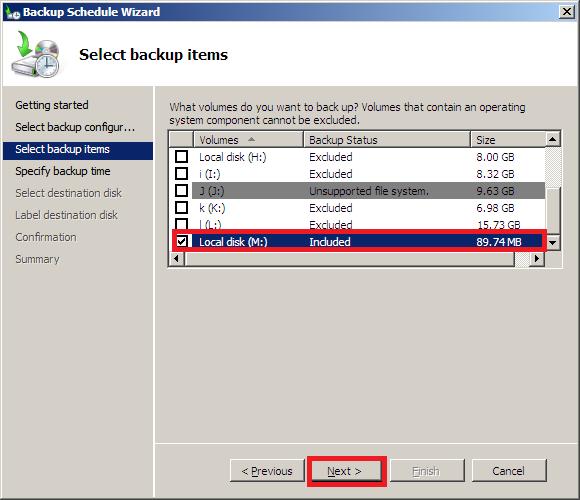
– It is time for the configuration of this wizard where the juice lies. Indicate here the schedule and frequency of your choosing. The remaining options stay the same so repeat the process you did earlier.
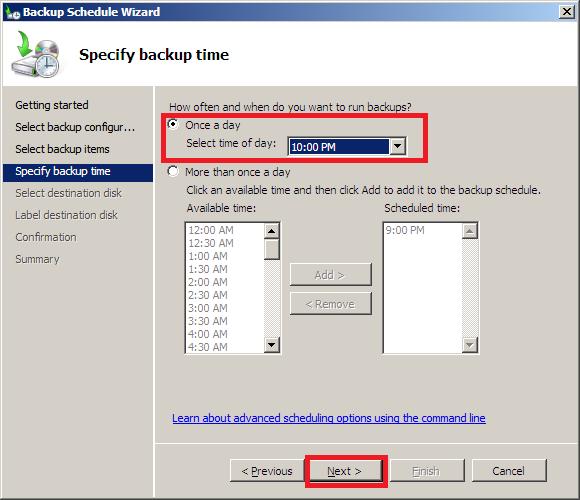
Before closing things down; it is better if we go through the recovery of backup as well. To do so, select ‘Recover’ from the Action menu tab on the right pane of the console.
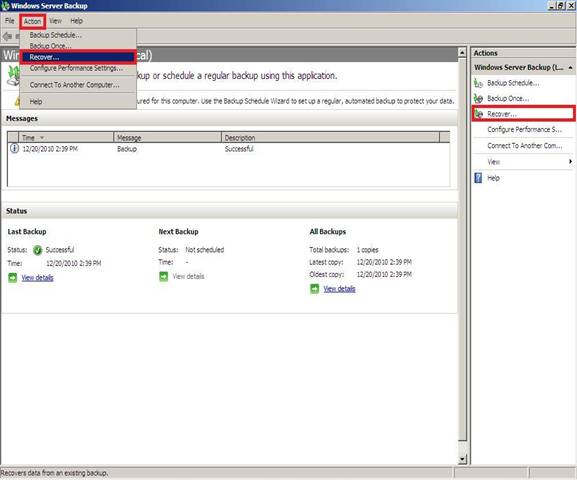
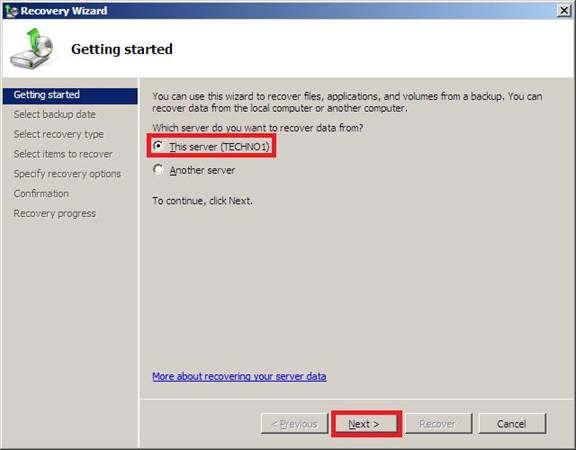
– Locate the data where backup is placed. Since we saved the backup data locally, select ‘This server (TECHNO1)’ then click ‘Next’.
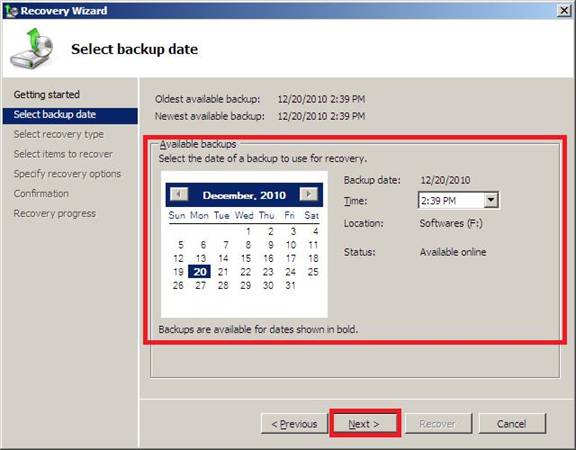
– The screen of the Recovery wizard comes up with the schedule database. Select the database for an exact date and time for recovery. Click ‘Next’.
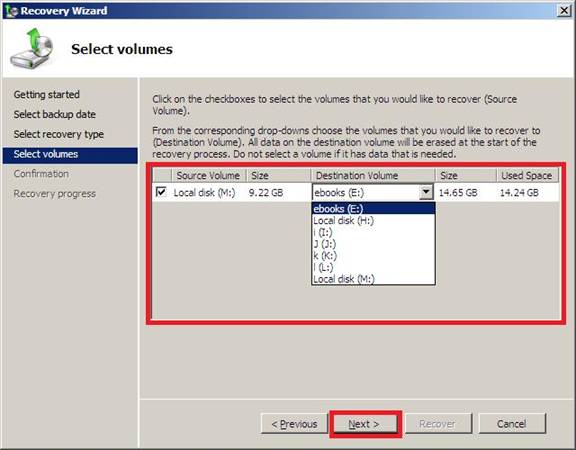
– We created a backup of the M: drive earlier with our databases shown as source volume. Select the destination volume where the backup will be laid. Once done, complete the recovery.
Conclusion: The ES 2007 SP2 under Window Server 2008 provides WSB feature, but with limited backup and restore facility.


