Client Access Server
What is Client Access Server?
Client Access Server or CAS is one of the 5 email server roles introduced in Microsoft Exchange 2007. This server role is a modified form of Front End Server in Exchange 2003 with a few enhancements in its functions and has a better support to the new architecture.
What Does Client Access Server Do?
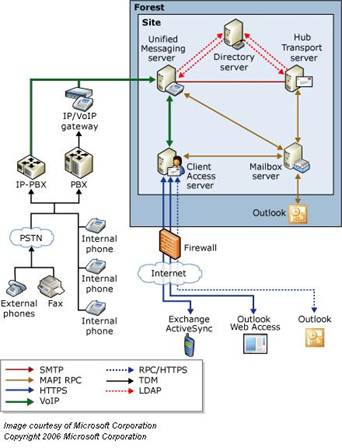
A Client Access Server’s basic function is to provide an entry point for email users coming through Outlook Web Access (OWA), Outlook Anywhere (OAW) versions 2003, 2007 & 2010, Windows Mobile devices or any other smart phones using Active Sync.
Even for a user coming through a web browser, CAS server provides a rich interface which includes tasks lists, calendar information and public folders along with the usual access to emails. Web interface works in full functionality on IE versions 6.5 and above. For all other browsers web access is available in light mode only.
CAS server can be configured to use HTTP, HTTPS, MAPI, IMAP4, POP3 protocols.
Deployment Considerations
Depending on hardware availability and utilization requirements, CAS server is installed on a separate physical or virtual machine. However, it can be deployed on the same physical or virtual machines having Mailbox and Hub server roles if limited resources exist.
Client Access Server requires communication to the outside world through internet so generally, it is placed in DMZ in a corporate network.
Installation
There are few pre-requisites for the CAS server role installation.
Who can install a CAS Server?
The user who will install CAS server must be member of following groups:
- Domain Administrators
- Enterprise Administrators
- Local Administrator
What are the Hardware Requirements?
A Client Access Server role requires 64 bit processor architecture.
It can be installed on any Pentium-IV, Xeon or AMD Athalon based processor.
CAS requires 1GB of RAM for its own processing
For every mailbox, an additional 7MB of RAM is also required, e.g. for 100 mailboxes a total of 1GB+700MB RAM will be required
A 1.2 GB free space available on installation drive and a 200 MB free space on system drive should be available when installing.
The file system must be formatted as NTFS on both drives.
What are the Software Requirements?
Minimum requirement for Domain Functional Level is Windows 2000 (Native).
Operating system must be Windows Server 2003 64bit with SP1 or above.
Operating system must be fully patched and antivirus installed with latest definition updates before you perform any installation.
There are some basic windows components that must be installed on the server before beginning the installation of any exchange server role. These components are the following
- Internet Information Service (IIS)
- Dot Net Framework 2.0
- MMC 3.0
- Windows Power Shell 1.0
Once all of the hardware is configured, that is ready to use, and is powered by the basic OS and the antivirus installations and updates etc, we can now proceed with the start of the installation.
Installing the Pre-Requisites
For the installation of Internet Information Services (IIS) follow these steps,
Go to Start Menu > Control Panel and click “Add or Remove Programs”
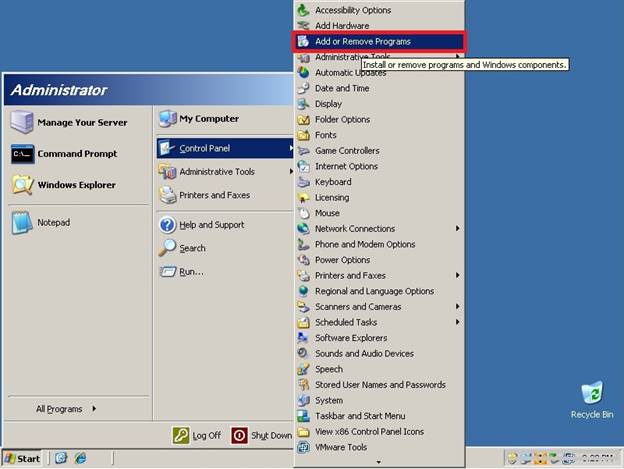
On the Add or Remove Programs screen click last tab on the left side “Add/Remove Windows Components”
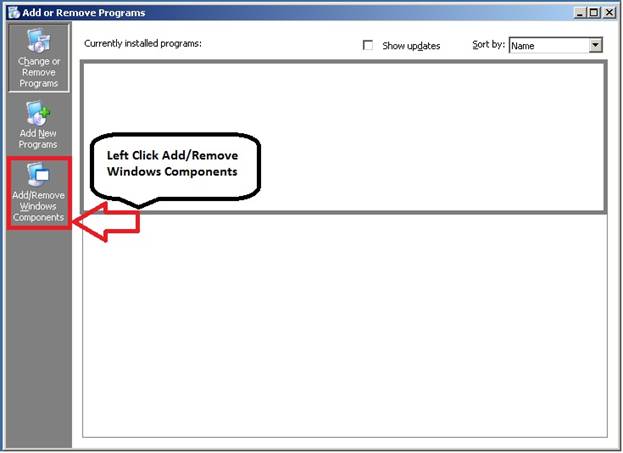
A wizard will start to assist the installation procedure.
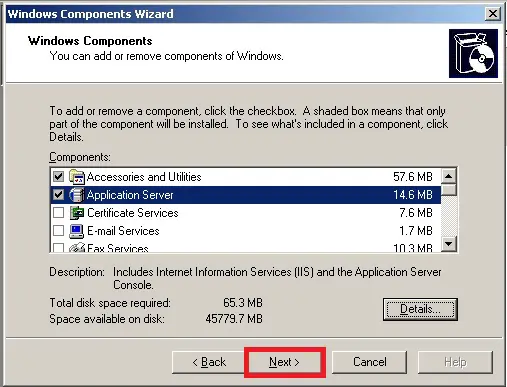
On the Windows Components Wizard screen select “Application Server” and click “Next”

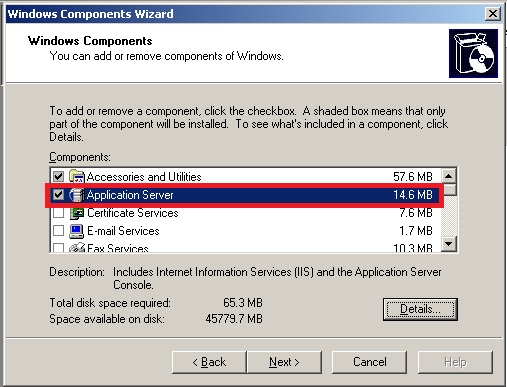
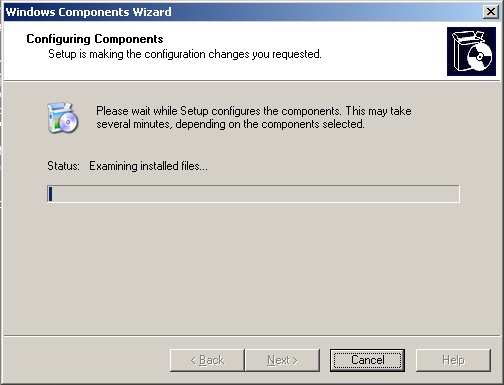
The installation will begin for IIS services.
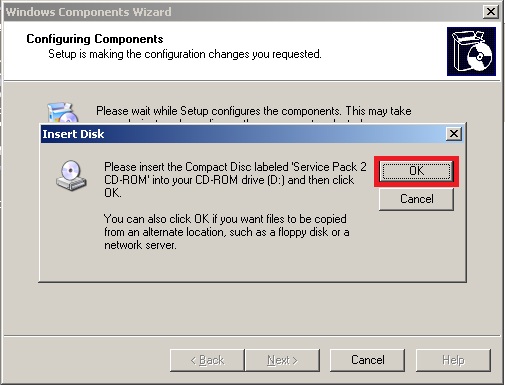
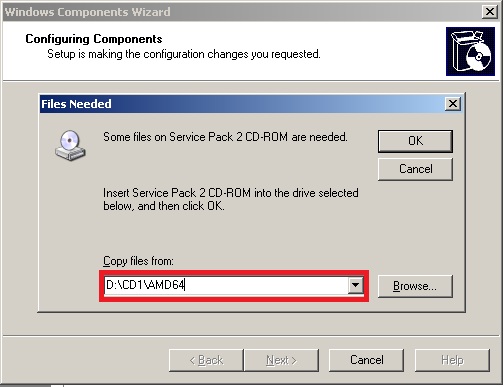
Incase the installer process asks for additional files located on any CD of Windows XP or Windows7, provide correct path of the directory or CD location by clicking browse button shown on your pop up screen
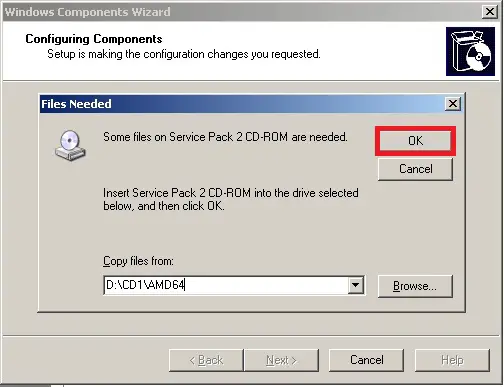
After providing the correct path click “OK” to continue installation
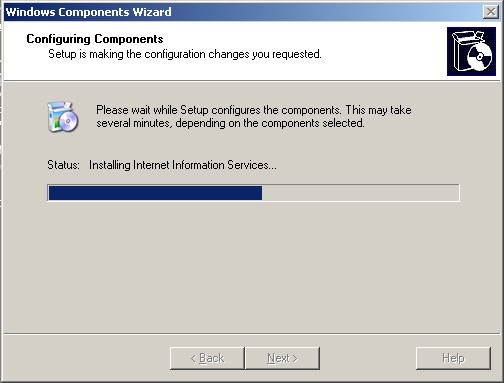
The installation will start for IIS
Once installation is completed click “Finish” to exit
Now close “Add or Remove Programs”
In order to install we have to get a re-distributable installation package of dot Net Framework 2.0 from Microsoft’s website.
You can download dot NET Framework 2.0 from this URL
http://www.microsoft.com/en-us/download/details.aspx?id=6523
After downloading the executable file on your desktop, double click on this file to initiate the installation procedure.
On the first screen it will ask for the user’s consent to install dot Net Framework 2.0.
Click “I have read and ACCEPT the terms of the license agreement”
You can leave the blue highlighted checkbox blank since this is an optional one.
Then click “Install”
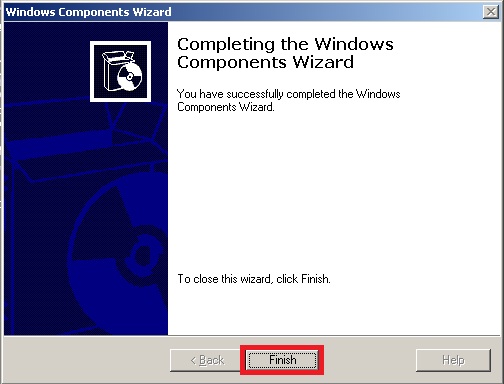
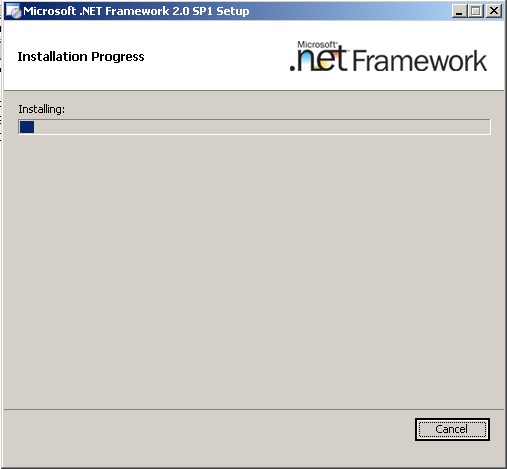
The Installation will start for dot NET framework 2.0
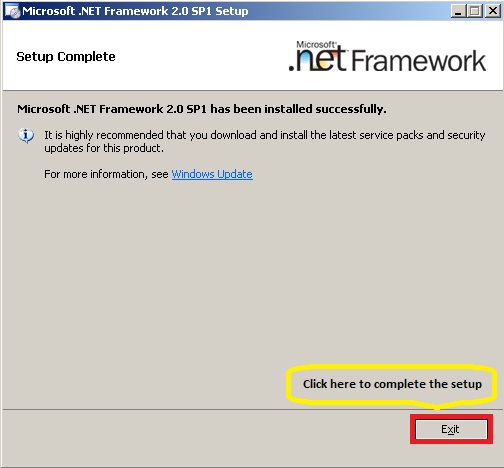
After the Installation is complete click “Exit” button to complete the installation process
Microsoft Management Console (MMC) 3.0 generally comes pre-installed with X64bit systems however it can be downloaded from this URL if required
http://www.microsoft.com/en-us/download/details.aspx?id=12709
Windows Power Shell 1.0 can be downloaded from this URL
http://www.microsoft.com/en-us/download/details.aspx?id=11892
After downloading the executable file, double click on the file to run the setup process
On the first screen of installation wizard, click “Next” to start installation of Windows Power Shell 1.0
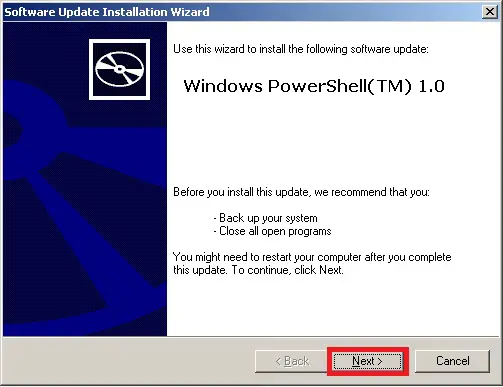
On the next screen select “I Agree” radio button and click “Next”
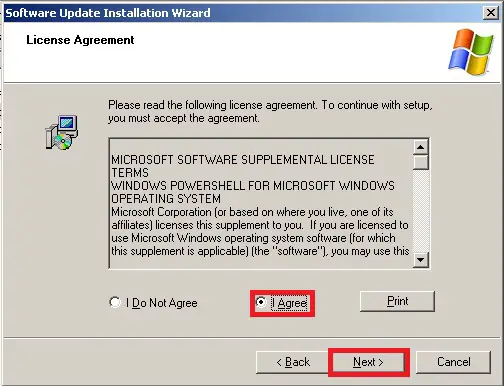
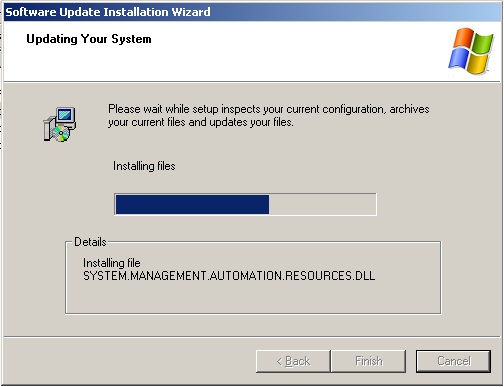
The Installation will start
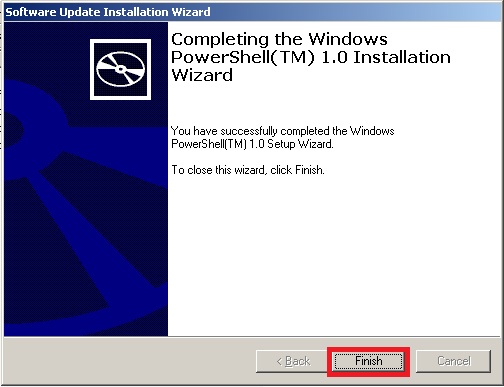
Once installation is completed click “Finish”
After installing all pre-requisites, restart the server for changes to take effect
Installation of Exchange Server 2007 (CAS Role)
Go to the installation source in DVD or where you have copied it after downloading.
Select “SETUP.EXE” which is generally found on the root of installation folder.
Double click this executable file to initiate the setup process.
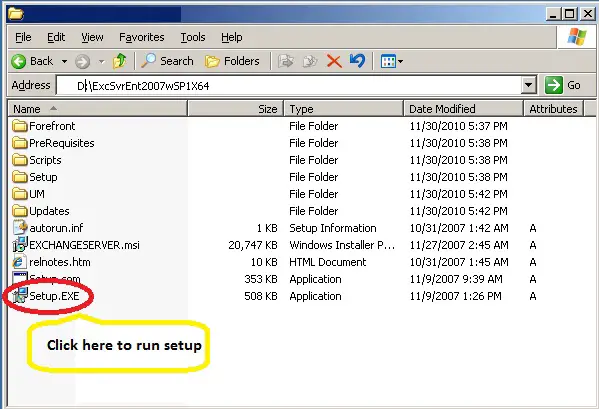
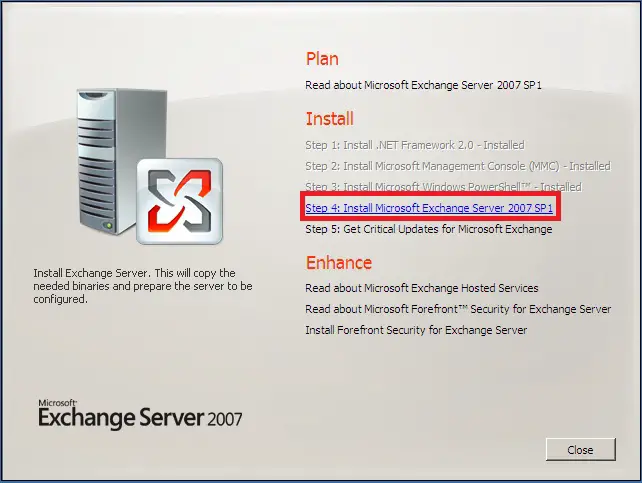
Exchange Server 2007 window will open up.
Here you can see that initial 3 steps are colored in gray because we have already installed pre-requisites and exchange setup has detected this too. If any of the first 3 options are not colored in gray, please review the installation steps and just repeat the installation procedure of the uninstalled component. Then, move to the first available option i.e. Step 4: Install Microsoft Exchange 2007 SP1 click this option to begin installation.
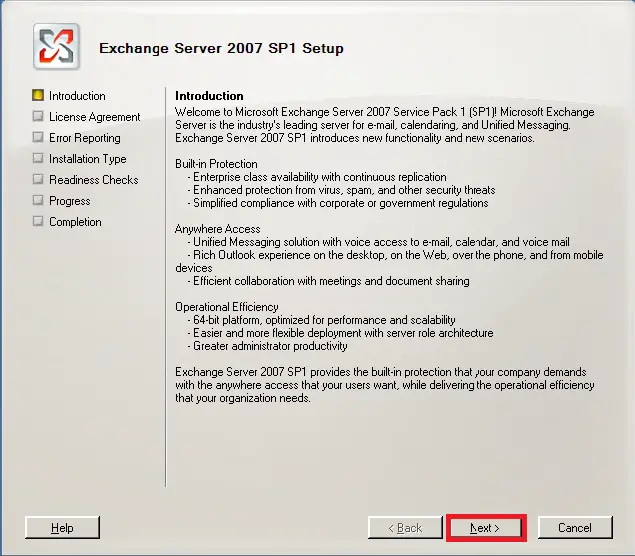
On the introduction screen, setup will give you a brief description of the product.
Click “Next” to proceed.
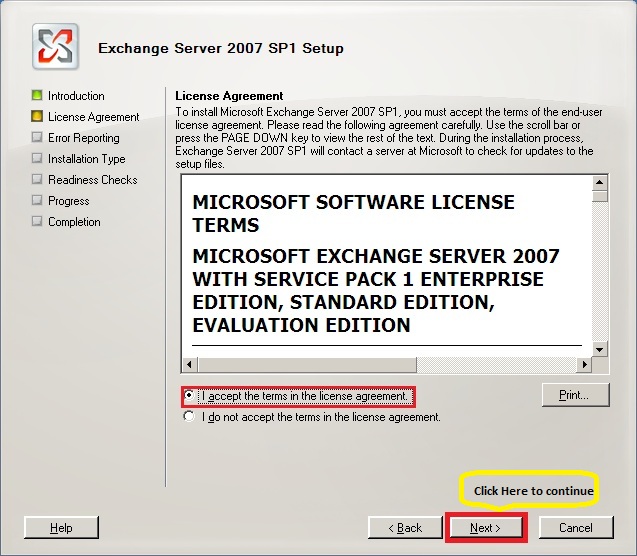
On the license agreement screen, you can read the license agreement, once satisfied with the information, you can then click “I accept the terms in the license agreement” and click “Next” to proceed
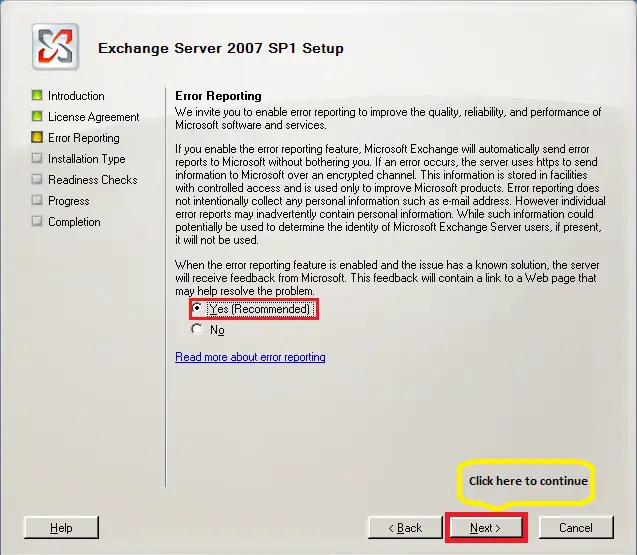
The next screen will show an Error Reporting feature for exchange. This feature can be disabled with no effect on the installation. However, to get a feedback from an end user, Microsoft recommends that you click “Yes” to proceed.
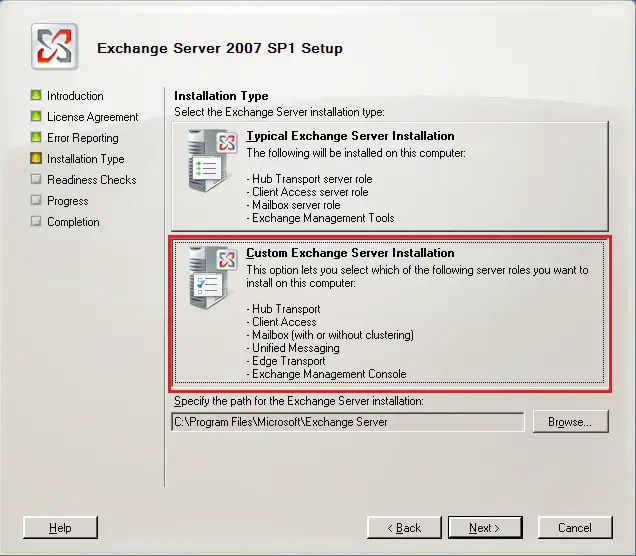
On the “Installation Type” screen you have two options. Either you can go for typical installation which can install multiple roles on same box or you can select an inpidual role for this specific machine.
As scope of this document is to install Client Access Server only we will click on the second option
“Custom Exchange Server Installation”
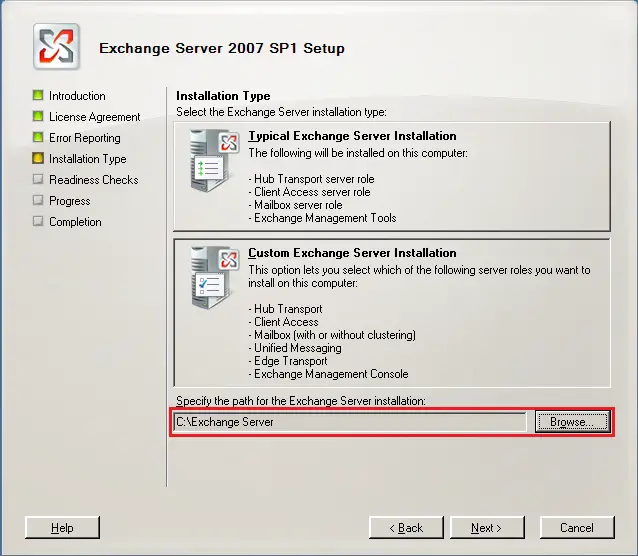
After choosing the installation type click the “Browse” button to locate the installation path where you plan to put all the installations. In this example we are choosing a folder created for CAS installation on C drive.
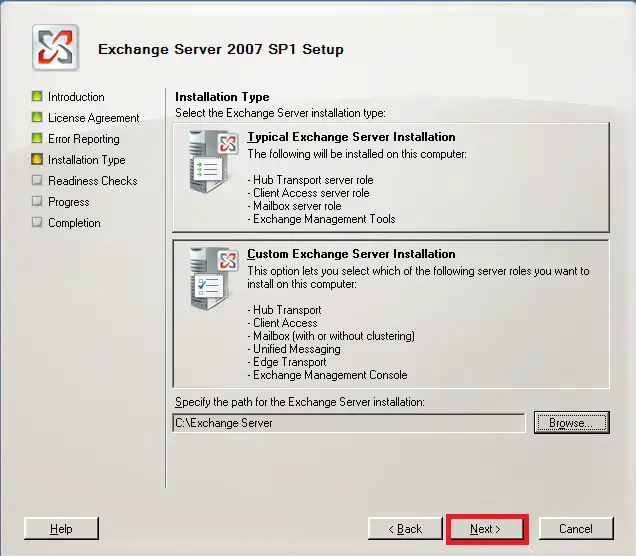
Click “Next”
The Server Role Selection screen will appear next. Here you have choices to select one or more server roles.
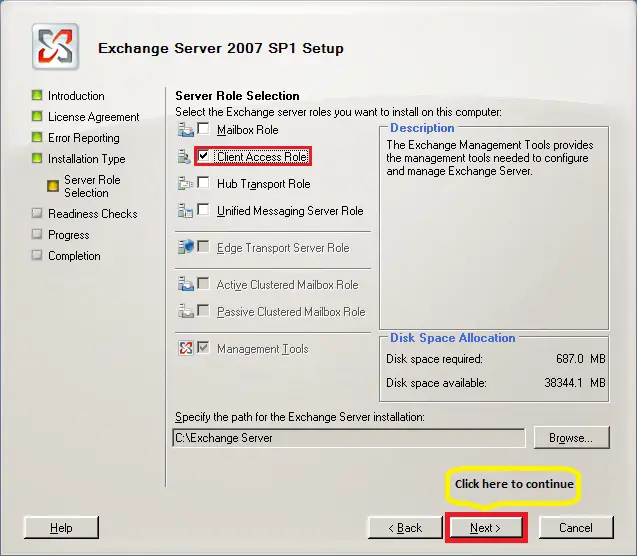
Select only “Client Access Role”
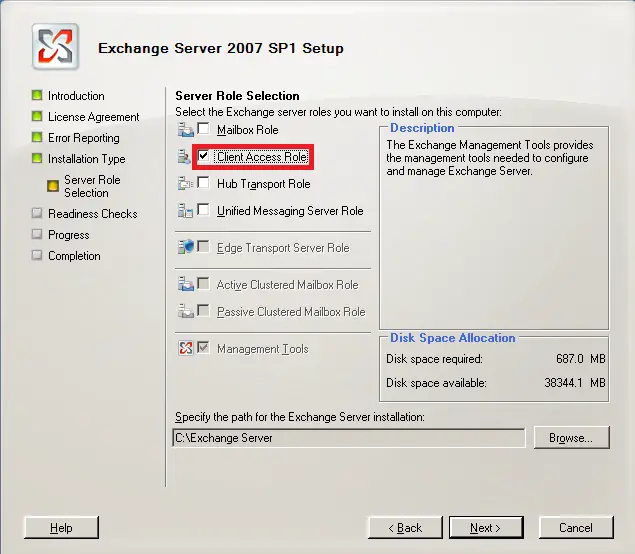
After you have marked the relevant checkbox, check Disk Space Allocation to confirm that you have enough space for the installation and operations.
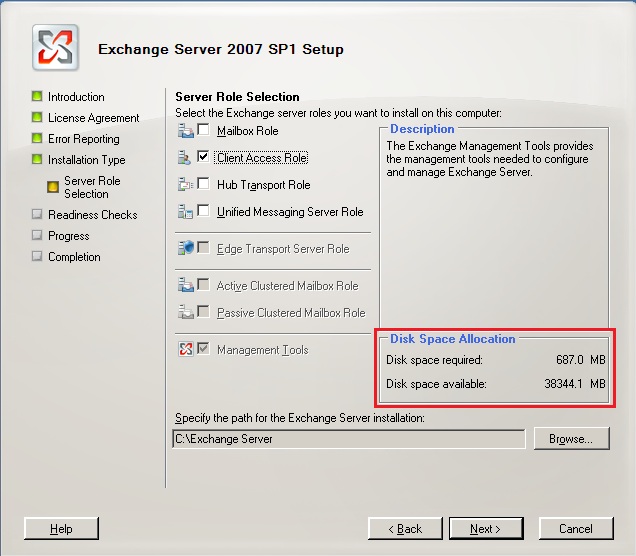
Once you confirm everything, click “Next”
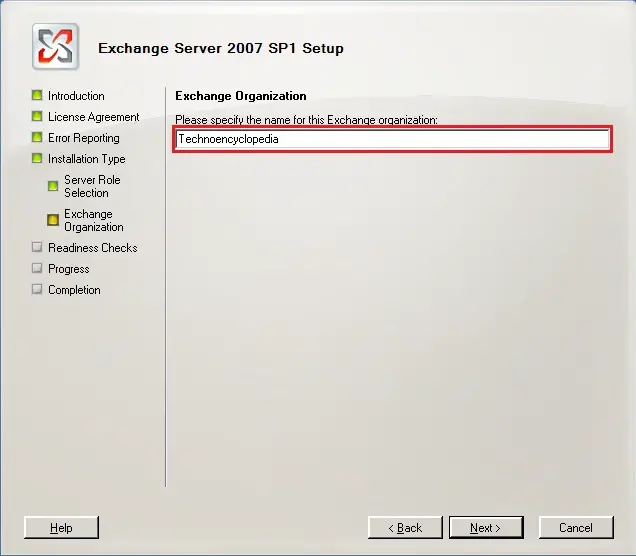
Exchange Organization screen will appear next.
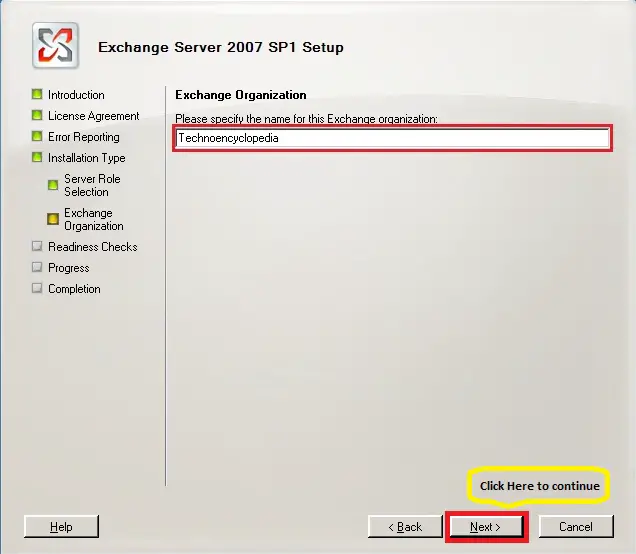
On the blank space, type the name of your organization.
Click “Next” to continue
Wait for it to finish setting up.
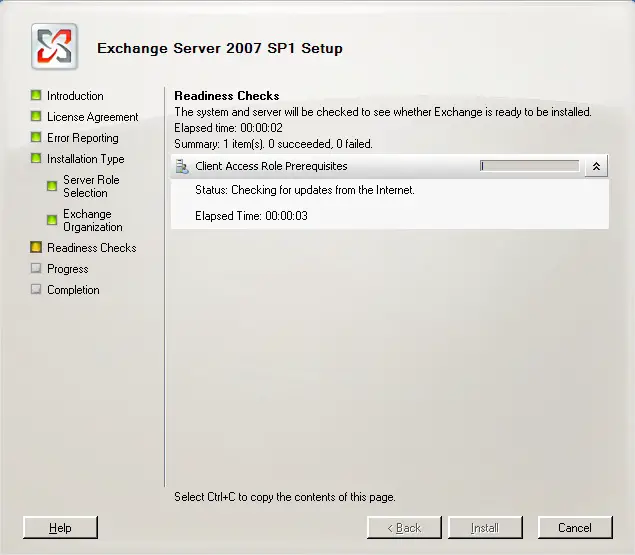
The “Readiness Check” screen setup will start evaluating the different types of pre-requisites as included on the screen shots below.
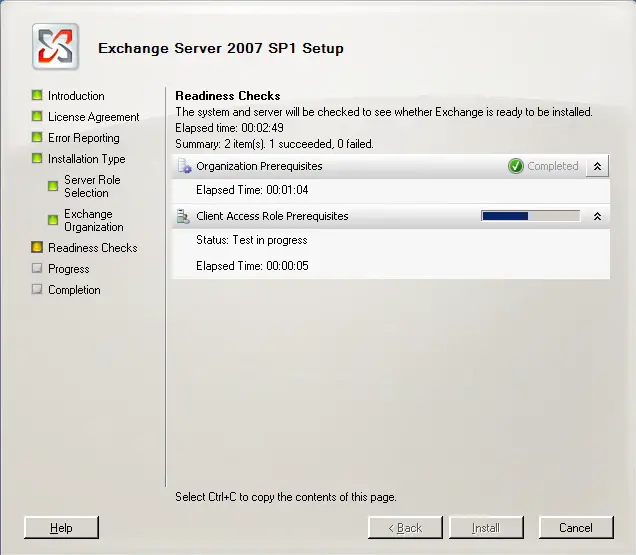
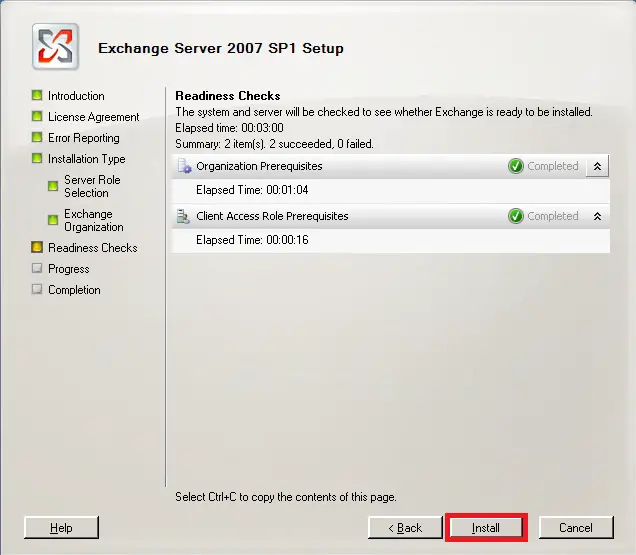
Once the readiness check is completed successfully, click “Install”
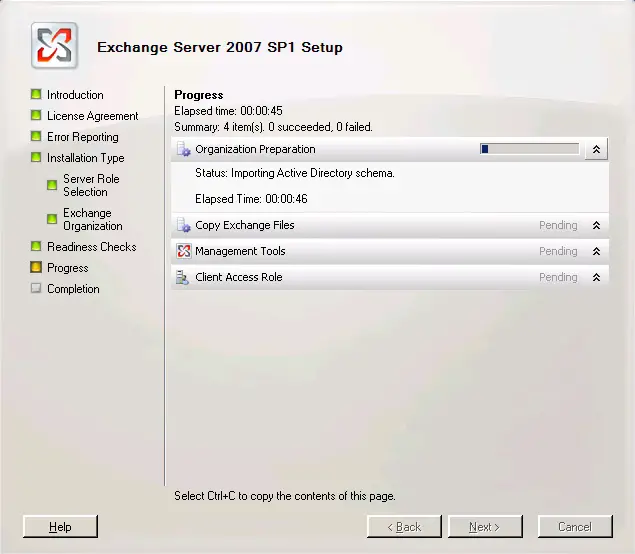
On the Progress Screen, setup will do a number of tasks. If it is not yet done, it will prepare Active Directory Schema for Exchange Installation. Copy and install the Exchange file and deploy CAS role along with the Management tools.
Once all of the installations are completed, click “Finish” to proceed.
Please note that once you click “finish” more than one window will pop-up.
However you have to go straight to Exchange Management Console which will open automatically.
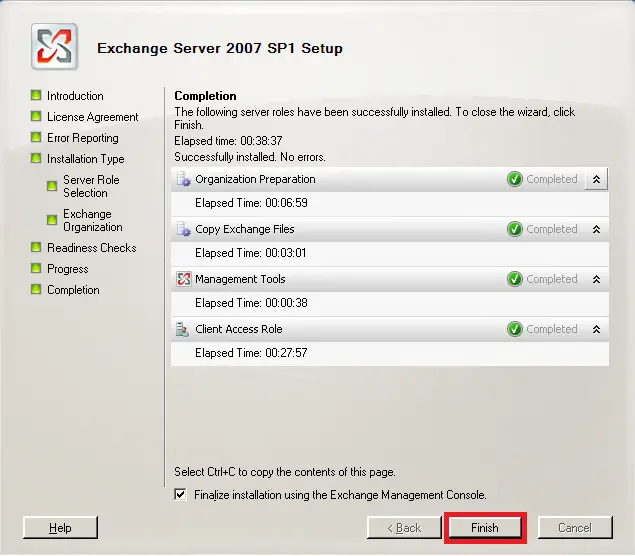
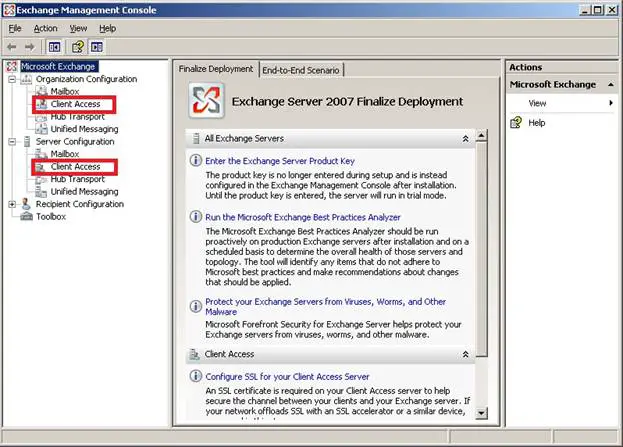
In the Exchange Management Console (EMC) verify that Client Access is both visible under Organization Configuration and Server Configuration both
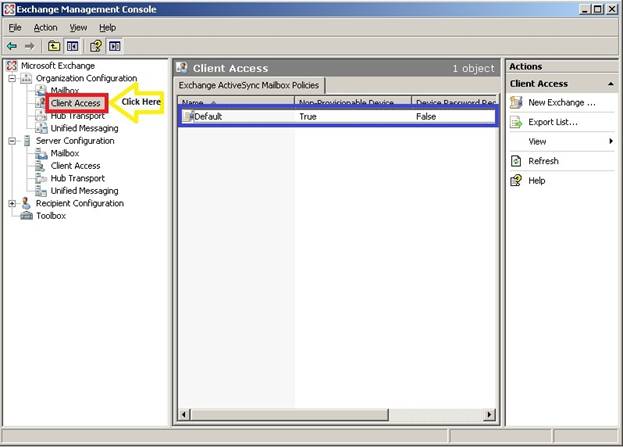
Under Organization Configuration, click on Client Access to verify that a default policy exists in the right pane under the “Exchange Active Sync Mailbox Policies” tab.
Under “Server Configuration”, click “Client Access” and then you will notice a number of options in the right pane.
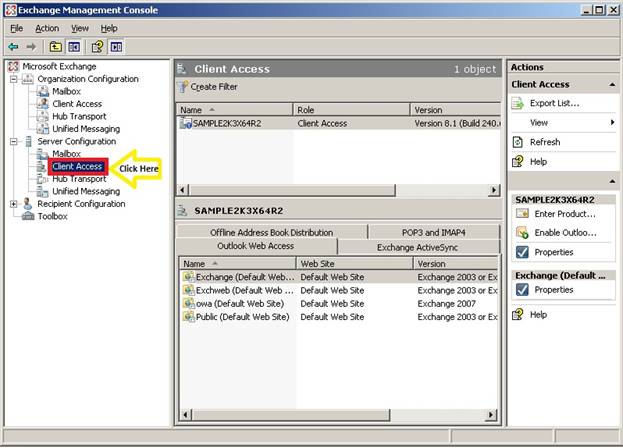
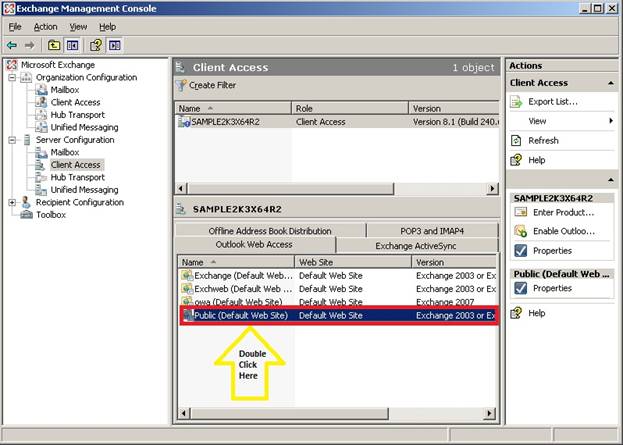
Click on the “Outlook Web Access” tab in the right pane to configure the different features of the CAS servers.
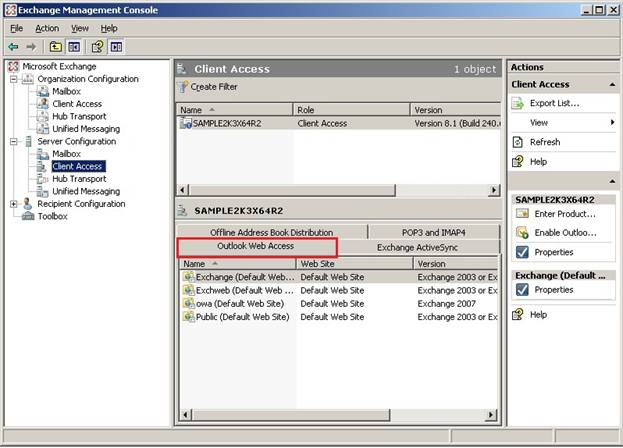
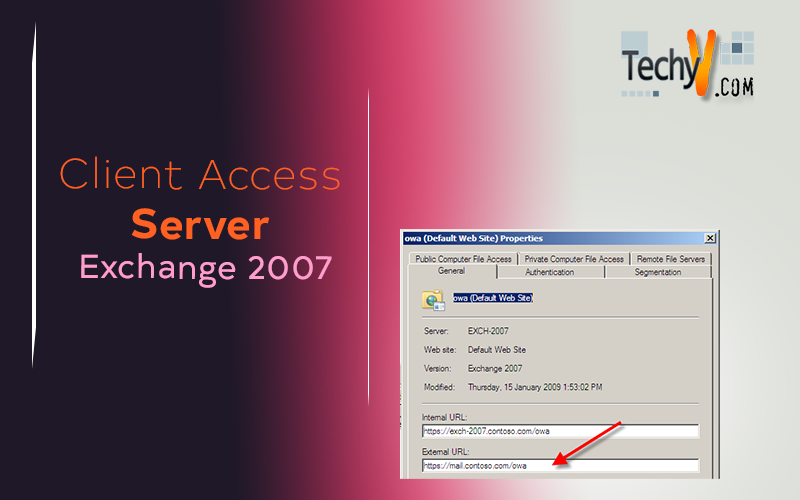
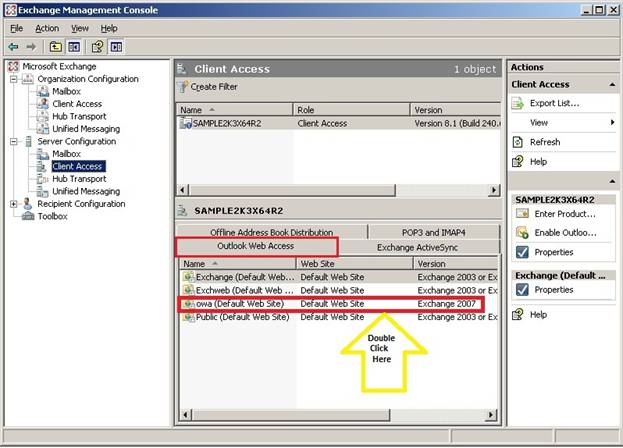
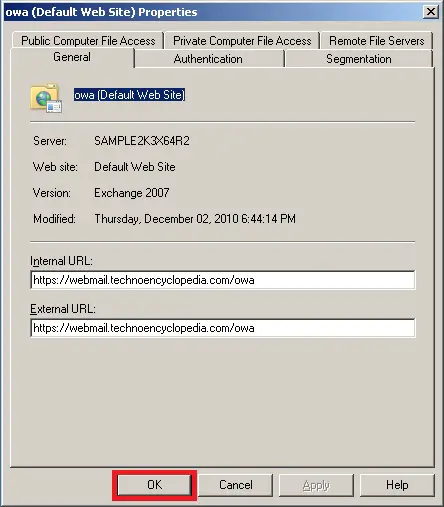
In order to do the configuration, double click on “owa (Default Web Site)”.
A new window screen will pop up.
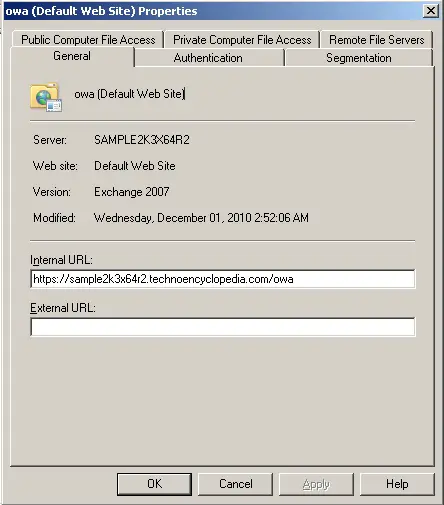
Go to the General tab and edit the blue highlighted fields depending on the requirements for setting up an appropriate URL.
Then click “Apply”
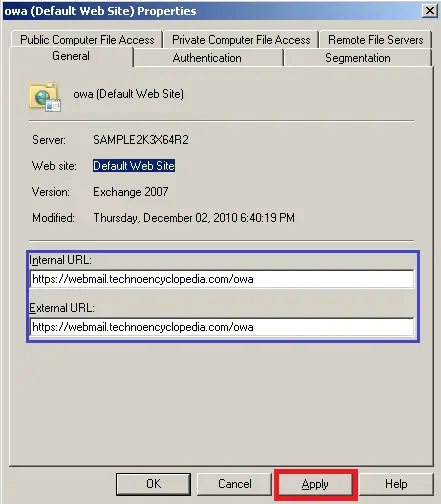
Click “Ok” to accomplish owa configuration and move on.
Create a host record in DNS server to redirect Outlook Website to the URL given above.
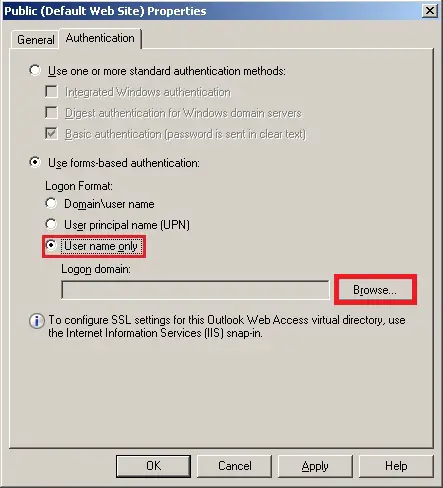
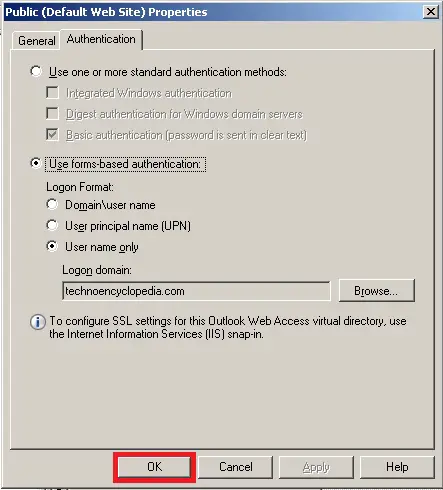
In the Outlook Web Access, double click on “Public (Default Web Site)”
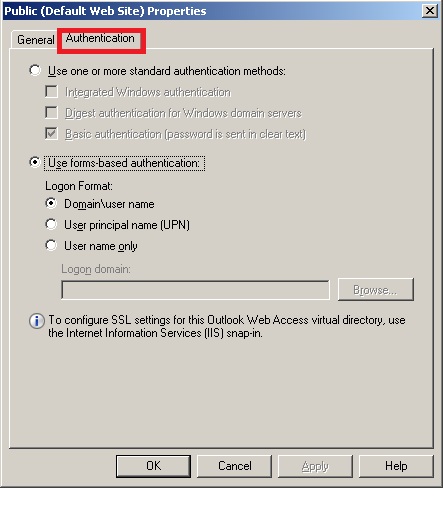
A new window shall pop-up. In the new screen, click “Authentication” Tab
In the authentication tab, click “User name only” radio button
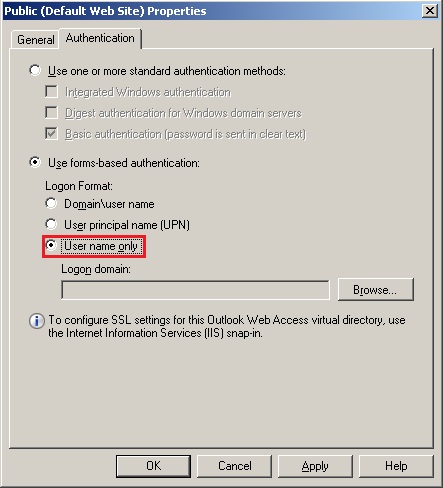
Now click “Browse” to open up a list of available domains.
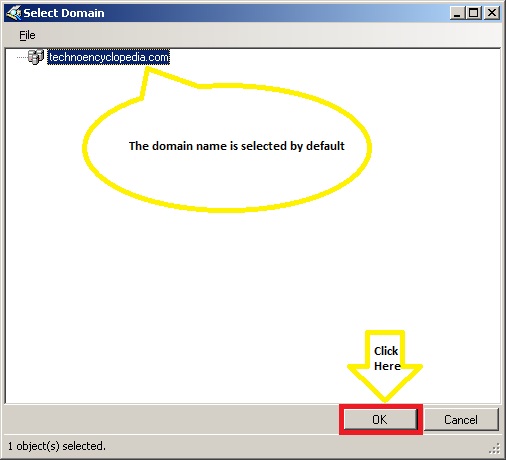
You will notice that your only available domain is already selected. If you have multiple domains selected together, you can choose one of them depending on the requirements.
Then, click “Ok”.
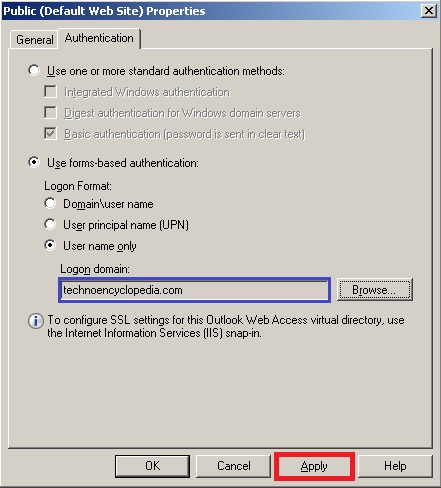
Now that the domain is selected, click “Apply”.
Once you click apply a warning will popup instructing to restart the IIS service on your server.
Click “Ok” to continue
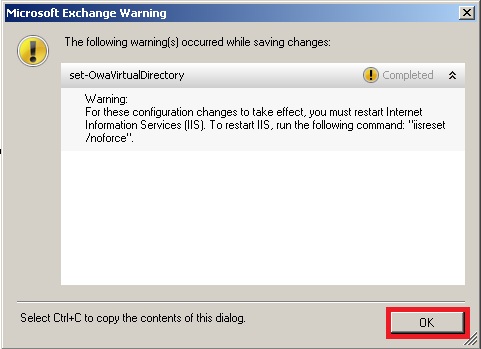
Click “Ok” to close configuration window.
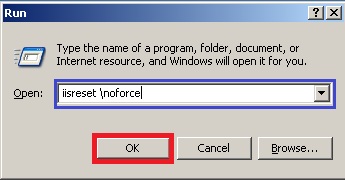
Go to your server’s task bar and click “Start ” > “Run”
In the “Run”, type this command iisreset noforce and press “Ok”.
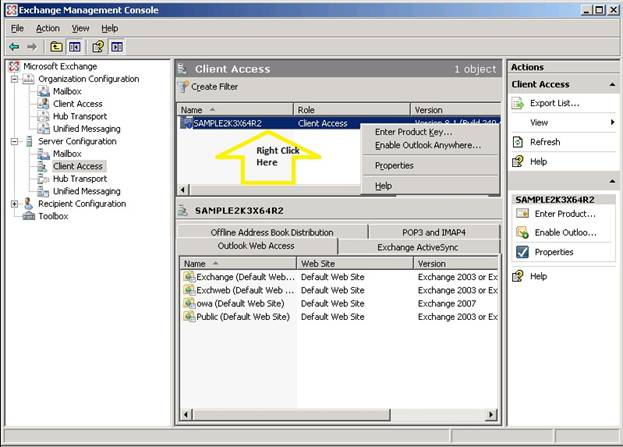
In the Exchange Management Console, go to Server Configuration > Client Access and right click on the computer name.
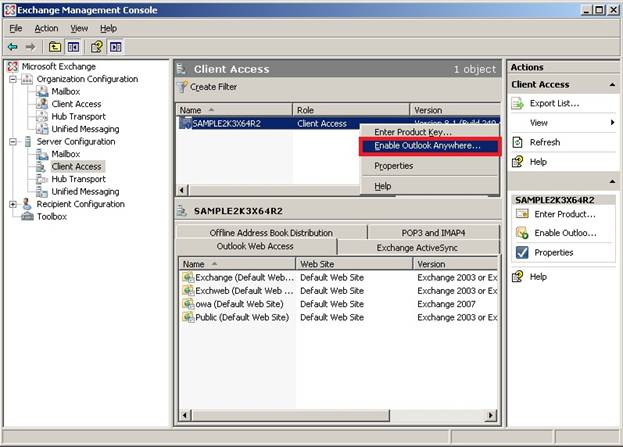
Click on Enable Outlook Anywhere
A new window will open for Enabling of Outlook Anywhere
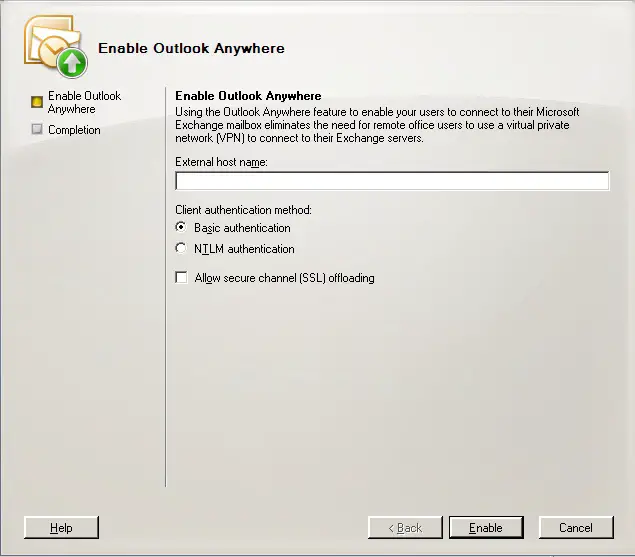
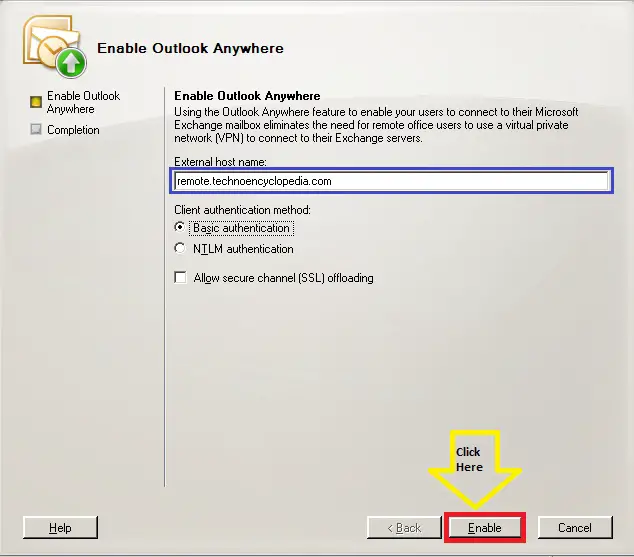
Give a suitable name for External Host Name. Keep authentication mechanism for your requirement and then click “Enable”
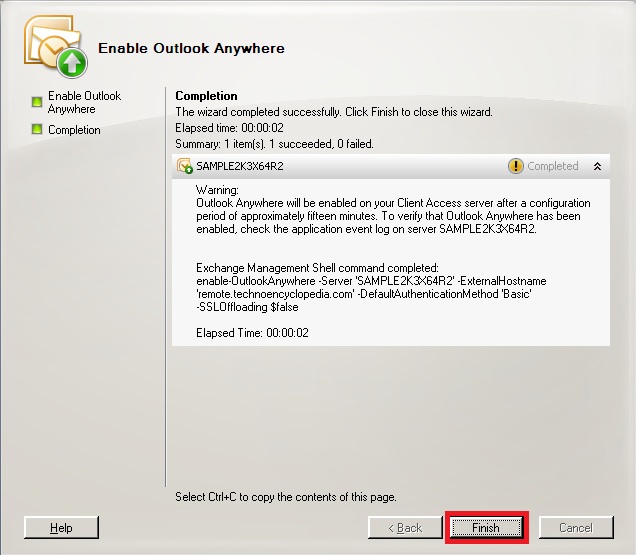
A completion message with some warning information will appear.
Click “Finish”
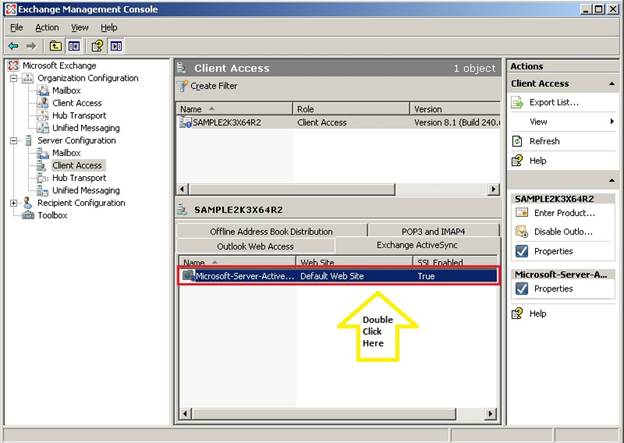
In the Exchange Management Console, go to
Server Configuration > Client Access >Exchange Active Sync
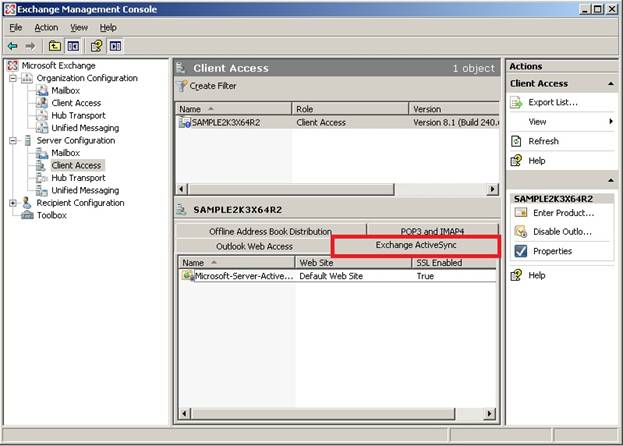
Double click on Microsoft-Server-Active Sync
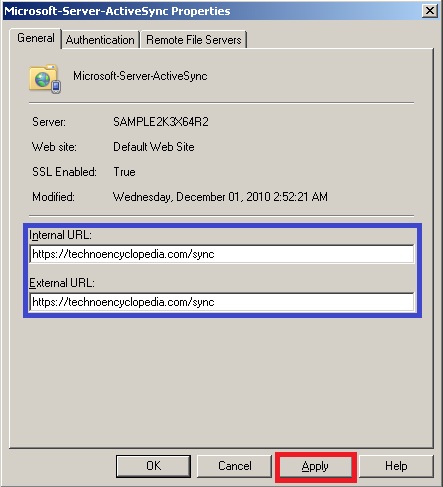
On the configuration window, type suitable value for External and Internal URLs and click “Apply”
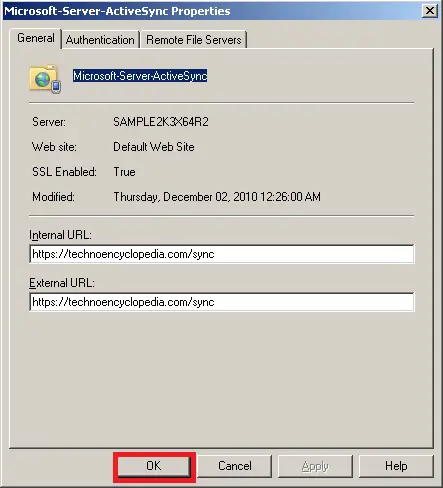
Click “Ok”
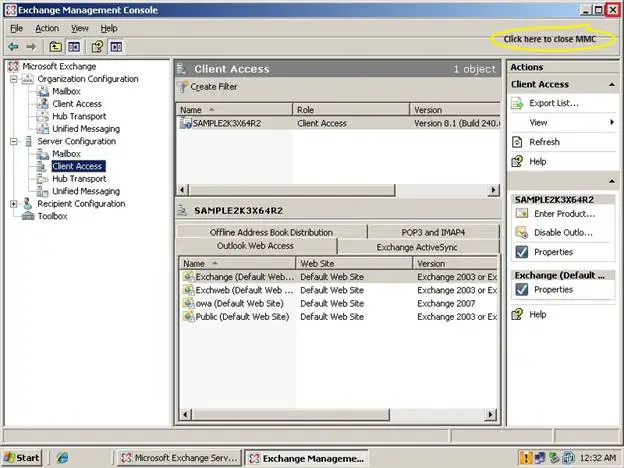
After doing these configurations, close Exchange Management Console
A warning message will appear. Click “Ok” once you have read and understood the message

Terminate installation setup window for Exchange 2007 by clicking on “Close”
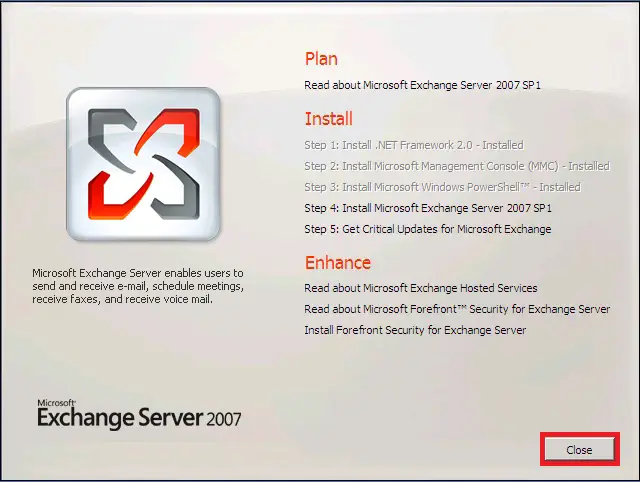
When you click “Close” another warning message will appear. You must click “Yes” to exit installation process
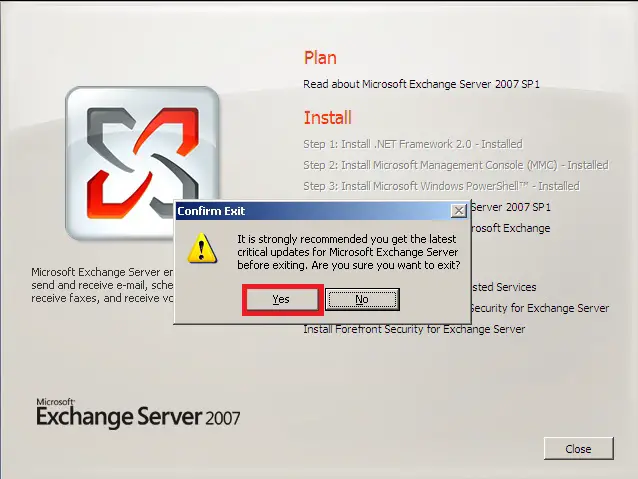
It is recommended to restart the server once again and set up automatic updates depending on your organization’s requirements.
Verification of CAS Server Accessibility
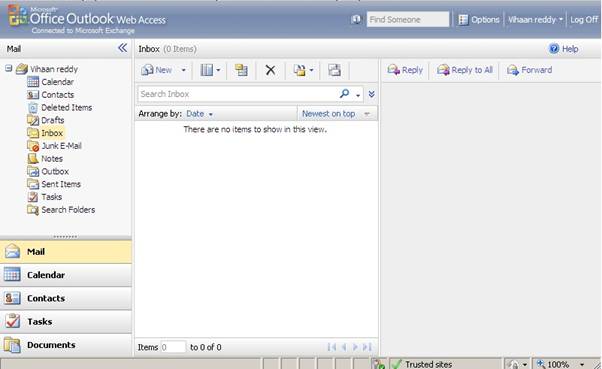
In order to verify that CAS server is running fine, go to web browser and type the URL used in Outlook Web Access configuration. (Fig. 44)
It must redirect to OWA’s default login page.
Once the login page appears, provide your credentials to log in.
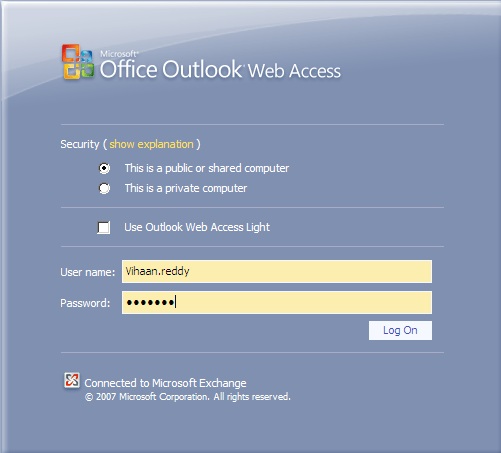
For first time users, OWA will ask for your preferred language and time zone.
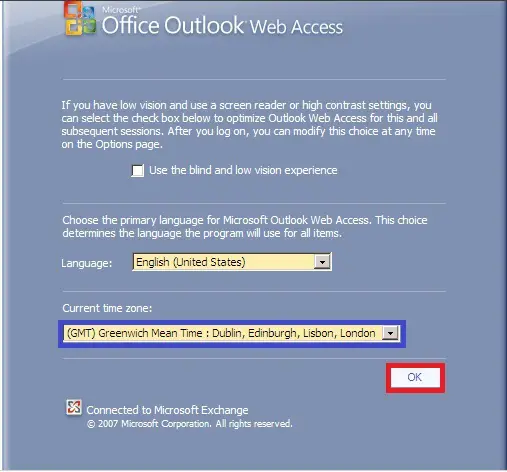
By clicking “OK” your mail box and other related features will open
Conclusion:
Availability of OWA page ensures that Client Access Server has been installed and configured, Users having exchange mailbox account can now access through Outlook Web Access, Outlook Anywhere and other clients.


