Configuring Thunderbird for Gmail IMAP/POP
These days many people are having Gmail accounts. They usually access their account by logging on to the Gmail account through a browser. But most of the people are not aware of accessing their Gmail account through a stand alone email client like Thunderbird. The advantages of using Thunderbird are as follows,
- You can draft the message even when you are offline.
- You can configure Thunderbird to use multiple Gmail accounts
- Internet Message Access Protocol (IMAP) allows you to download only the message headers. If you wish you may download the message after reading the header.
- Using Post Office Protocol (POP), Thunderbird can download the emails to your computer. So email is available even if you are offline.
In this article we will configure Thunderbird Email client for Gmail connectivity using IMAP and POP protocols.
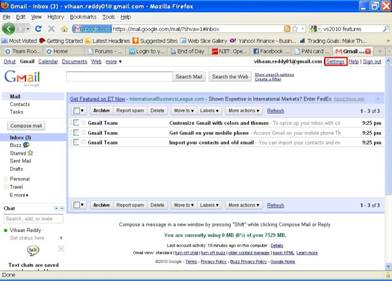
Before we configure Thunderbird, we have to enable setting for IMAP and POP in our Gmail account. To do this, we click on Settings after logging into the Gmail account through the browser as shown below.
Now a settings page will open as shown in the next screen shot.
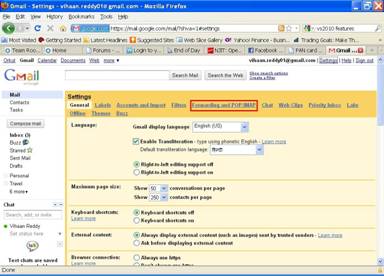
Now on this page click on Forwarding and POP/IMAP
A new page will open as shown in the screen shot below,
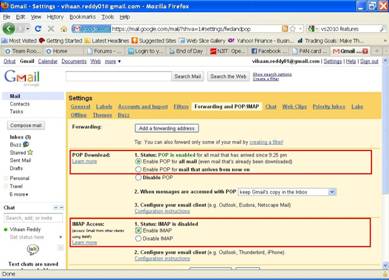
On this page you can enable the POP download and IMAP access as shown in the screen shot above. You may select either POP or IMAP or both the options on this page.
As the POP Download and IMAP Access settings have been enabled for our Gmail account, we will now proceed to configure the Thunderbird email client for Gmail connectivity.
- Open Thunderbird by double clicking on its icon on the Desktop.
- Now click on Tools -> Account Settings as shown below
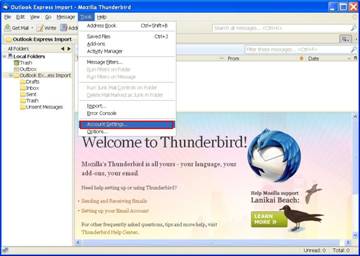
- Now a new Account Settings window will open as shown below
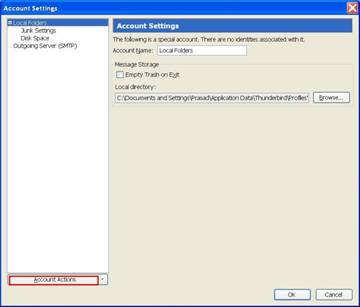
In this window, click on the Account Actions as shown above. Now Accounts Actions will expand as shown below. Here click on Add Mail ACCOUNT.
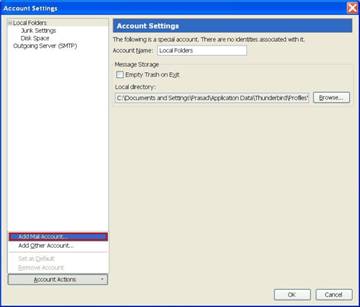
- This will open up new Mail Account Setup window as shown in the following screen shot
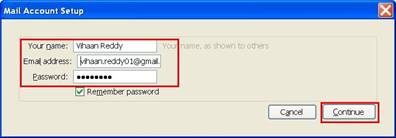
In this window enter your name, email address and password as shown and then click on continue.
- In the next window that pops up you will be able select the IMAP or POP options as shown below.
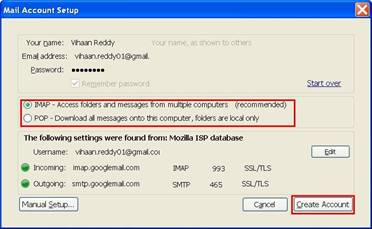
When we select IMAP option, we just have to click on the Create Account button to create an automatically configured IMAP account. However when we select POP option in the window, we have click on Edit button as shown in the following screen shot,
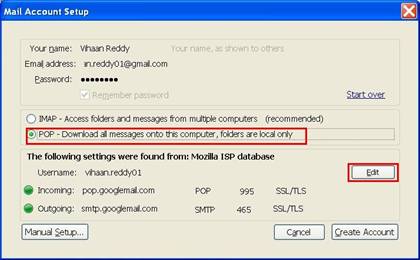
Now a new window will open as shown below.
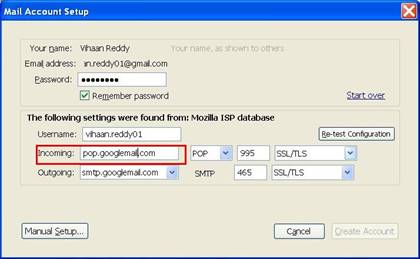
In this window we have to change Incoming to pop.gmail.com from pop.googlemail.com. After making this change Mail Account Setup box will look like the following box,
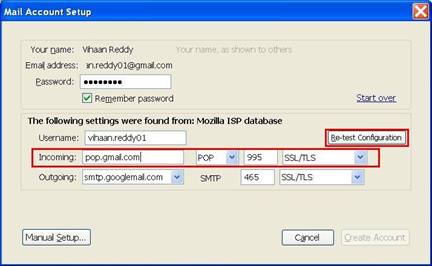
After making the change in Incoming Text Box, we have to click on Re-test Configuration. Now the Thunderbird will display the window like the following window,
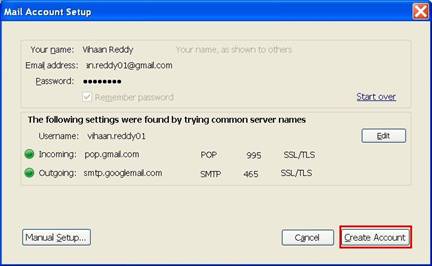
After checking the configuration for POP, we just have to click on Create Account button, to finish the POP configuration.
- After the new account is created (IMAP or POP), Thunderbird will open a box as shown below.
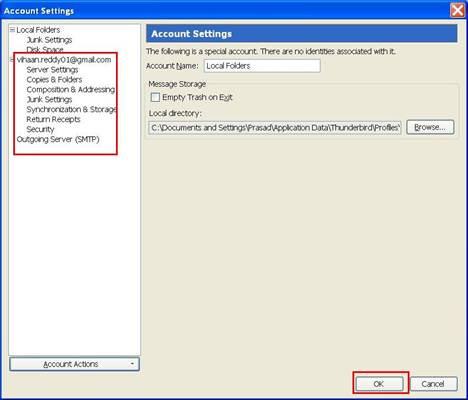
In the box shown above if you want you may check/modify the configuration selecting appropriate item under the newly created account. However as account is already pre-configured in our example case, we just have to click on OK button to exit this box.
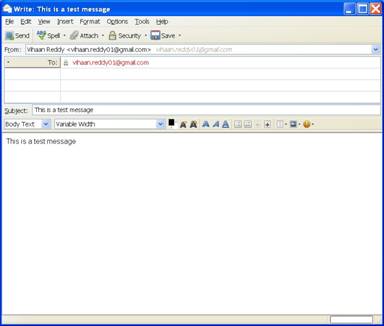
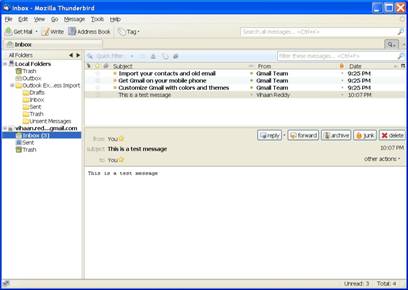
In the following screen shots we can see the functioning of Thunderbird with newly created (POP/IMAP) Gmail account.
Example 1: Sending the Email from Thunderbird
Example 2: Using newly created Inbox
To download, install and configure Mozilla Thunderbird, please watch this video for a tutorial:


