A Linux distribution is a collection of open source (usually) software which sits on top of a Linux kernel. A distribution or distro can bundle system management tools, server software, documentation and many other desktop applications in a central secure software repository and aims to provide a common feel, look, secure and easy software management.
Red Hat Linux is a distribution of Linux, developed by Red Hat, a billion dollar commercial Linux Company, which is known for their excellent support to the users. The company has hundreds of Linux specialists who put excellent support in developing Linux. If you are a manager and you want a good support contract Red Hat Enterprise Linux is best Linux distribution for you.
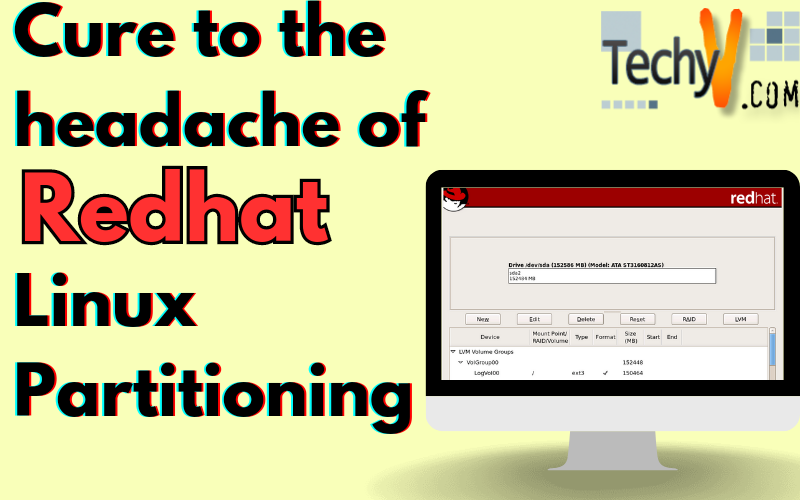
Now let’s come to the hard disk partitioning issue of Red Hat Linux.
For x86, AMD64, and Intel 64 systems, there are five main partitions that must have to be done in Linux:
- A swap partition –to support virtual memory
- A /boot partition- to contain operating system kernel
- A / partition – to contain root directory of the system
- A home partition – To store user data separately from system data.
- A /boot/EFI partition (EFI System Partition) – To enable us to upgrade or reinstall Red Hat Enterprise Linux without erasing user data files.
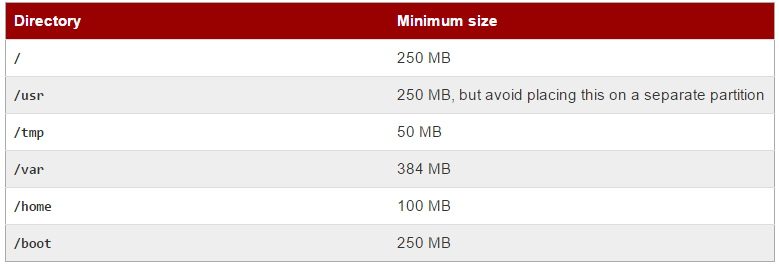
Minimum Partition Size:
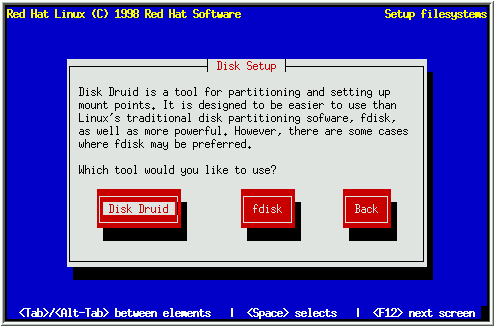
There are two kinds of hard disk partitioning schemes or tools that will be presented as a dialog box that allows to select one of them (as shown in figure): Disk Druid and fdisk.
Disk Druid is install-time disk management utility of Linux. It works in accordance to user-supplied requirements i.e. creates/deletes partition on user’s demand. On the other hand fdisk is the traditional Linux disk partitioning tool and more flexible than Disk Druid but it has a downside. If you are experienced with disk partitioning than only it will be helpful for you. We are going to learn partition using Disk Druid.
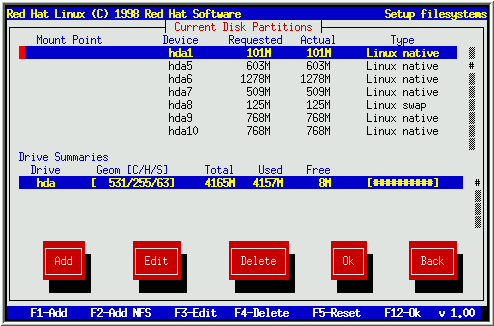
The figure (given below) is main screen of Disk Druid. You can see add, edit, delete options which are available to add a new partition, edit an already created partition or delete an already created partition.
Creating a new partition
Press Add button then press [Space] or [Enter]
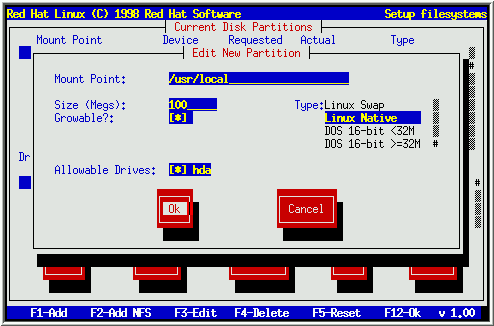
Dialog box “Edit new Partition” will appear with following fields:
Mount point- To enter the partition’s mount point. For example, for root partition, enter /; for user partition /usr etc
Size – this field will contain size of partition (in megabyte)
Growable – this field will contain a check box that indicates whether the size entered in the previous field is to be considered the partition’s exact size, or its minimum size so that it can expand or shrink with other partitions. . When this field will be checked using [space], the partition will grow to fill all available space on the hard disk.
Type – this field contains different partition types. You can choose appropriate partition using up and down arrow keys.
Allowed drives – This field contains a list of all hard disks currently installed on your system, with a check box for each. If check box of a particular hard disk is checked then only a partition may be created on that hard disk.
Ok – when you are satisfied with the partition’s settings and wish to create it select [Ok] button and press [space].
Cancel – to cancel a partition, select this button and press [space]
Deleting an already created partition
To delete a partition, highlight the partition in the “Current Disk Partitions” section, select Delete button, and press [space], then a dialog box will appear for confirmation of your choice. Select ok.
Editing a Partition
If you want to change a partition’s settings, go to “Current Disk Partitions” section, select the Edit button, and press [space]. Then make desired changes. Select Ok to confirm your changes.
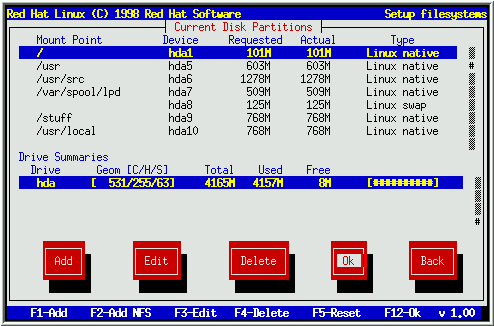
All done?
Select OK, and press [Space].
Good luck!


