Disk Management
One of the features of Window 7 is Resize the Partitions. Now you can extend and shrink the Window 7 partitions by using the Disk Management. With the Disk Management you can create the volumes, format the volumes and file systems like FAT, FAT32 or NTFS etc with out interruption by rebooting the system.
As we know that now hard disks are available in terabytes range and large space is available to perform different tasks. Disk Management allows you to divide the disk into multiple partitions and store large amount of data at different locations. Now you can save your data separate from window installation drive and store them in a logical way. One of the main benefits of this separate data storage in logical drives by disk management doubles the backup if you reinstalled your window. Disk Management window has four parts .Two main parts are upper pane and lower pane.
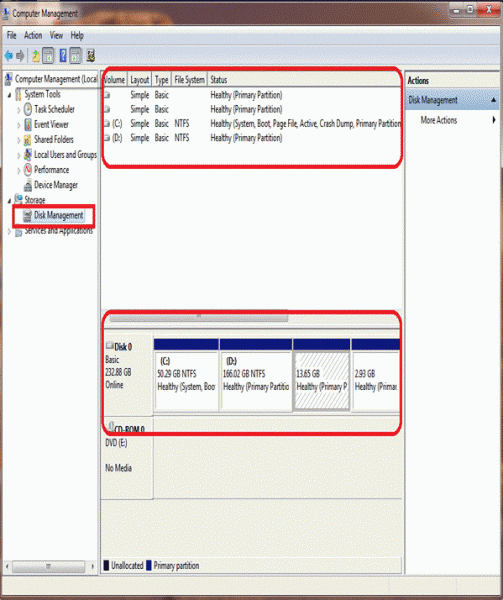
Upper pane contains description of disk drives, type of file system, and amount of the space used and free and about the status of the system.
Lowe pane contains the information about all the physical disks and drives including floppy disks that are installed on the computer.
Before using the disk Management it is also important to keep a backup of files so no problem is occur with these files.
As by using Disk Management you can create a partition, delete the partition, extend the disk and even reduce the disk. This all functions or utilities are avail in one tool that is Disk Management.
In order to create the disk partition following steps is required
Step 1 :
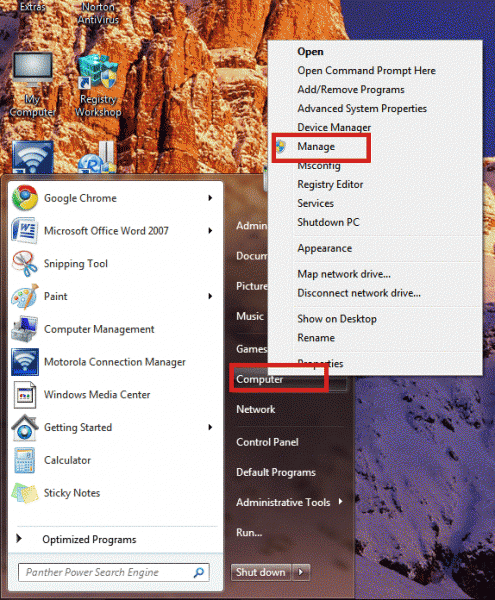
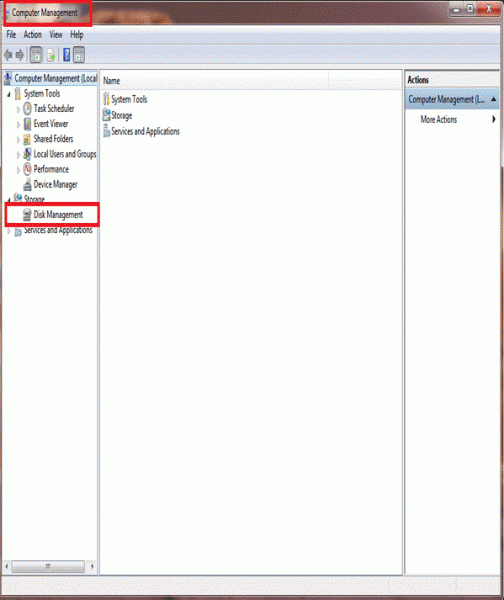
In order to create the disk partition, you must go to”Computer Management “console by Right Click on the Computer Icon and click on Manage.
Step 2 :
Following window will appears, This is Computer Management console there is an option of Services on the console Tree. Click on Services Icon and then click on Disk Management option.
Step 3 :
Following window will show all the Drives in the computer, their allocated spaces and their sizes.
Step 4 :
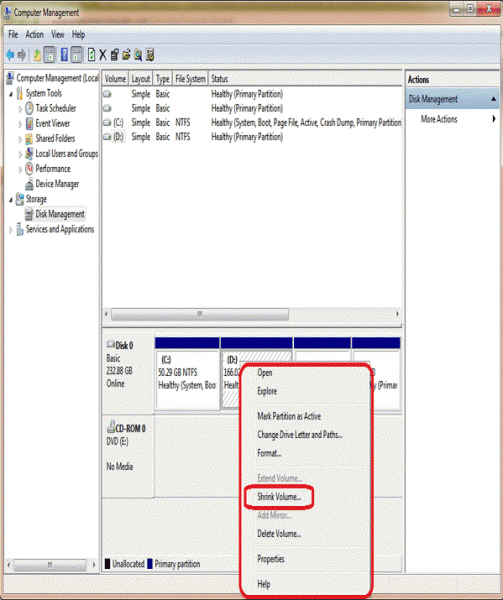
Right Click the Disk that you want to shrink, an Option menu will open. Select the option “Shrink Volume”
Step 5 :
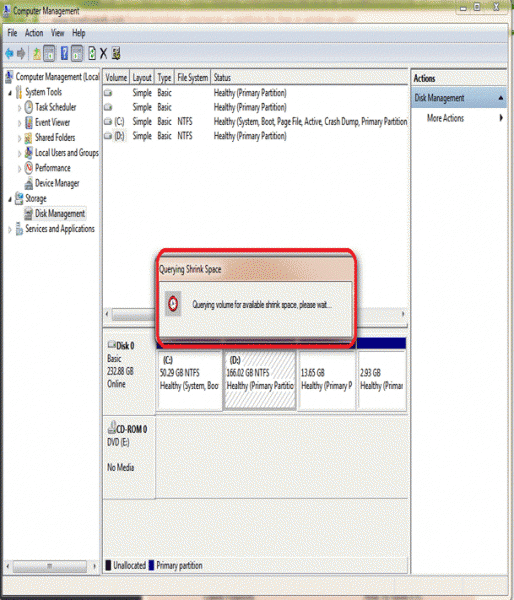
A dialog box showing the “Querying Volume for available spec…Please Wait” will appear.
Wait for few minutes.
Step 6 :
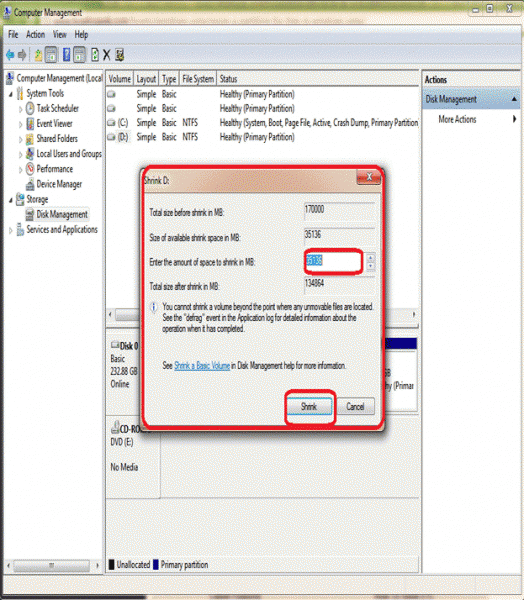
After fifth step, A Window Box showing the option for amount of space that you wants to shrink. Enter the space requirement in shrink dialog i.e. 35136.Click on button Shrink.
Step 7 :
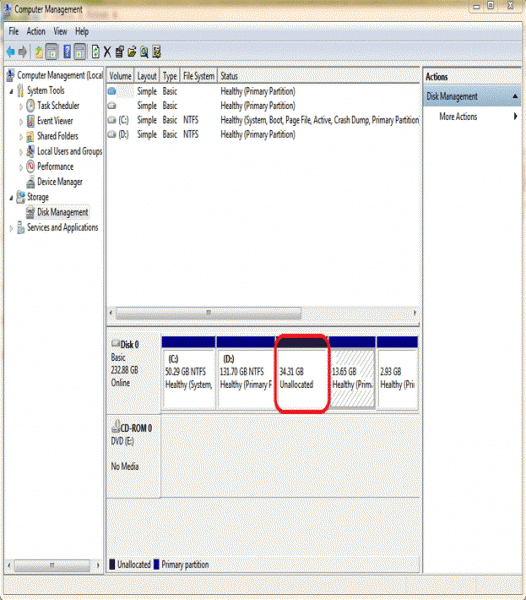
Following window will appear and Showing the Unallocated Space in the disk.
If you want to extend any Volume in Window 7 then following steps are required
Step 1 :
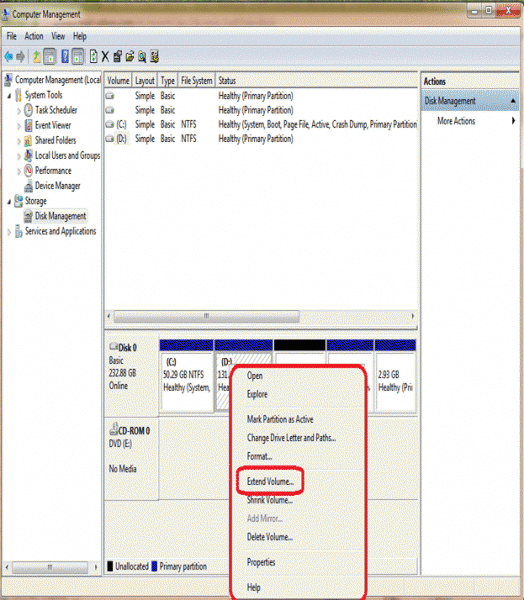
Right Click on the Drive and select the option “Extend Volume” in option menu.
Step 2 :
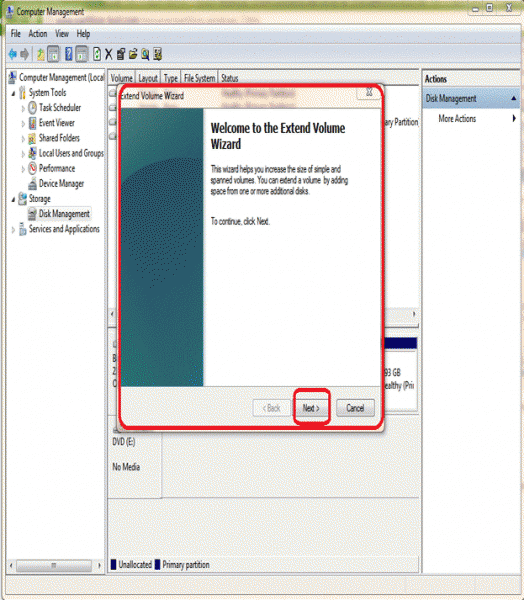
The wizard will open first window box, Click on Next button.
Step 3 :
Next step is to specify the amount of space by which you want to extend the volume of the drive. Click on Next after entering the space.
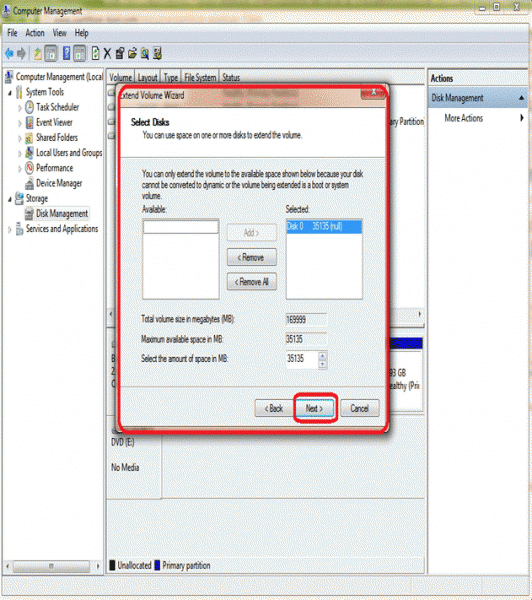
Step 4 :
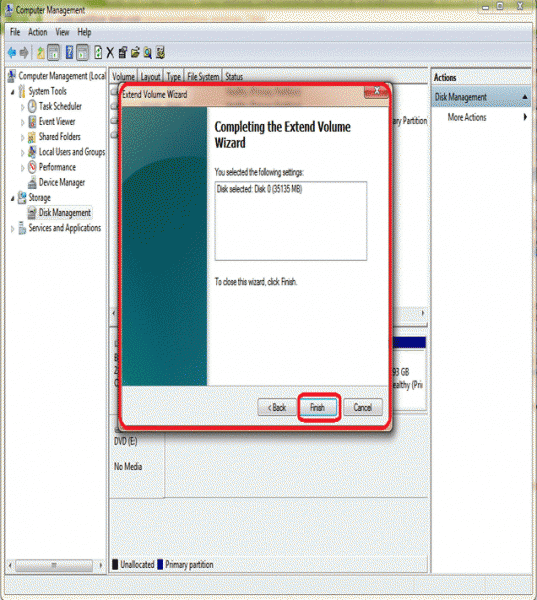
Final summary of Disk Selected and Space will appear in the last window box of the wizard. Click on Finish button.
