Disk Management in Windows 7
Microsoft has brought Windows 7 is the latest operating systems for home and professional use and it comes with new and advanced features. Some of the main features that Windows 7 has facilitated its users are the mixed environment of Server and Client where the advanced users can apply permission settings to folders and basic users can enjoy the user friendly GUI and multimedia options.
Disk Management utility has been one of many important features offered by Microsoft in its operating systems. Microsoft Windows 7 Disk Management has an improved GUI with more advanced features some of them are explained below.
How to access Disk Management tool in Windows 7
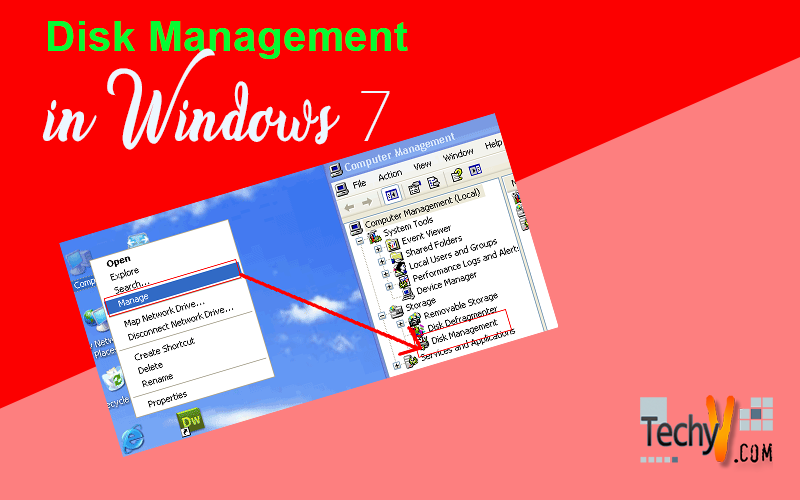
Disk management tool is one of the tools in Computer Management application of Microsoft Windows 7. The procedure to access this tool is explained in very simple steps below.
Step 1
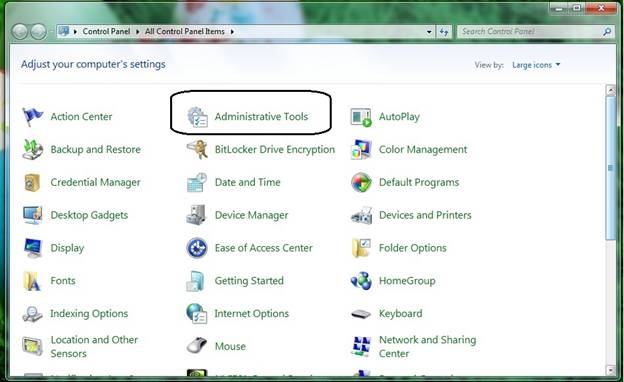
Go to “Control Panel” and open Administrative Tools as depicted in the screenshot below.
Step 2
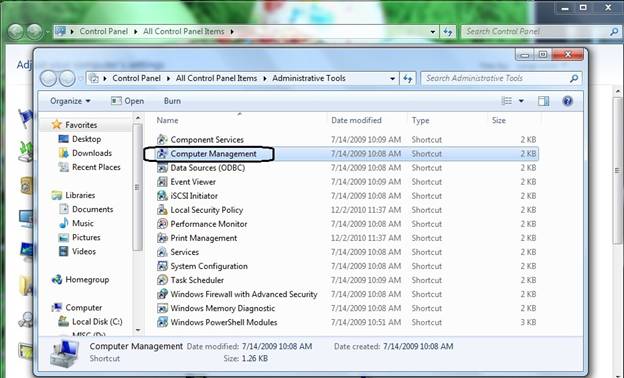
Open Computer Management in Administrative Tools as highlighted in the graphic below.
Step 3
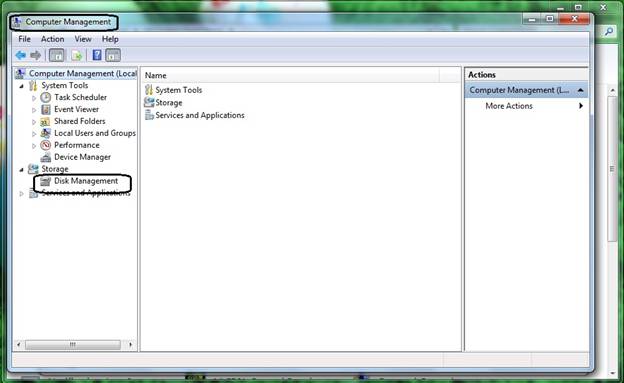
Disk Management is available in Computer Management in the left panel under storage category.
Change the Drive Letters and Paths
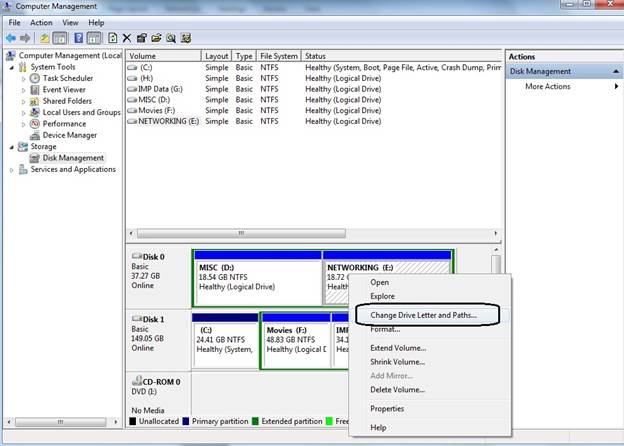
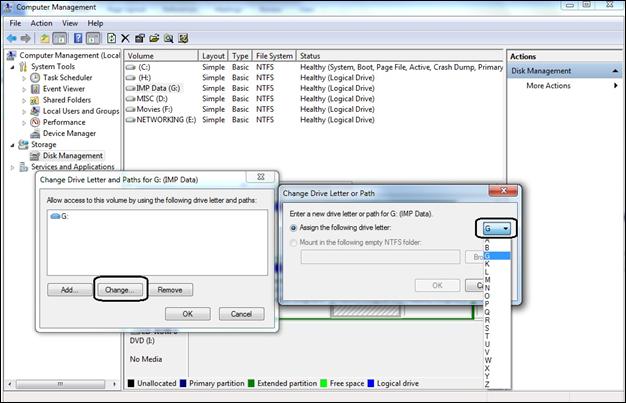
The first task is the ability to change drive letters and paths of the volume. It is to note that the volume means a drive or a partition of a hard drive. Just right click the desired drive then select the option as highlighted in the graphic below. Another dialog box will appear on the screen where users can press the “Change Drive Letter and Paths” button and choose the letter.
Step 1
Step 2
Formatting
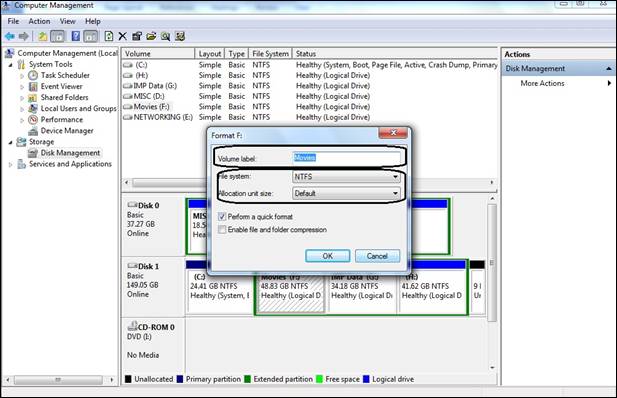
Disk Management also allows formatting the drives easily. After clicking the right mouse button on the drive, format option will appear as shown in the given illustration. Label the drive and select the file system from NTFS or FAT32 as per requirement.
Extend Volumes
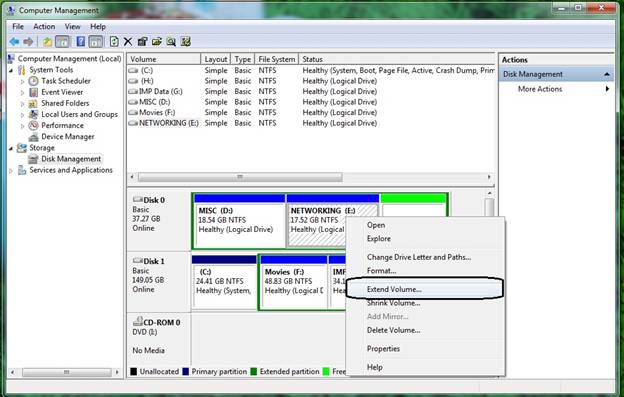
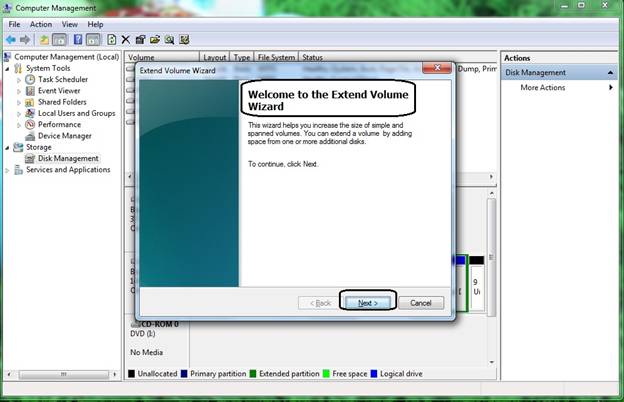
Extending is the next option available in disk management tools. It allows users to add more space to a volume from an unallocated or free space in a drive. Procedure is illustrated in the self-defining screenshots below.
Step 1
Step 2
Step 3
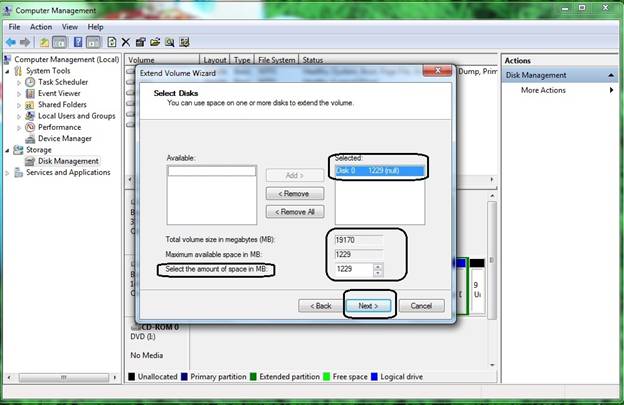
Step 4
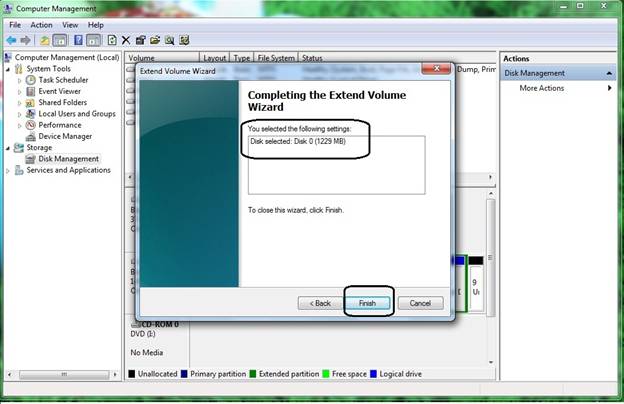
Shrink Volumes
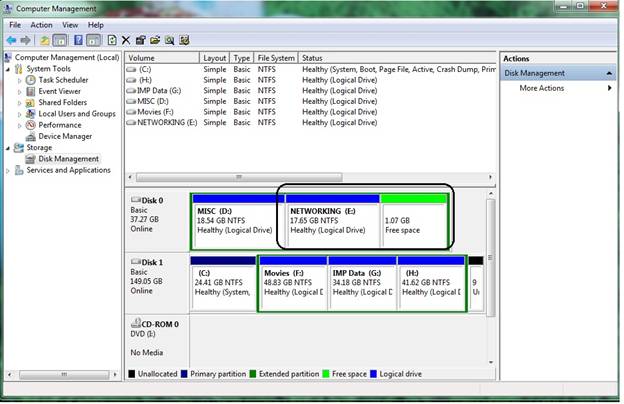
Users may shrink the volumes or partitions where the disk management tool for Windows 7 automatically calculates the free space and comes up with the space that is free in a volume. Users then can select either all of the free space of some of the free space to be taken out and later added to another volume or a new partition can also be created. It is advised to defragment your drive in order to be able to shrink your volumes to the maximum as the tool only takes out the free space from subsequent free sectors of the drive. Shrinking procedure is depicted in the self-explanatory screenshots below.
Step 1
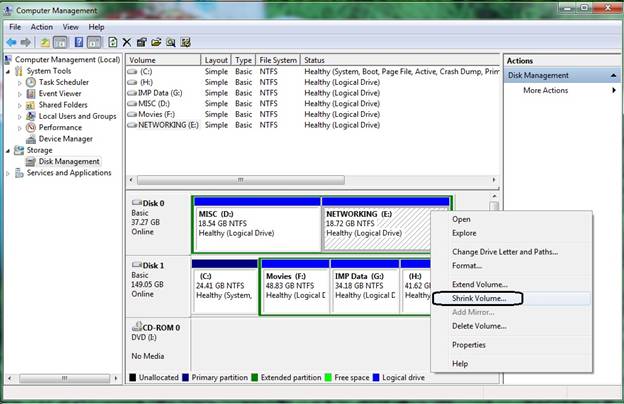
Step 2
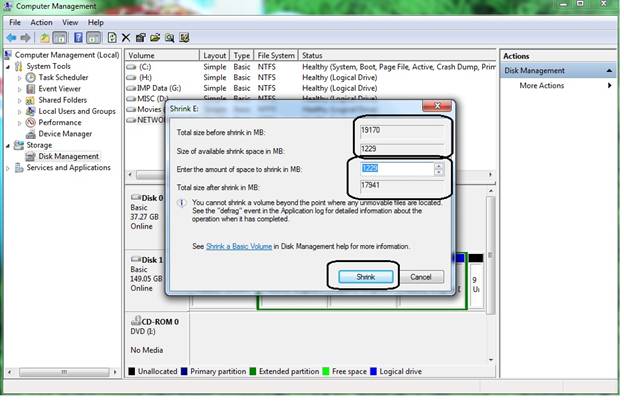
Step 3
Delete Volumes
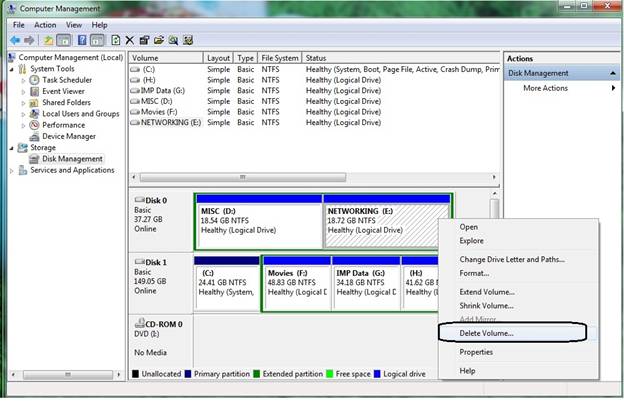
Users may delete a partition or a volume as per their requirements through this option as shown in the figure below.
Properties
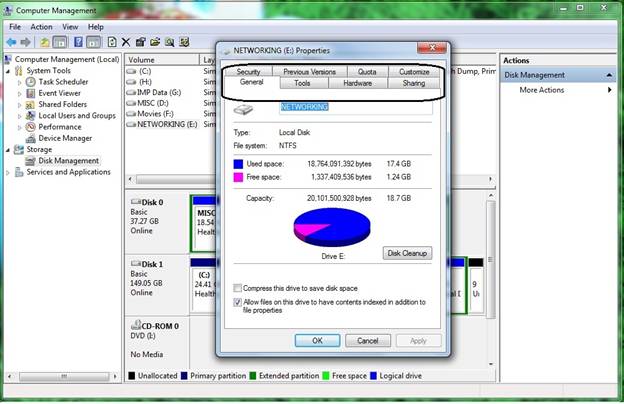
Properties option allows users to check disk space, fragment the disk, apply security options, select quota, check/update drivers, check errors and take back up. The figure below depicts the properties and tabs of these options.
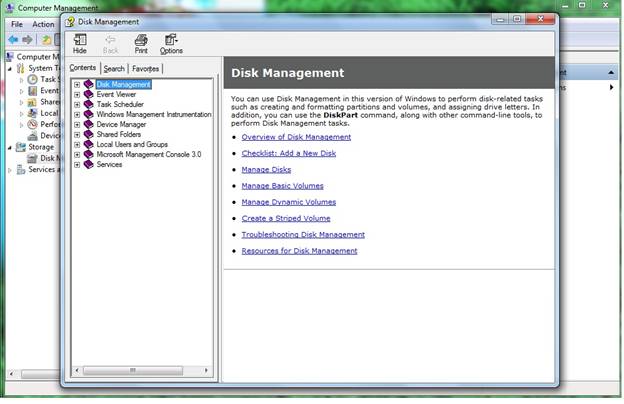
Help
The users are provided with a detailed user guide for each application by Microsoft. “Help” in disk management provides the user with a detailed guide that can be referred to in need of assistance.
