FileZilla Installation
Many times there is a need to transfer files using FTP client. FileZilla is such an FTP client application with which you can upload or download files. The main features of FileZilla FTP client’s area as follows:
- It is a free open source software
- It supports FTP, FTPS and SFTP
- It is cross platform applications. It runs on Windows, Linux, and Mac OS X etc.
- It has got support for IPV6
- FileZilla FTP client has a tabbed user interface. Hence one can open multiple FTP session in multiple tabs.
- You can bookmark the FTP sites
- FileZilla FTP client has a drag and drop support
- Built-in Network Configuration Wizard
- HTTPS/1.1, FTP-Proxy and SOCKS5 support
- FileZilla FTP client provides the utility for remote file editing
As FileZilla FTP client is full of so many features, in this article I’ll show you how to install FileZilla on your computer.
Step 1: Go to the FileZilla website at https://filezilla-project.org/download.php to download FileZilla FTP client.
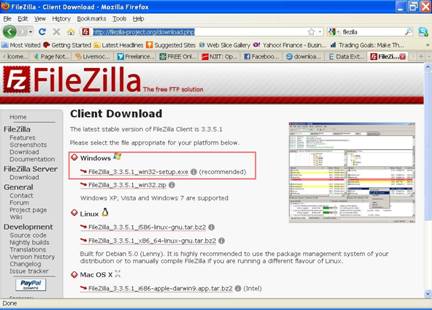
Preferably download.exe version of the FileZilla setup as shown in the above screen shot. You will be redirected source forge website as shown below.
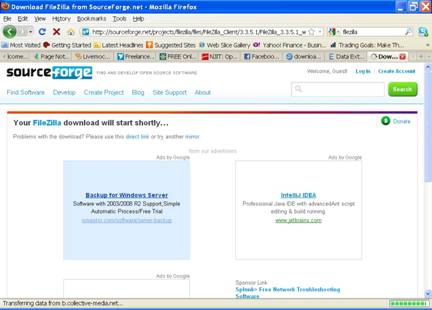
Next the downloading of the FileZilla will begin..
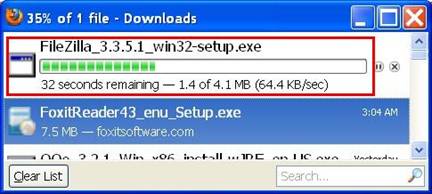
After the download is complete the download box will look like the following screen shot.
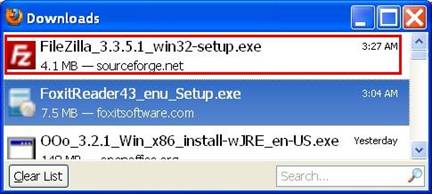
Next double click on the downloaded FileZilla setup.exe file in the Downloads box.
Now the new box will appear on the screen asking you for the confirmation for running the FileZilla setup executable file. Click on the OK button as shown below.

Next another box will appear on the screen asking you to confirm whether you really want to run the FileZilla setup program as shown in the following screen shot. You may safely click on the Run button.
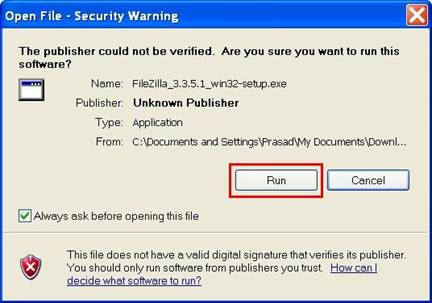
Step 2: Now the actual FileZilla setup program will start running and your screen will look like the following screen shot,
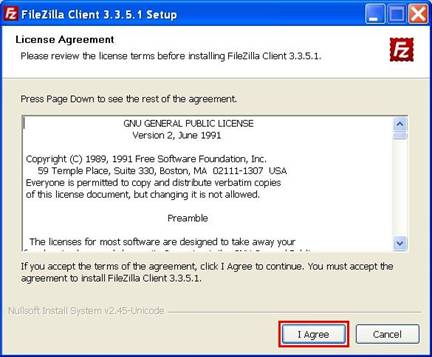
If you agree to the terms mentioned in the License Agreement click on I Agree Button or else click on cancel button. To proceed further I assume that you’ve agreed with the terms mentioned in the License Agreement.
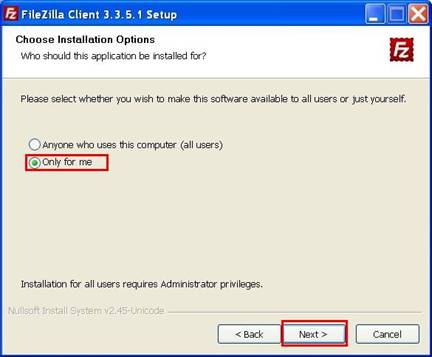
The next box will appear on the screen as shown in the following screen shot asking you to choose the Installation options. If you want to install the programs for all the users you will require Administrative privileges. You may choose only for me option too as shown in the screenshot. After choosing the installation options click on the Next button.
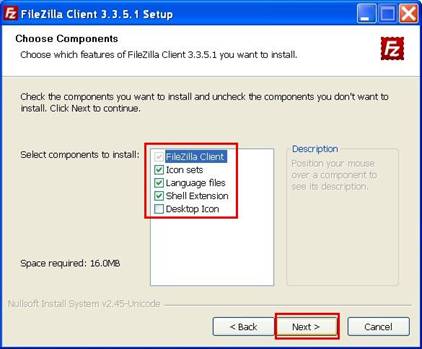
The next screen will appear on the screen asking you to select the FileZilla components you would like to install. If you are not sure which components to choose you may select the default settings and click on the Next button.
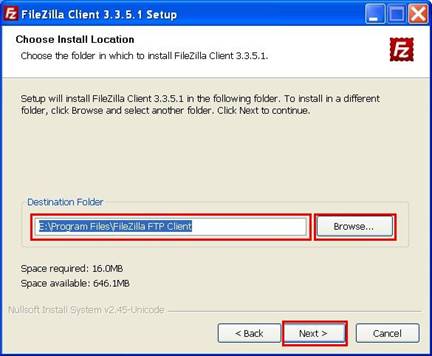
In the next box you will be required to choose the folder for the installation. If you would like to install FileZilla in some other folder other than the default one, you may do it so by clicking on browse button. Once you have chosen the destination folder click on the Next button.
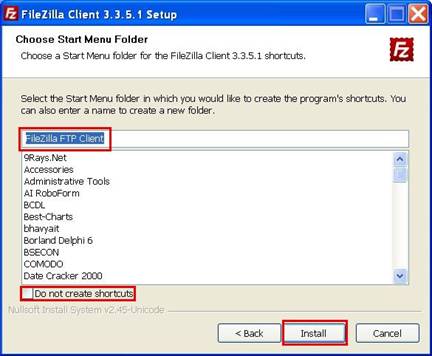
Next you will need to choose the Start Menu Folder or you may choose the default options as shown below. You may if you wish to check the Do not create shortcuts option
Next click on Install button to begin the installation.
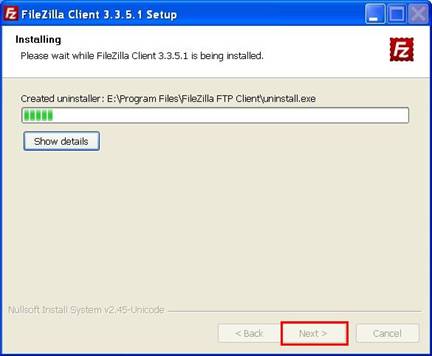
Step 3: This is the final stage of installation. Here you will see the box with a progress bar indicating the actual installation process. After the installation is complete the Next button will be enabled. Click on the Next button when it is enabled as shown in the screen shot below,
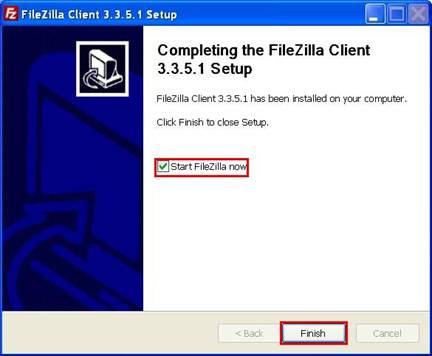
The next box will be indicating that the installation is complete. In this box you may select and check the option Start FileZilla now as shown in the following screen shot. Next click on the Finish button to complete the set up process.
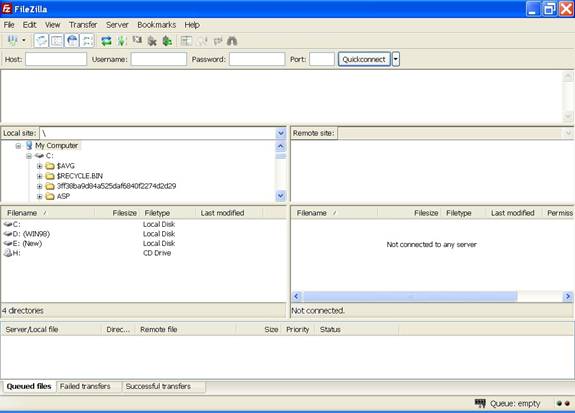
After the FileZilla FTP client is installed, the FileZilla FTP client will start and it will look the following screen shot.
To download and install FileZilla 3.5.1 please watch this video for a tutorial:


