IIS Installation on Windows 2003 Server
Internet Information Services (IIS) is a powerful Web server on Windows Server 2003 that provides reliable, manageable and scalable Web applications.
Let’s check as how to install IIS on Windows Server 2003 system. We can install IIS on a Domain Controller (DC), a member server in an Active Directory (AD), or on a standalone server.
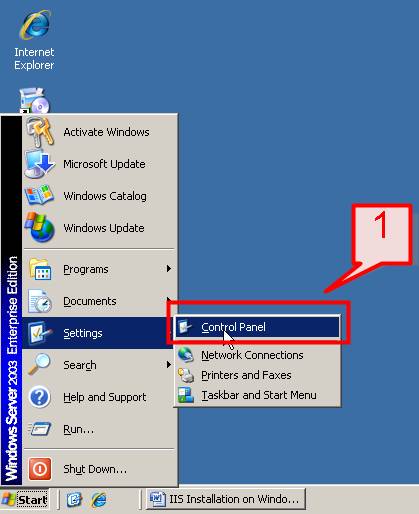
# 1. Click Start-> Choose Settings->Control Panel
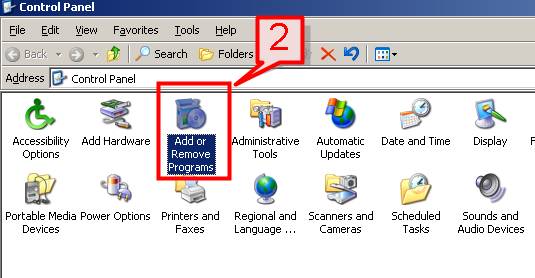
#2. On the next screen Click Add or Remove Program
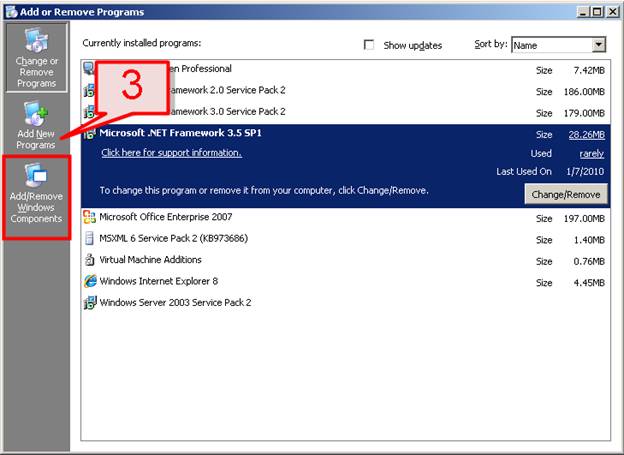
#3. Add or Remove Windows will appear, on the Left pane Click Add/Remove Windows Components
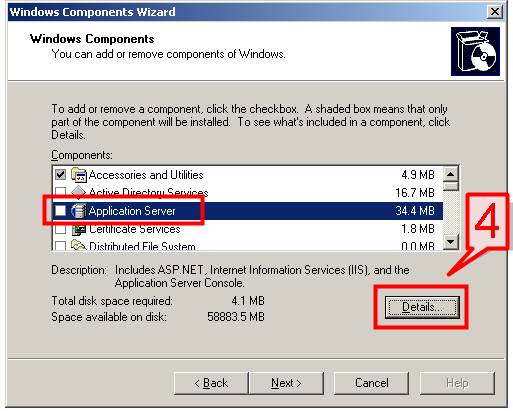
#4. On Windows Components Wizard, Select Application Server and Click Details
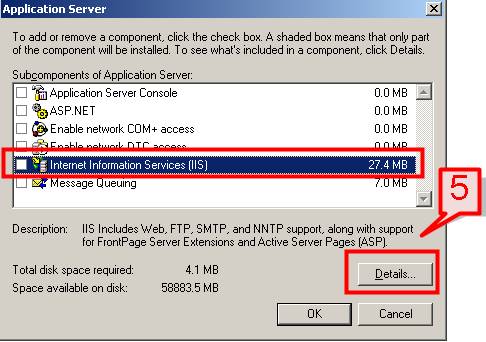
#5. On the Application Server page, Choose Internet Information Services (IIS) and Click on the Details button.
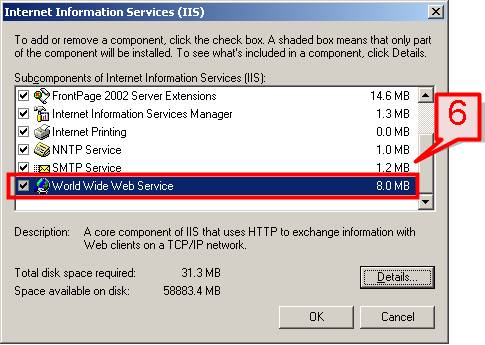
#6. On the Internet Information Services (IIS) dialog box, put a check mark on the lists of components that you want to install to support your Web server. Let’s select World Wide Web Services and other components.
#7. You can also check the lists of components that will be installed on World Wide Web Service by clicking on Details button. Check the components and click OK,
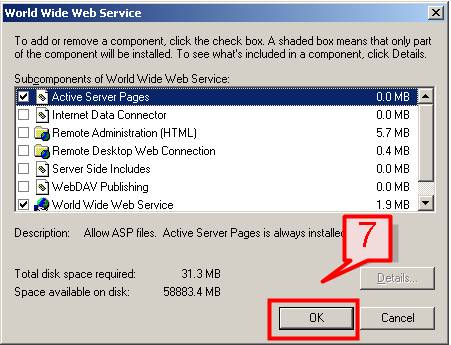
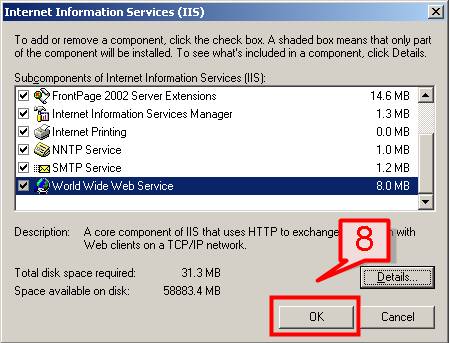
#8. Click OK on the Internet Information Services (IIS) dialog box.
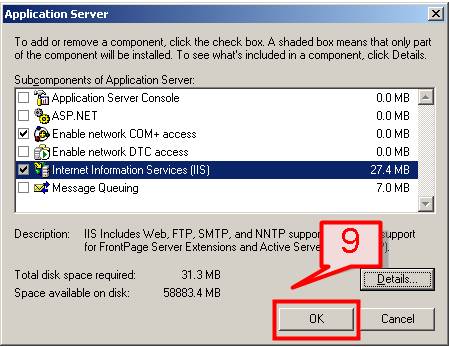
#9. Click OK on the Application Server dialog box.
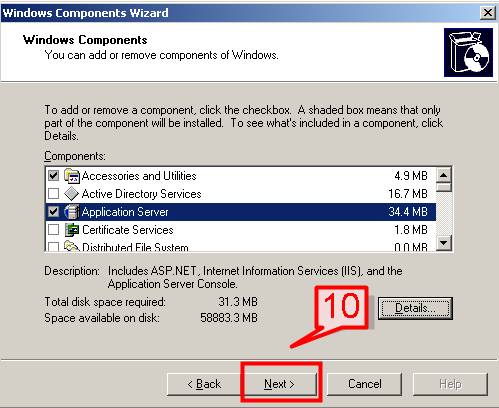
#10. On Windows Component Wizard page, Click Next
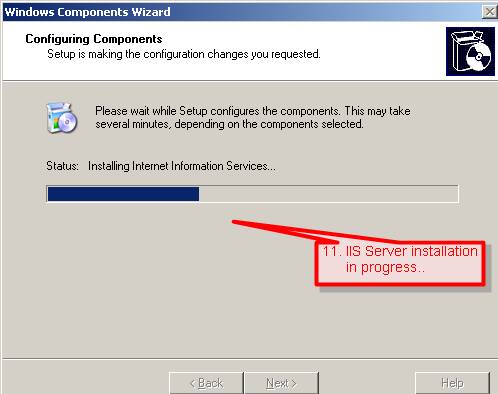
#11. Windows will start installing IIS Server.
#12. Click Finish on Windows Component Wizard dialog box.

This finishes the installation of IIS. Now to check whether IIS installation is successful or not,
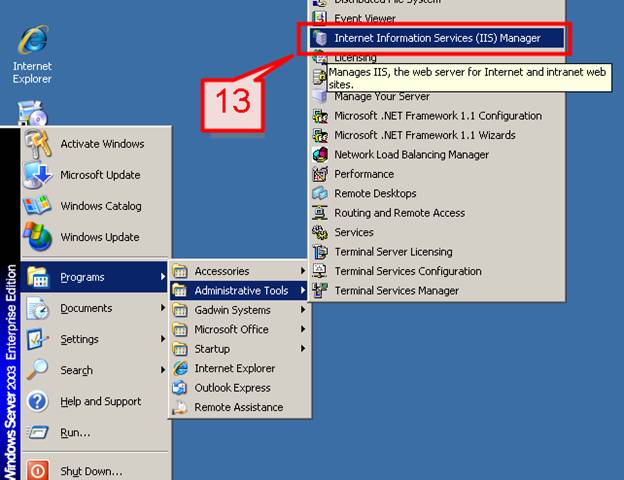
#13. Click on Start->Program->Administrative Tools->Internet Information Services (IIS) Manager link will appear.
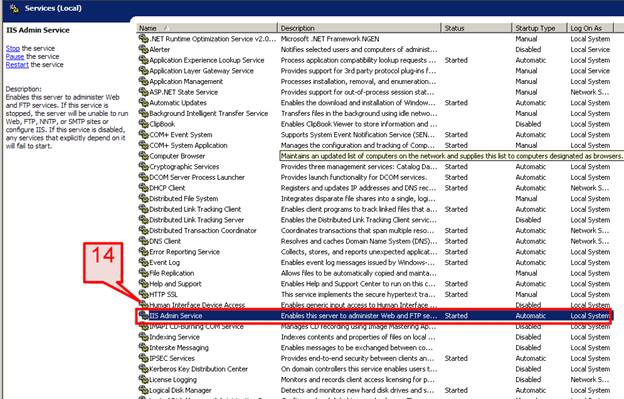
#14. Click Start->Programs->Administrative Tools->Services, IIS Admin Service will be created and started.
Now let’s create a New Web site for IIS testing.
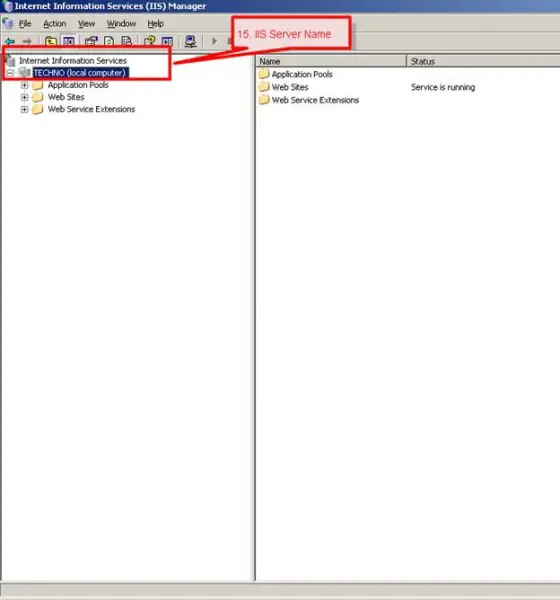
#15. Open IIS Manager from Start->Program->Administrative Tools->Internet Information Services (IIS) Manager link
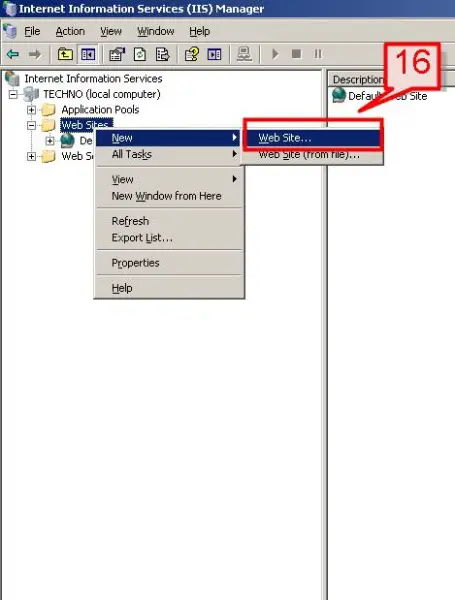
#16. On left pane, Right click on Web Site->check New->Web Site.
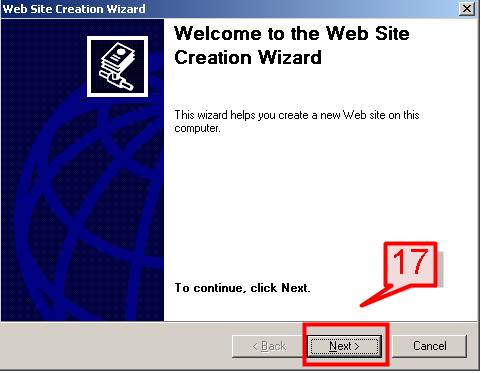
#17. On the Web Site Creation Wizard, click Next
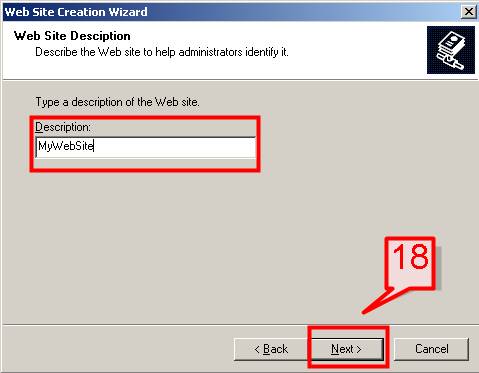
#18. On the Description field give a name to your Web site and click Next,
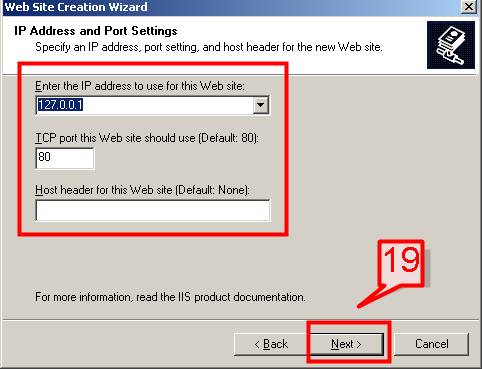
#19. On the next screen, Enter the IP address for your website, TCP port no (default is 80) and Host header name. The default IP address is your local machine IP. If the computer is configured on a Network Setup then it will get an IP from DHCP or a static IP.
Click Next
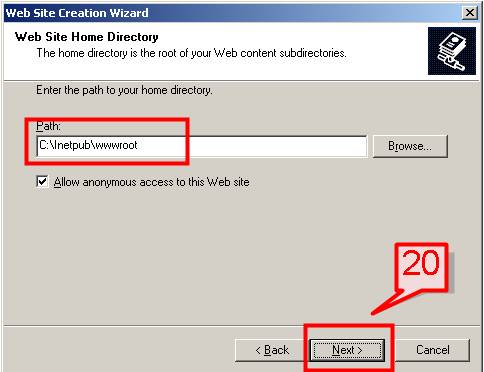
#20. On next screen, provide a path of your home directory where the Website files reside. The default location is C:Inetpubwwwroot location.
Click Next
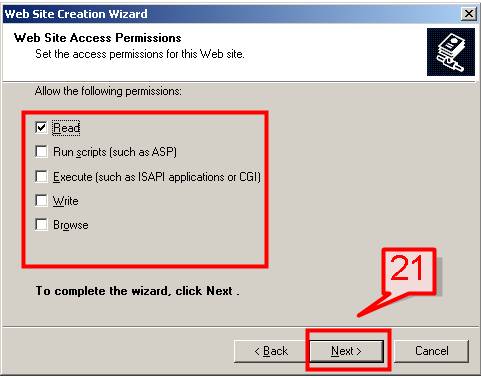
#21. Provide the type of access permissions for the web site and click Next,
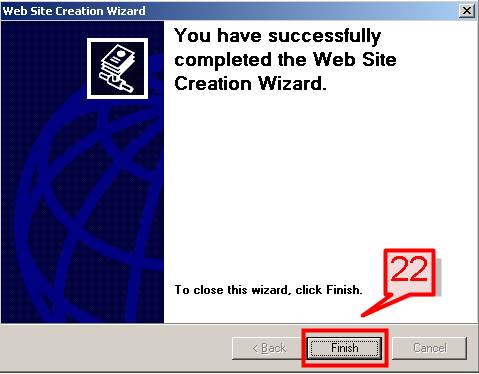
#22. The installation wizard will complete, click Finish.
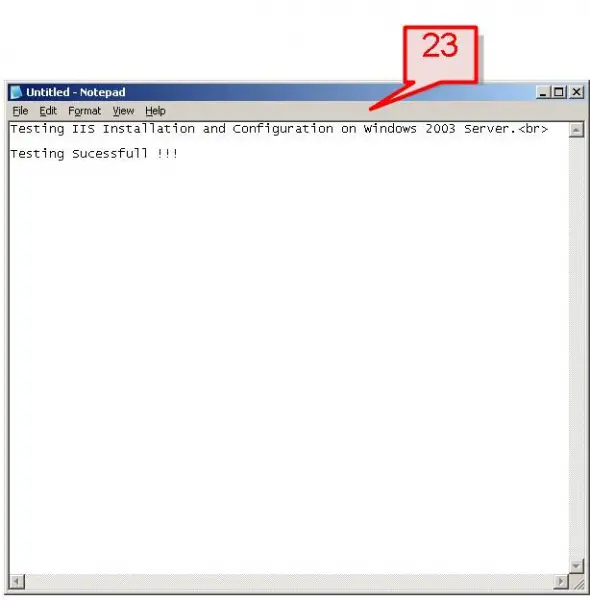
#23. Now let’s create a static html page that we will display as the welcome screen for the site.
Open Notepad and create an html file,
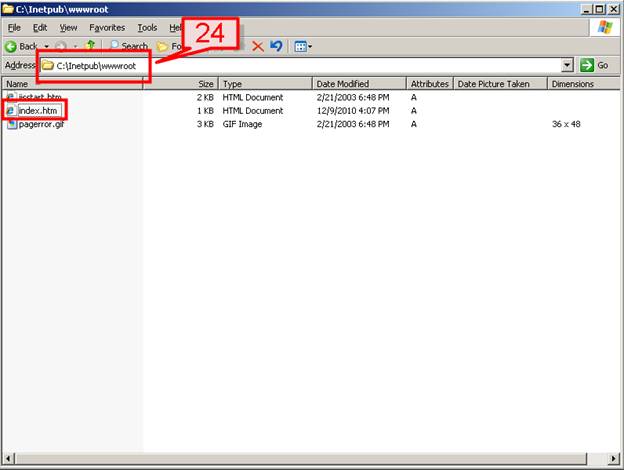
#24. Save the file as “index.htm” and save to C:Inetpubwwwroot folder.
#25. Now open IIS manager, on your Website ->right click and go to properties
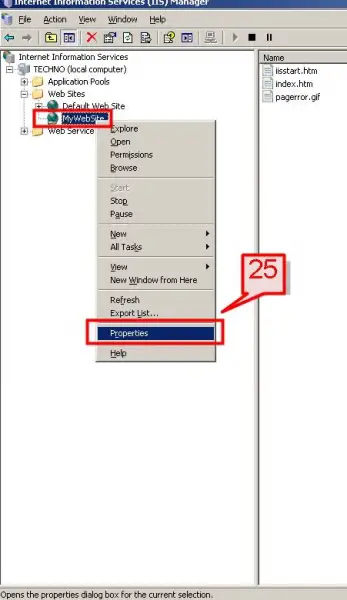
#26. On your website properties dialog box click on Documents tab, scroll up then choose index.htm file to the top of the page. Then click OK.
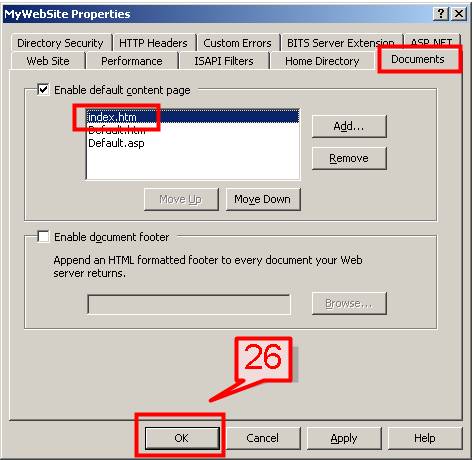
On the web site properties dialog box there are other options such as Directory security, ISAPI filters (to support ASP .NET) features that you can set to further customize your site.
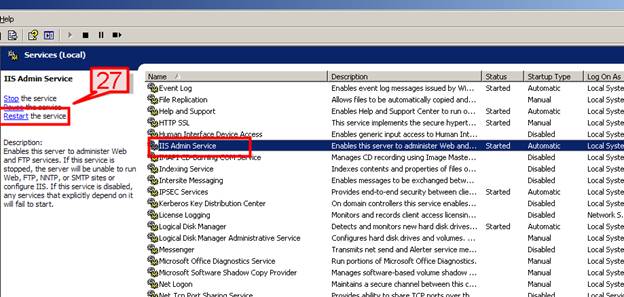
#27. We need to restart the IIS for the changes to take effect.
Go to Start->Programs->Administrative Tools->Services, select IIS Admin Service and click restart.
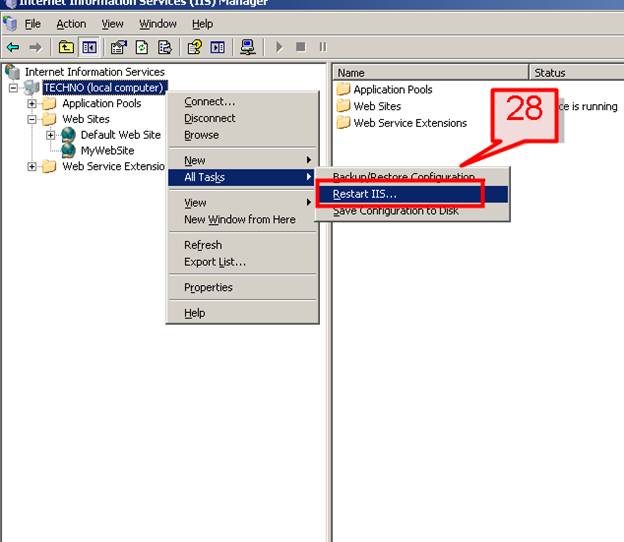
#28. Alternatively we can restart IIS from IIS Manager.
Go to IIS console select IIS server name->right click->All Tasks->Restart IIS
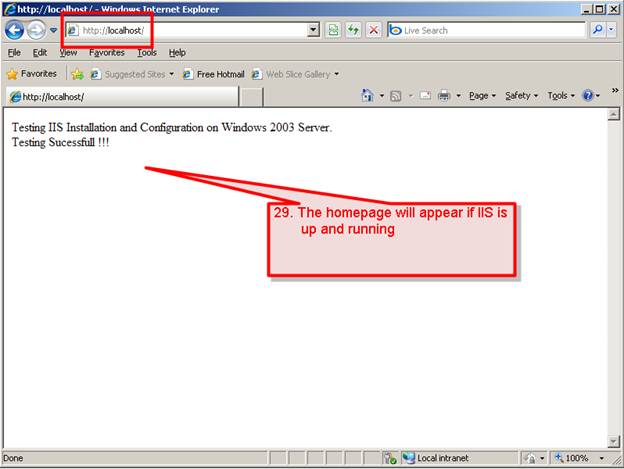
#29. Go to Internet Explorer and on the address bar type
http://localhost
The static index.html home page will appear if the IIS service is up and running.
Now let’s check at some of new features of IIS
#30. New Authentication Method
IIS 6.0 includes a new authentication method called Advanced Digest Authentication. User credentials are stored in the Active Directory as an MD5 type of hash message digest which work on HTTP 1.1. So if the browser is not HTTP 1.1 compatible, the web pages can’t be displayed due to lack of Authentication. This provides better security.
To enable Advanced Digest Authentication, Open IIS console->select the website->right click->properties->select Directory Security tab.
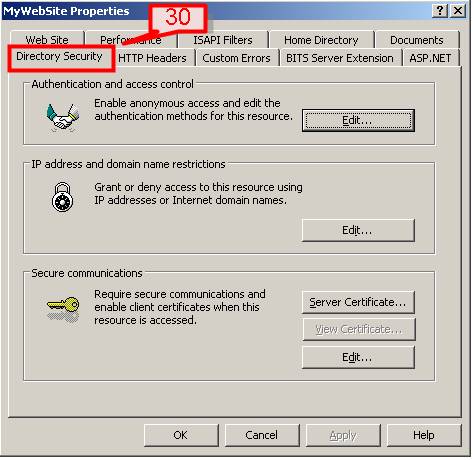
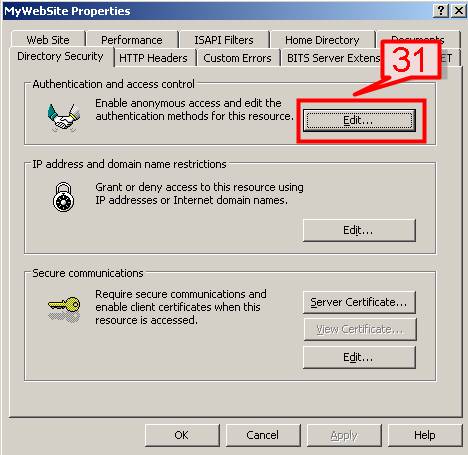
#31. Click Edit on the Authentication and access control tab.
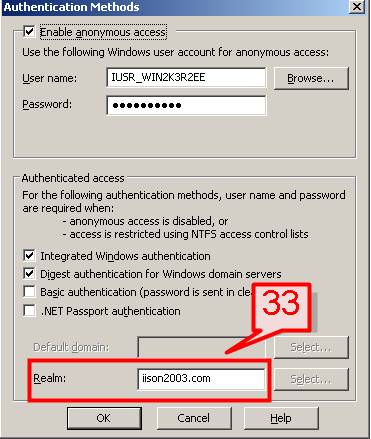
#32. In the Authentication Methods dialog box, check the Digest authentication for Windows domain servers checkbox.
A window message dialog will open to inform you that Digest authentication works with Active Directory domain accounts and asks if you wish to continue. Click Yes.
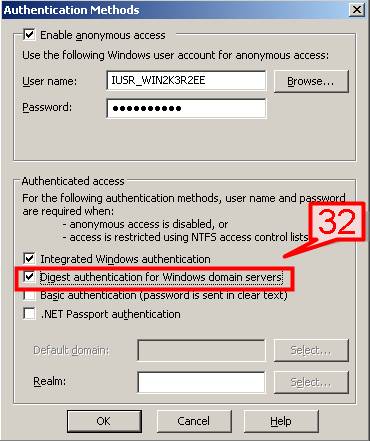
#33. In the Realm box, configure a realm name. Then click OK.
Realm is a security boundary which allows user authentication within that boundary. If the user moves to other realm boundary then they need to re-authenticate to access. Realm feature provides greater security to Web server.
#34. URL Authorization
This is a new security feature in IIS 6.0. Based on user’s role as defined in LDAP queries, Authorization Manager Scripts, and custom-created user roles, IIS provides authorization to a particular URL. You need to associate the URL with an Authorization Manager store in which the authorization policy for the URL is contained.
#35. Enabling and Disabling Dynamic Content
IIS 6.0 has the option to enable or disable dynamic content such as Active Server Pages (ASP), ASP.NET, Web Distributed Authoring and Versioning (WebDAV) and server-side includes (SSI). This provides highly secure or lockdown mode.
To enable dynamic content features
Go to IIS Manager Console->in the left pane of the IIS Manager->click Web Service Extensions
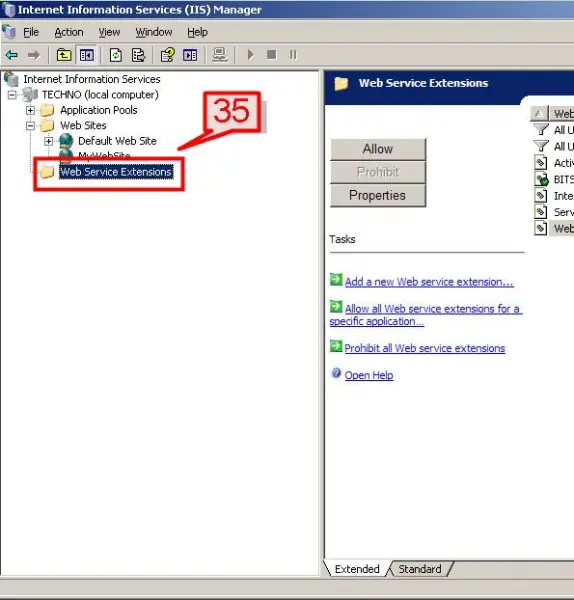
#36. On the right pane, a list of web service extensions and the status (Prohibited or Allowed) for each are shown.
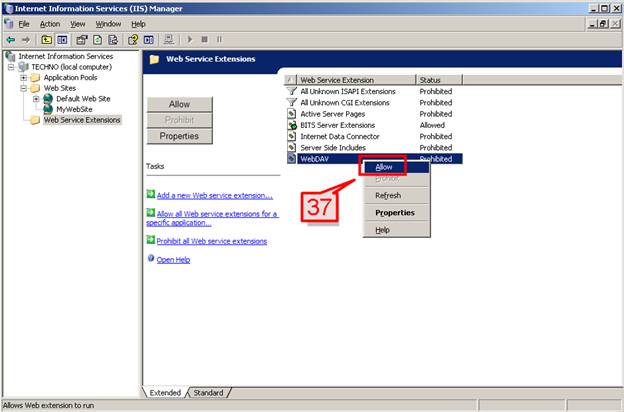
#37. Based on your requirement, select a Web Service Extension name which is Prohibited, right click and select Allow to enable.
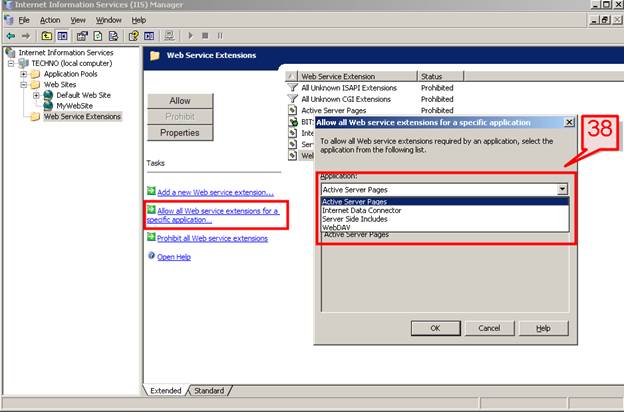
#38. We also have the option to allow all extensions for a specific application. Select the Allow all Web service extensions for a particular application icon in the Tasks section and then select the application from a dropdown box.
#39. Application Pools
Application Pools allow setting applications to run in their own pool or area or bucket so that they don’t interfere each other on the server.
#40. ASP .NET support
IIS 6.0 supports ASP .NET based applications which provide better customization, scalability and security run on .NET architecture mechanism.


