IIS Installation on Windows 7
IIS 7 can be installed from Control Panel -> Program management screen on Windows 7.
To start,
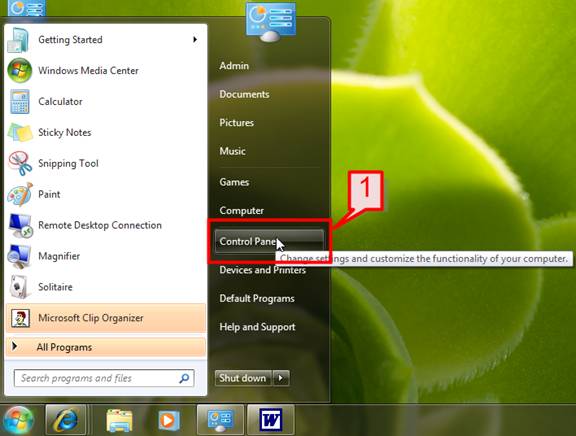
# 1. Click on Start -> Control Panel
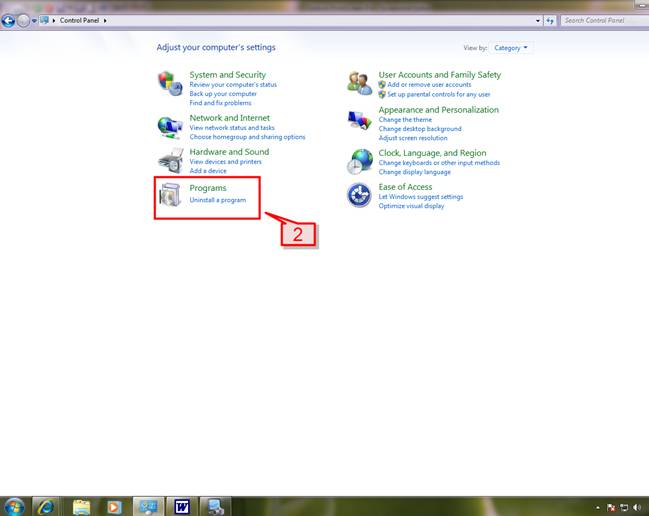
# 2. Control Panel home screen will appear, Click on Programs
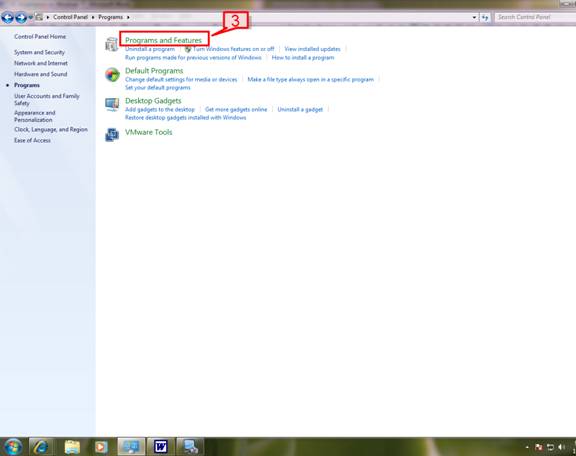
# 3. Then Click on Programs and Features,
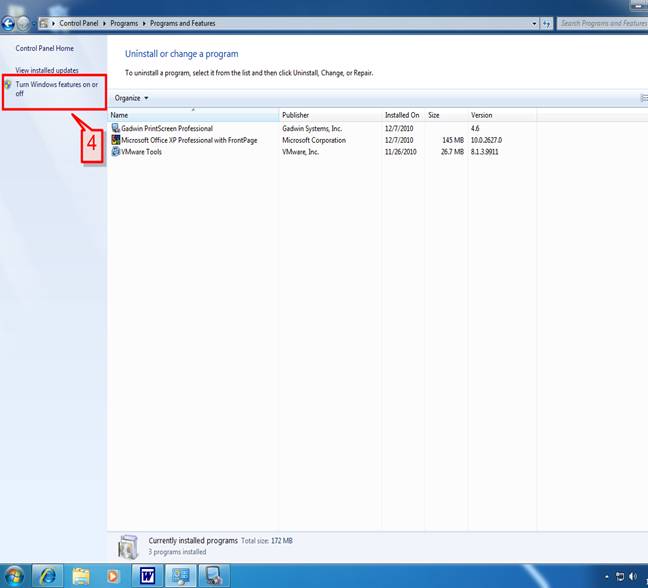
# 4. On left pane, Click on Turn Windows features on or off
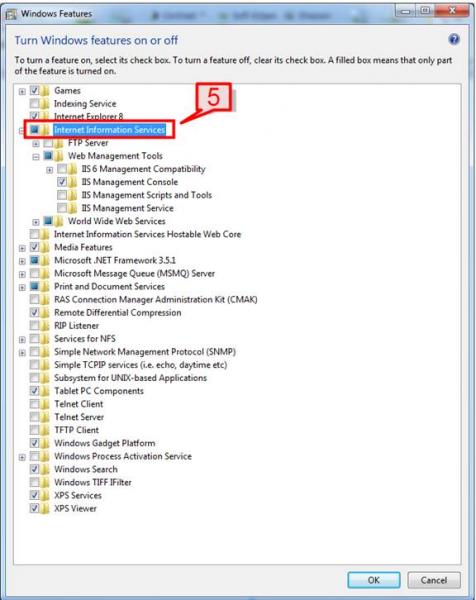
# 5. Next window will open to choose Windows Components. Select Internet Information Service.
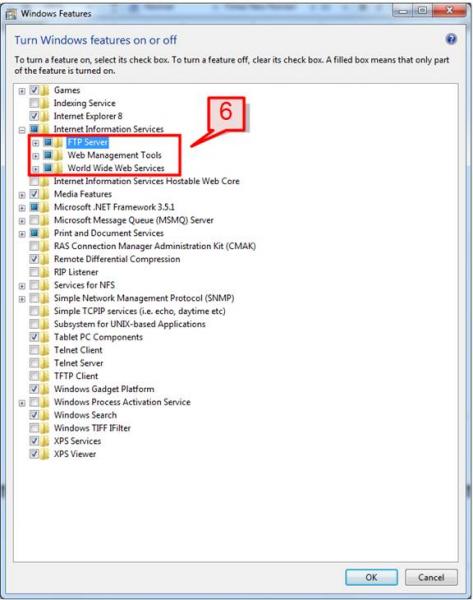
# 6. Under Internet Information Services (IIS), we have the various subcomponents to choose from. Choose the components that are best fit for your requirement.
- FTP Server
- Web Management Tools
- World Wide Web Services
Windows will provide you a brief description of each component if you move the Mouse cursor to that selection.
# 7. You can expand each sub-feature and can check which components to install. Let’s expand and check the components under FTP Server,
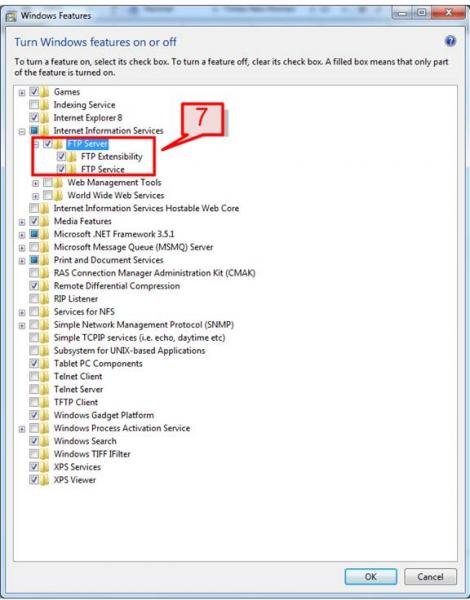
If you want to go for a file transfer method by FTP protocol, then you can choose FTP Server features.FTP Service enables you to FTP publishing on a Web Server.# 8.Expand Web Management Tools,
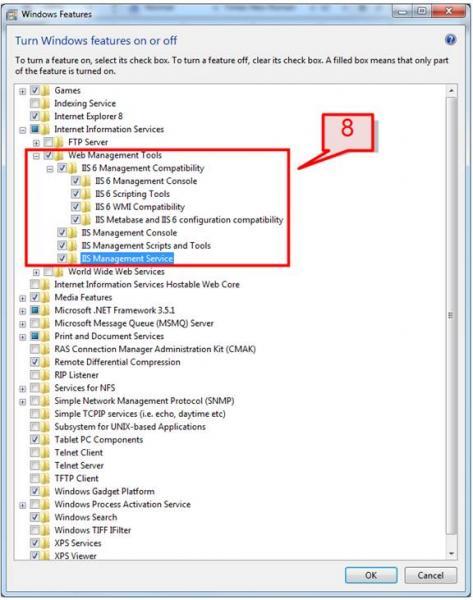
The Web Management Tools have the components that you can go for to publish, manage, log and trace your web applications and web sites.
IIS 6 Management Compatibilityprovides you the option to use existing IIS 6.0 API’s to work on IIS 7.
IIS Management Scripts and Toolsprovide the tools and scripts that you can work on to customize your sites.
# 9. Expand World Wide Web Services,
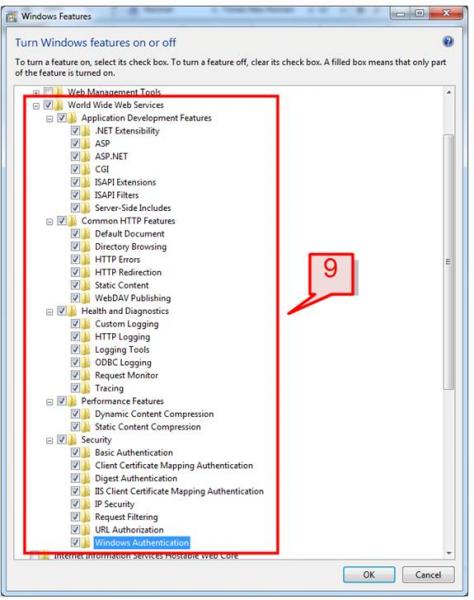
If you are an ASP Developer and you want to host a web server, you can check ASP.NETcomponent.
Likewise on the Security, you can go for Basic or Windows Authentication where users can browse pages using their NT login IDs.
Under Health and Diagnostics, one can choose for what logging, monitoring and tracing information he needs to make your Web Server secure.
On Common HTTP Features, choose type of contents or web page that you opt to publish. This would be a Static Content in .htm and or .html file contents or Dynamic contents.
On Performance Features, you can select the type of compression functions for your Dynamic and Static contents.
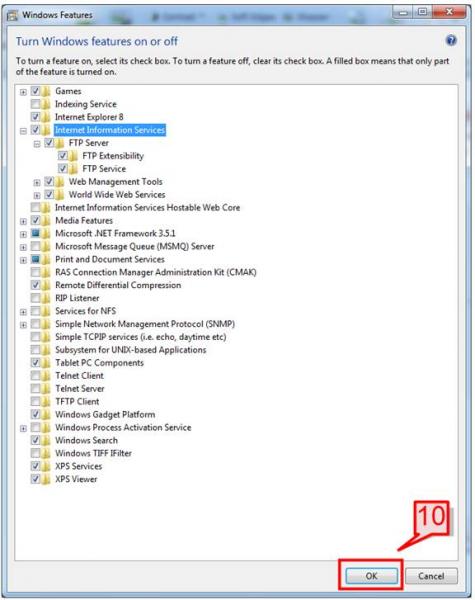
# 10. After you select all the necessary components, tools and features required for you click on OK button to start installing IIS 7 on Windows 7.
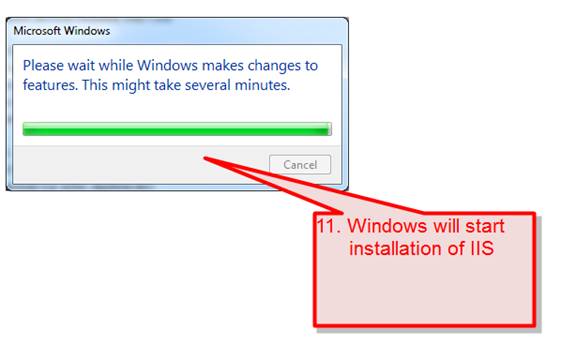
# 11. Windows will then start making changes and start installing IIS. IIS installation will be done after a few minutes.
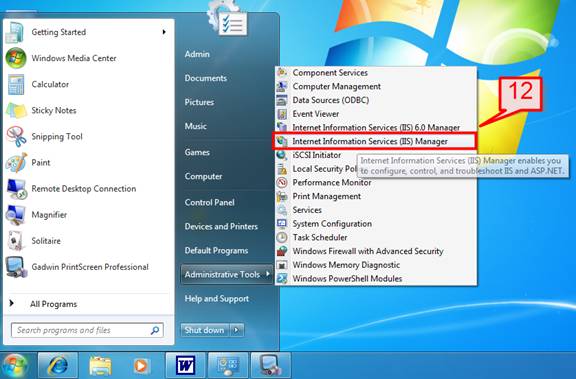
# 12. Once IIS installation is finished, check the following to check Installation integrity,
Go to Start -> All Programs -> Administrative Tools -> Internet Information Services (IIS) Manager link will appear.
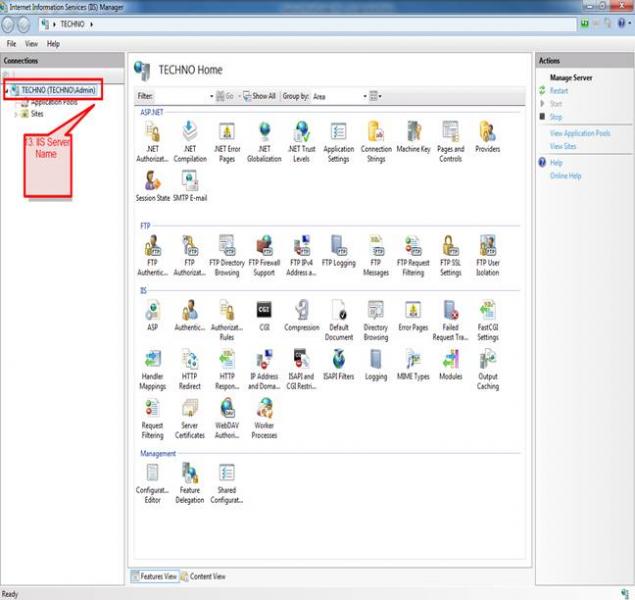
# 13. Once clicked, it will open IIS management console. Left Panel shows the IIS server name and default Web Sites and Application Pools. Right Pane shows the components that we have selected while installation of IIS.
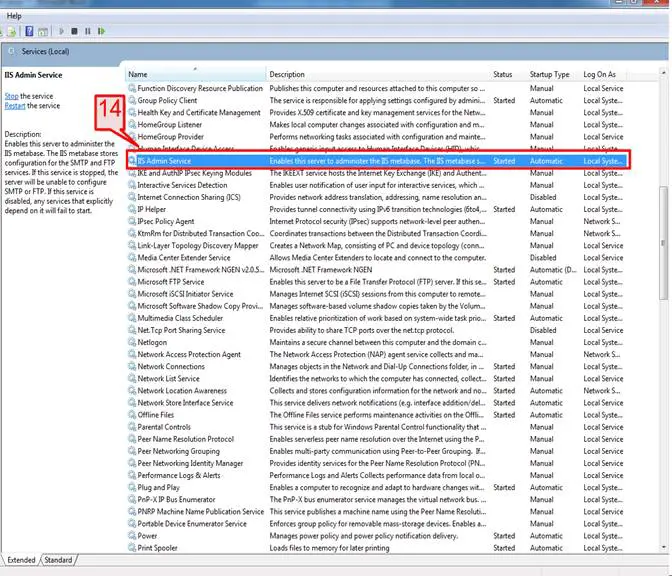
# 14. Go to Start -> All Programs -> Administrative Tools -> Services, You can see IIS Admin Service created and started.
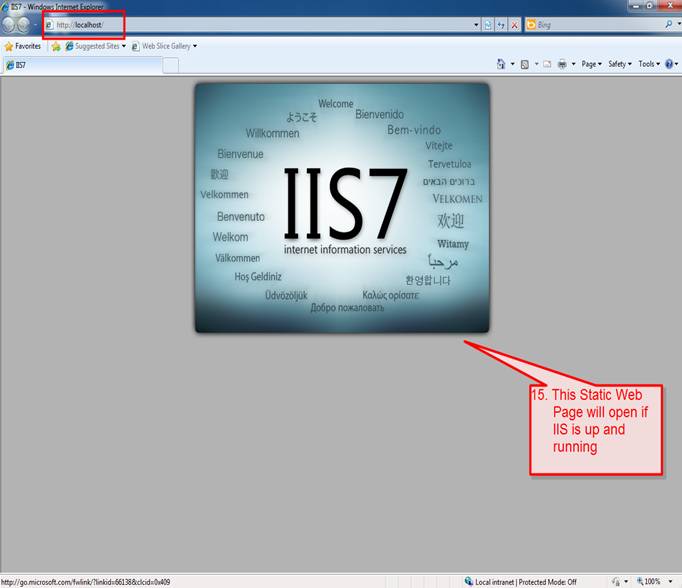
# 15. To Confirm that the Web Server is working, go to the Internet Explorer and in address bar, type
http://localhost. If IIS7 is up and running the following static web page will be displayed on your browser.
Kindly leave your comments if this has helped you..


