Installing Firefox
Mozilla Firefox commonly known as Firefox is a popular web browser. The main features of Firefox are
- Free: Mozilla Firefox is free software.
- Private Browsing: With Firefox it is possible to surf and browse without leaving a trace.
- Built-in Protection: Built in protection against fishing and malware.
- Speed: Browsing with Firefox is much faster.
- Session Restore: With Firefox you can easily restore previous session
- Tabbed Interface: You can view multiple websites in different tabs.
- Built-in Password Manager: With built-in password manager you don’t have to remember so many usernames and passwords.
- Anti-virus Integration: When you download a file Firefox automatically checks the file for viruses.
- Add-INS: Hundreds of Add-ins available.

Therefore in this article I am going to show you how to install Firefox browser on your computer. So let’s begin,
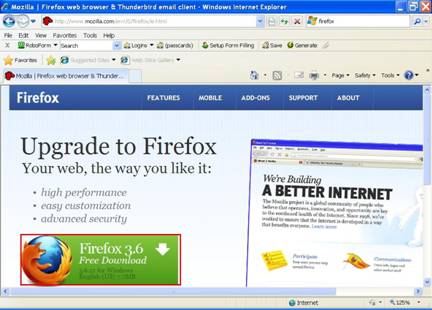
Step 1: Open Internet Explorer and navigate to the following web address,
http://www.mozilla.org/en-US/firefox/fx/
The Internet Explorer will display the web page as shown in the following screen shot. Click on Firefox 3.6 free Download as shown in the first screen shot.
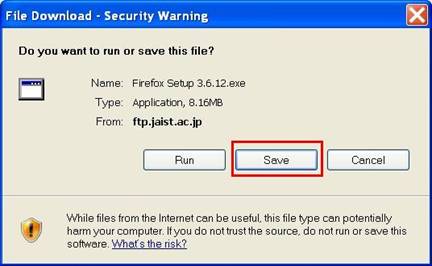
Next the box will pop up asking you whether you want to run this file or save this file. Click on save as shown in the following screen shot.
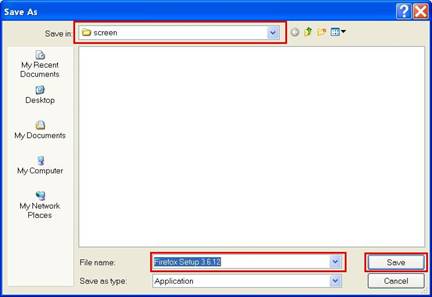
Now choose the location where you want save the file in the Save As box. You may change the filename of the downloaded Firefox set up file or keep it as per the default settings as shown below. Next click on the Save button as shown in the box below.
Now the Firefox setup file will be downloaded from the Mozilla website to your computer. When the download is over you will see a box as shown below. Next, click on the Run button.
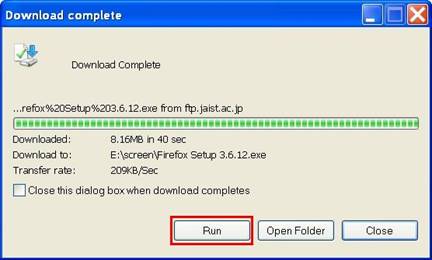
Now a box will pop up displaying a warning as shown in the screenshot below,
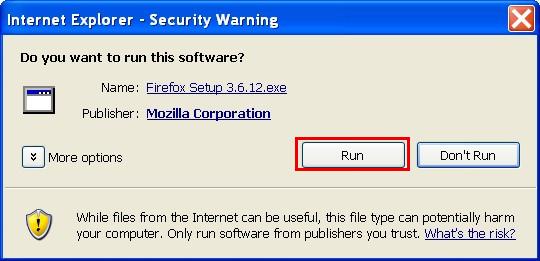
You may safely click on the Run button to install Firefox browser on your computer. Now the Firefox installation files will be extracted from the downloaded set up file. The box showing the extraction process will be displayed and will look like the following screen shot.
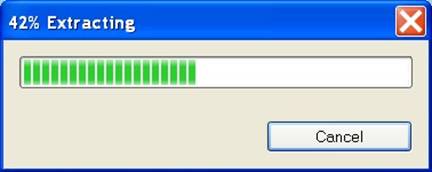
After the file extraction process is over the Fire box set up process will begin.
Step 2: The Setup Wizard
Now the Firefox set up wizard will appear on the screen as shown below
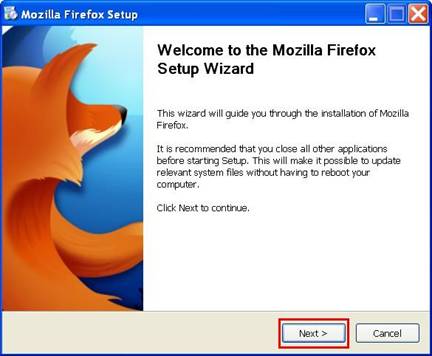
Click on the Next button to continue. The next box will appear on the screen asking you the details of the set up type.
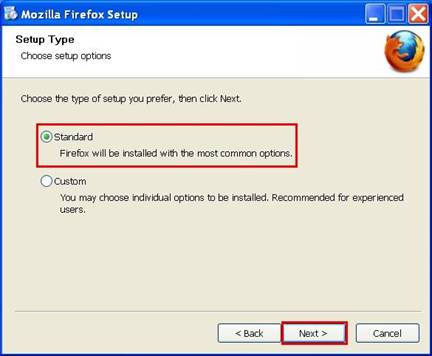
In the Setup Type Box you may safely choose the Standard option as show in the screen shot or you may choose Custom option to customize the installation. Next, click on the Next button. Next the Summary box will appear on the screen showing the path to a folder where Firefox will be installed. If you want Firefox browser as the default browser, select and check the option Use Firefox as my default browser. Next, click on the Install button, as in the box below.
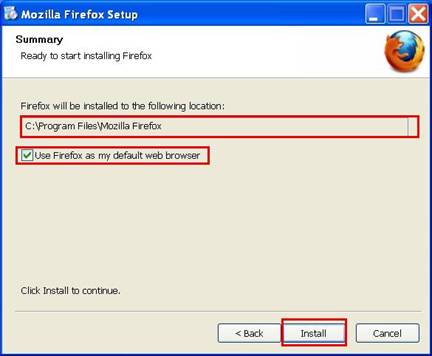
Next installation will begin an on the completion you will see the box like the one below.
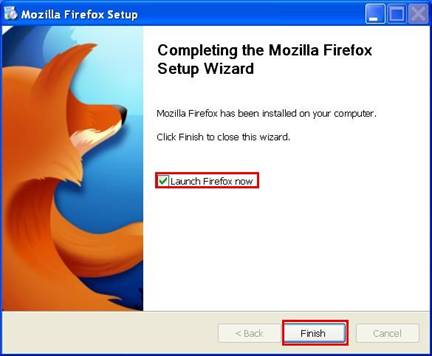
Next, click on the Finish button as shown in the screenshot. Congratulations! The setup of Firefox web browser is now complete.
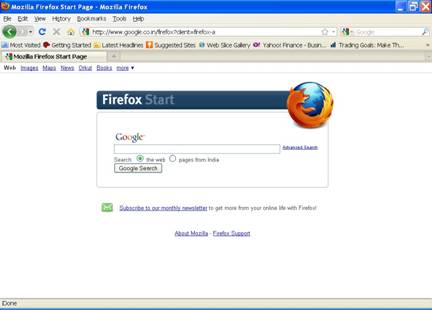
When the Firefox is launched after importing settings from Internet Explorer (depending on whether you want to import the settings or not), the Firefox application will look like the following screen shot,
