Installing Visual Studio 2010
Visual Studio 2010 is a must for those who are interested in developing applications based on .NET frameworks, whether they be a Desktop or a Web Application.The main features of Visual Studio 2010 are as follows:
- VB.NET Integrated Development Environment
- C# Integrated Development Environment
- ASP.NET Integrated Development Environment
- F# Integrated Development Environment
- Silverlight & WPF
- Fully support .NET Framework 4.0
Considering these features, we strongly recommend installing Visual Studio 2010 on your computer. In this article, we will see how to install Visual Studio 2010.
1. To begin installation, insert the Visual Studio 2010 Setup disk into the CD/DVD drive. Immediately, you’ll see a box open up, as shown in the following screen shot:
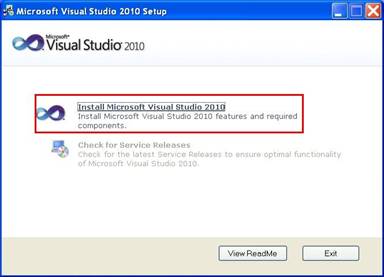
Click on, Install Microsoft Visual Studio 2010.
2. Another box will appear, informing you that the required resource files are being copied into your temp directory. See image below.

3. The next box that will open up will welcome you to the Visual Studio 2010 installation. In this box, you will have the option to send information about Visual Studio 2010 to Microsoft Corporation. The progress bar located at the bottom left will also display the process of loading the installation components, as shown below:
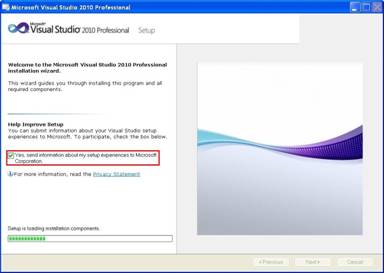
4. After the loading of installation components is complete, the progress bar will disappear and the Next button will be enabled.
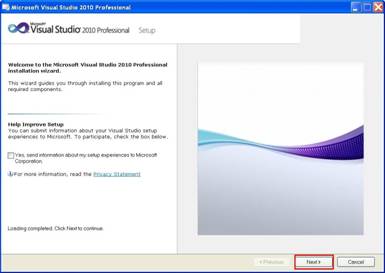
Click on the Next button to continue.
5. Now, the setup process will display a box as shown in the screen shot below. All the components that are installed and are still going to be installed on your computer are shown on the left side of the box. The right side includes the License Agreement.If you agree with the terms in the agreement, select the option I have read and accept the license terms.
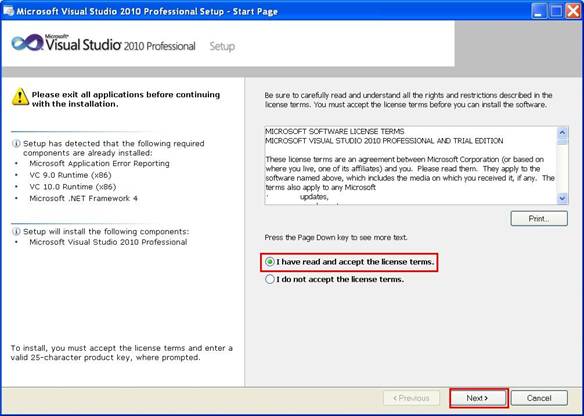
Next, click on the Next button to proceed further.
6. In the next box, you will be able to select the type of installation.There are two types of installations available: full and custom. It is advisable to opt for the full installation if you don’t need to customize the program.
On the right side you will be able to see the languages and the components that will be installed as a part of full installation. Usually you will also be able to choose the Visual Studio 2010 installation path by clicking on the browse button (In the example case, the set up has prohibited us from choosing the installation path).
This box also lets you see the amount of disk space that the installation requires and the amount of disk space available on your computer. Make sure you have an ample disk space before proceeding further.
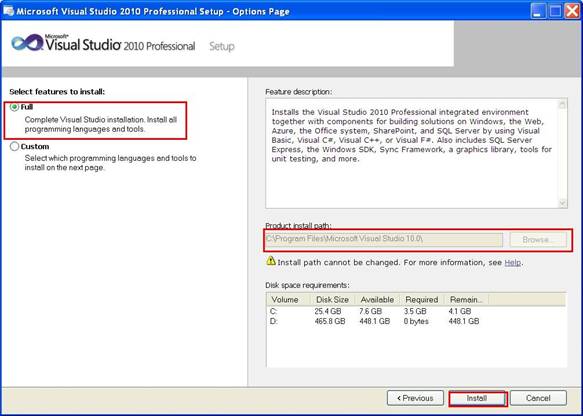
After you have done your selections click on the Install button to proceed
7. The next box will show you the actual step-by-step process of the installation of the selected components. The progress bar will indicate the status of this process.
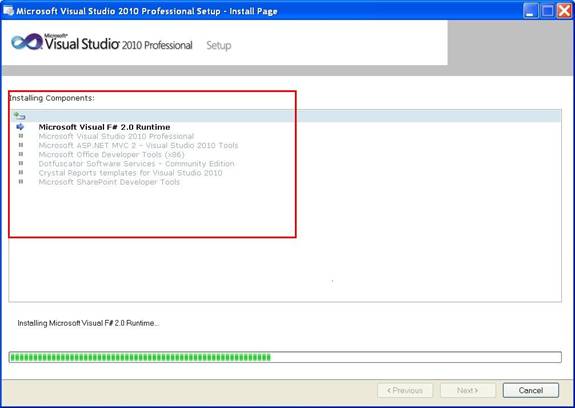
The installation process will take quite some time and may reboot the computer during the installation of .NET Framework 4.0 installation.
8. After installing all the components, set up will display on the next box, as shown in the following screen shot:
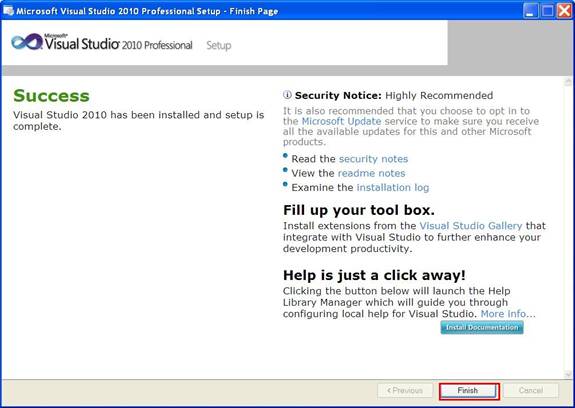
Now, you may click on the Finish button or you may choose to install the documentation before clicking on the Finish button.
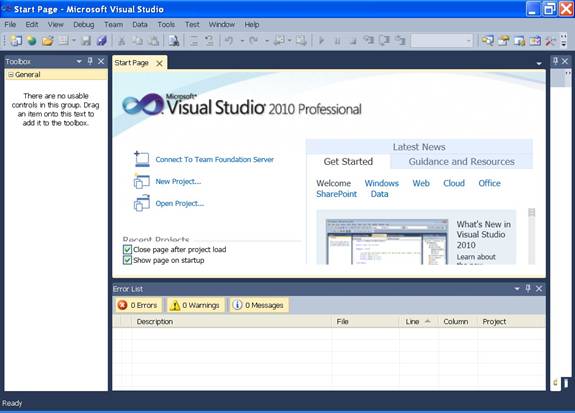
After installation when you start the Visual Studio 10, you will be able to see the box similar to one in the following screen shot:
You can then see the application wizard used to create a new project, as shown in the screenshot below:
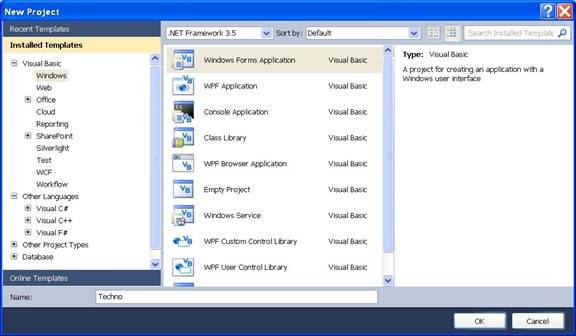
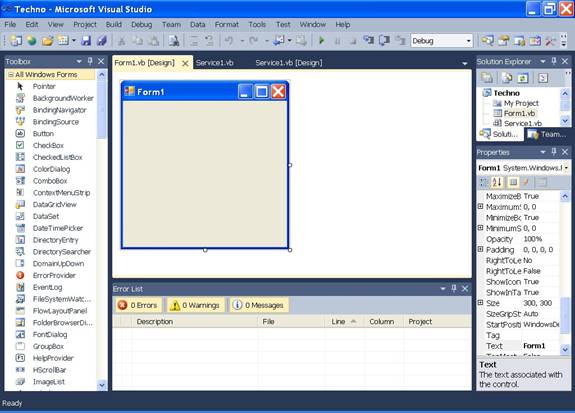
After choosing to create a new project, the Design mode will appear.Here, you can see the Solution Explorer, Properties Editor, and Tool Box.
