Mailbox enable newly added User in Window Server 2008 under Exchange Server 2007
Active Directory (AD) is a central repository of resources, users, computers and their groups. Each of which symbolize a unique object and its attributes. It uses Lightweight Directory Access Protocol (LDAP) to add, query and modify data of directory (or repository). Best part of AD is the ability to manage most instincts centrally.
Creating User under Active Directory Users and Computers (ADUC):
ADUC administrates organization of users, computers and groups with their security. We can add, delete, reset, or delete user and computer accounts using ADUC.
Part-1 of tutorial covers creation of a simple user under the domain.
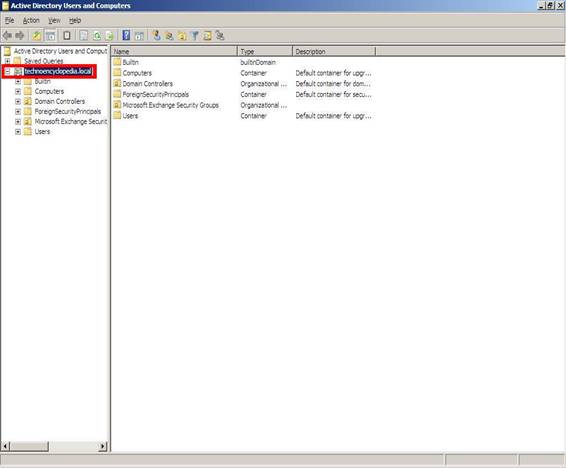
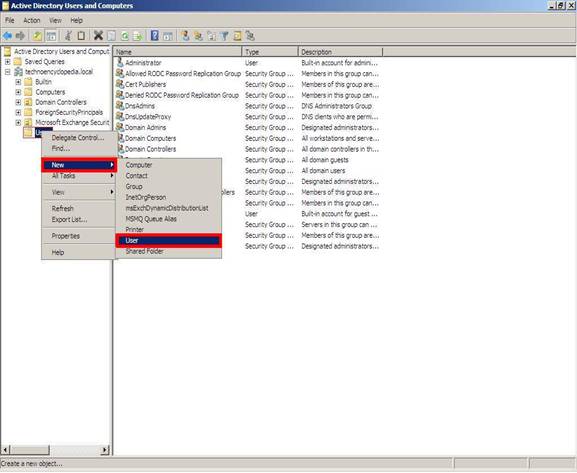
Open Active Directory Users and Computers from Administrative Tools. Expand the installed domain, ‘technoencyclopedia.local’ in the figure below.
Create a new user by right clicking User folder under the domain then selecting User under sub-menu of New. This pop-up a new dialog titled ‘New Object – User’.
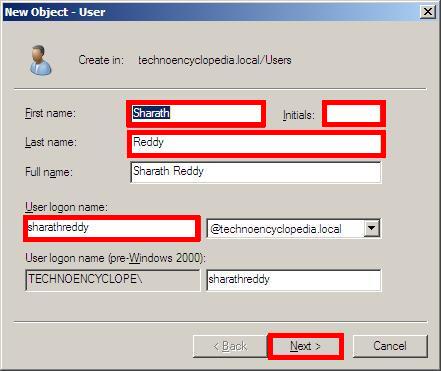
Enter user details then click next. Logon name defines a username that is usable on any system, part of the domain.
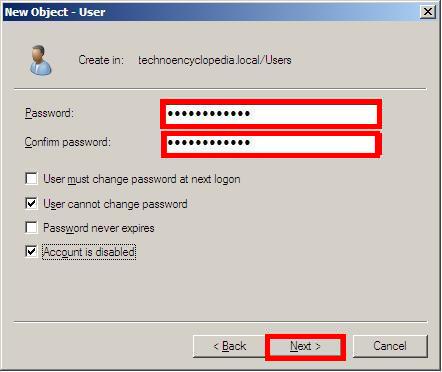
Enter strong password with selection of security checkboxes then click next. Each checkbox clearly narrates its purpose.
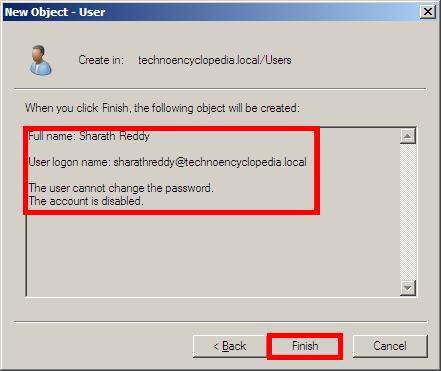
Read the summary of the user account, if satisfied click finish. This will create a new user account under the domain, if minimum requirements are fulfilled.
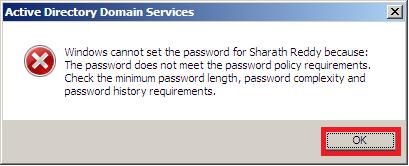
You might see an error if the, previously, entered password doesn’t fulfill the domain password complexity. To do so click ok then go back to the screen where you entered password. Once new password meets required complexity, you are done.
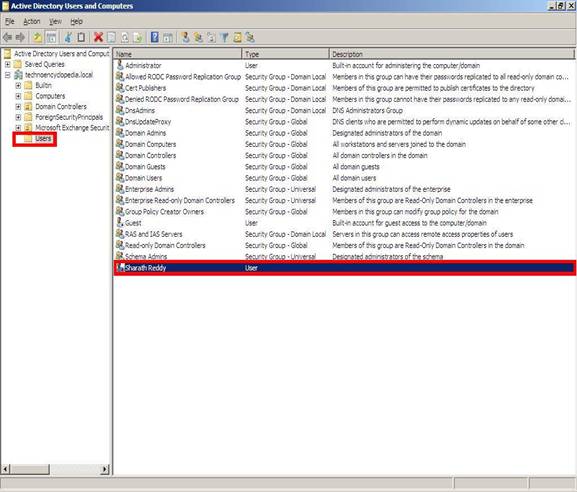
Newly created user will show-up in right-pan of ADUC. Detailed information can be added, viewed, or changed in the properties of the user.
Enable mailbox for the Created User:
Microsoft Exchange Server (MES) is the server side of Microsoft’s client-server model for messaging system providing electronic mail, calendaring, contacts and tasks capabilities. Key features available with MES 2007 are:
- High availability and reliability of email service at enterprise level.
- More protection against spam and viruses.
- Easy mode of access for remote employees; among others.
Part-2 of tutorial enables mailbox of the newly added user in previous topic (or part).
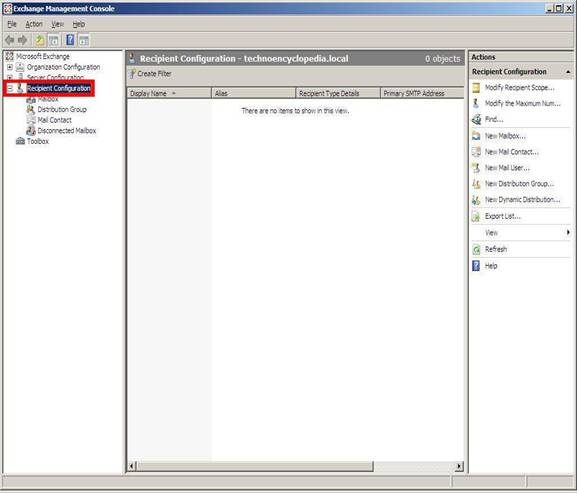
Open Exchange Management Console (EMC), expand Recipient Configuration.
From Action menu, select New Mailbox… this will open a new dialog box titled ‘New Mailbox.’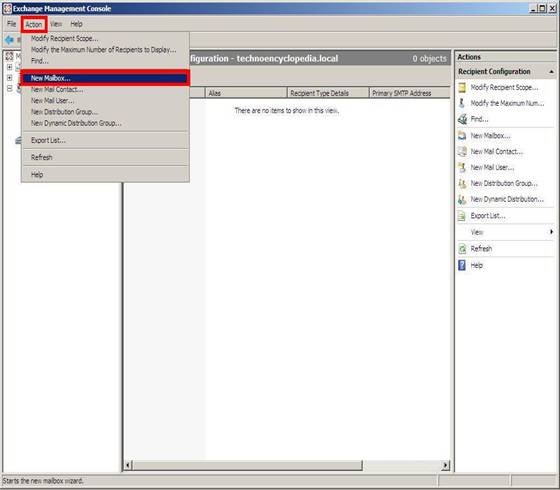
This dialog box offers different types of mailboxes. We are concerned with a simple user mailbox to send and receive messages so select User Mailbox option under Choose mailbox type then click next.
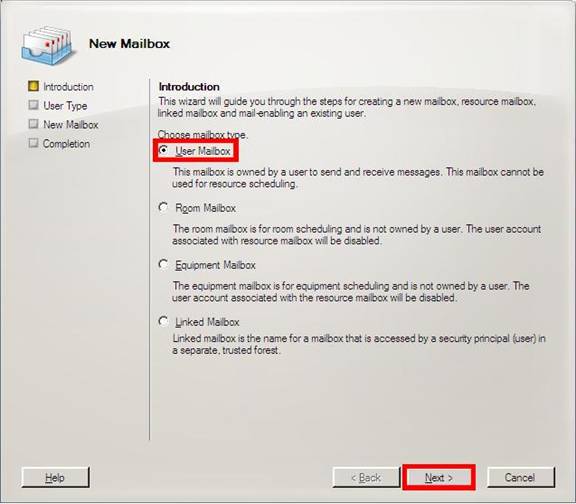
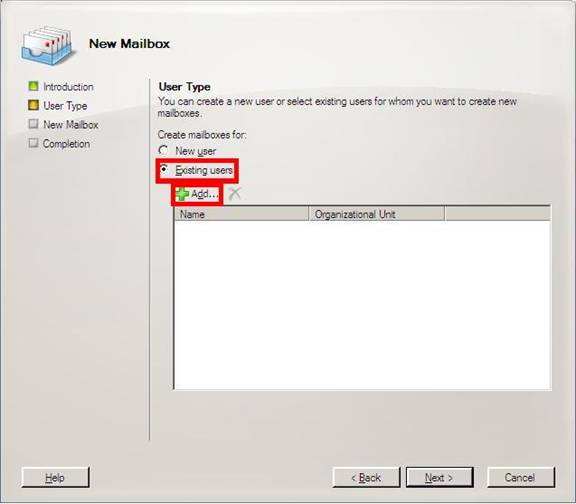
Because we want to add mailbox to an existing user, above created user; select ‘Existing users’ option under ‘Create mailbox for’ then select Add…
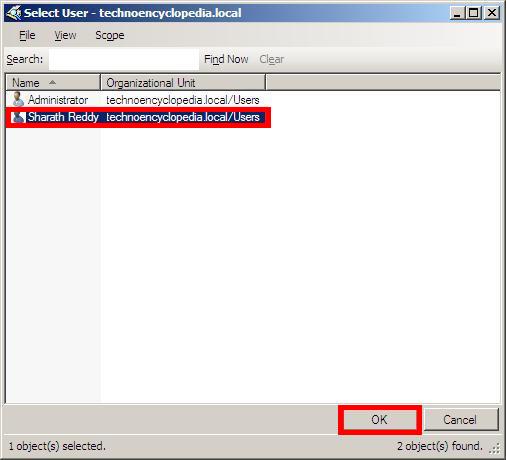
Opened dialog box will show all users. Select the desired one then click OK.
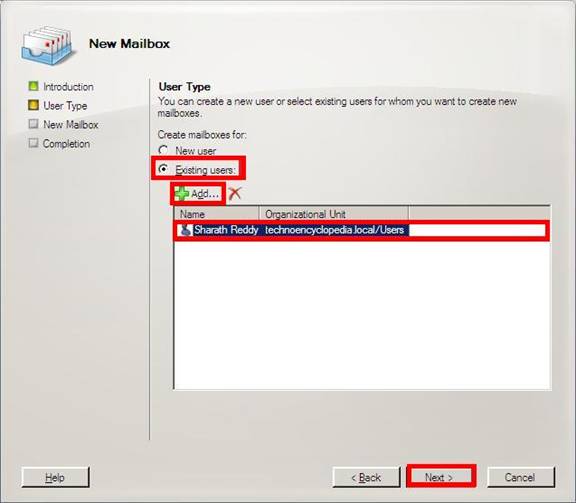
On return, window will show-up like this. Click Next.
You can change Mailbox Settings on this page. First enter desired alias name:
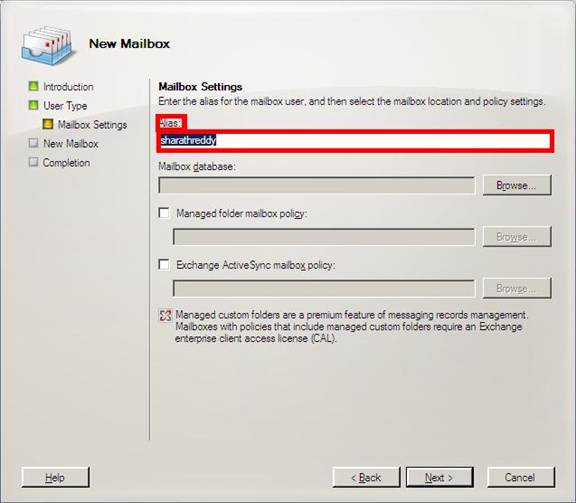
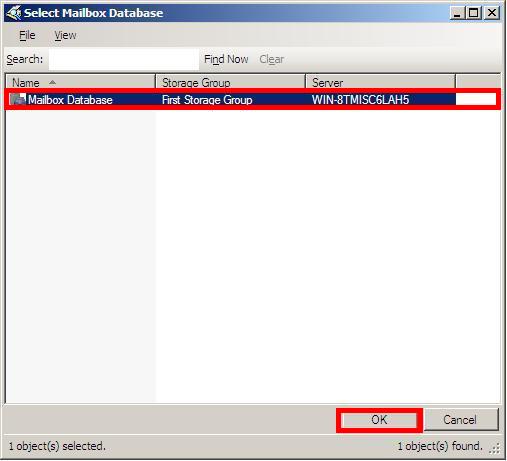
Select database by clicking Browse button against Mailbox database label then click OK.
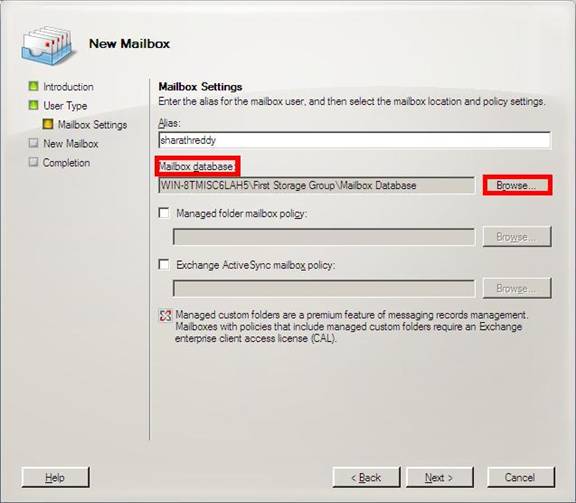
Mailbox setting will look like this.
Mailbox policy let you apply a common set of policy or security settings to a user or group of users. You can specify mailbox policy by checking Exchange ActiveSync mailbox policy and selecting default; we haven’t created yet so, from the dialog box shown on clicking Browse button.
Note: ActiveSync is optional
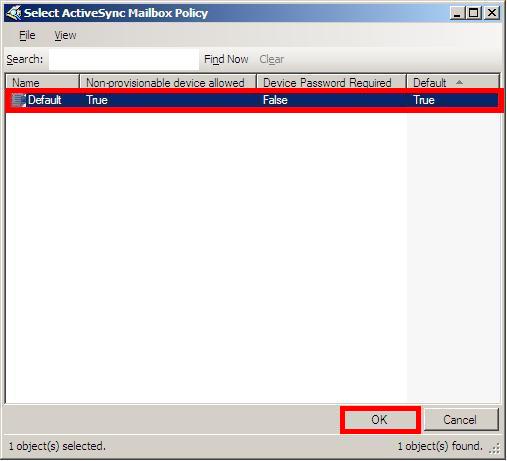
Click Ok and Next button to move on.
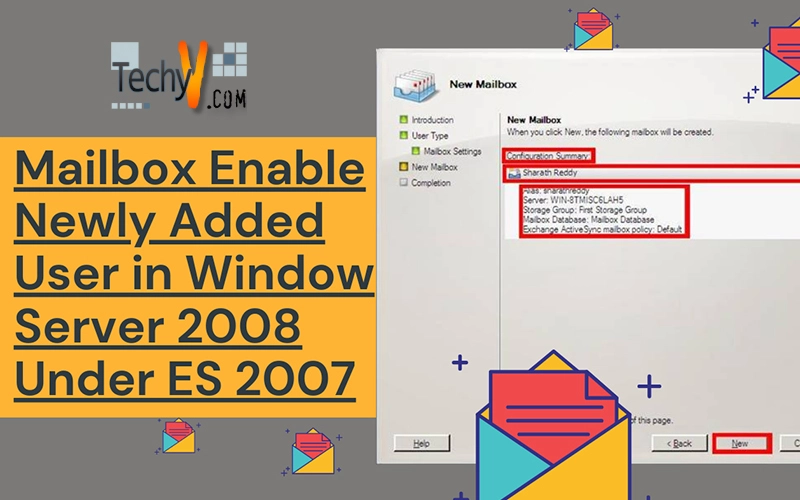
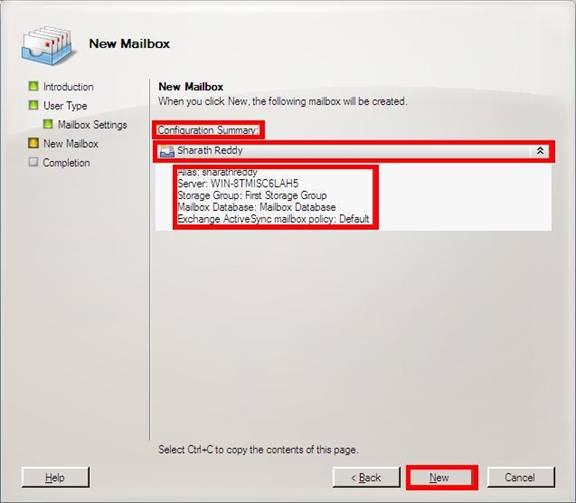
This page will show Configuration Summary of all settings we did in previous steps. If all is well then click New. Once we click New; there is no way to undo things, unless we decide to delete and create again, so analyze settings before moving forward.
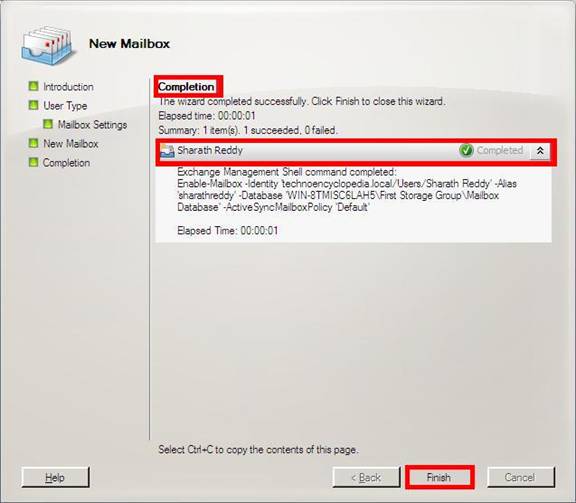
On Completion, following window will show-up. Important information in this dialog is the command Enable-Mailbox executed on Exchange Management Shell to create this user using switches as per our configuration setting. Click Finish.
If everything works fine, mailbox enabled user will show-up in right window.
Conclusion:
This two part tutorial covered two basic operations under ADUC and EMC. In part one; we added a new user ‘Sharath Reddy’ to the domain ‘technoencyclopedia.local’. While in subsequent we enabled messaging system for this user.


