
Configuration Yahoo & Hotmail & Gmail 3 Versions Outlook Microsoft Outlook
Microsoft has brought so much convenience for users in this era of Information Technology. Microsoft Outlook is one of them, which is a good tool to use an email application. However, outlook needs to be configured with an email account e.g. Gmail, Yahoo or Hotmail. Microsoft Outlook allows users to send, receive, forward and search the emails from any of the configured email accounts.
Users can configure more than one email account at a time. Furthermore, it allows saving the emails onto your hard drive that can be accessed later in offline mode or without internet. The emails are sent or received once the Microsoft Outlook is online again and internet is working. This feature has allowed Microsoft Outlook to be an essential daily used application.
Microsoft has been improving its Office applications and software with time and has launched several versions. This article covers the features and configuration procedure of Microsoft Outlook 2003, Microsoft Outlook 2007 and Microsoft Outlook 2010.
Configuring Microsoft Outlook 2003 with Gmail
Microsoft launched 2003 version of Microsoft Office with new features and improvements as compared to the previous version. Gmail ID configuration with Microsoft Outlook 2003 is the process given below. Sign up for a new account if you don’t already have a Gmail ID. vihaan.reddy11@gmail.com is used to simulate a real email process.
Step 1:
In the first step, open M.S Outlook and go to the Tools menu. Select Email Accounts from the drop down menu as depicted below.

Step 2:
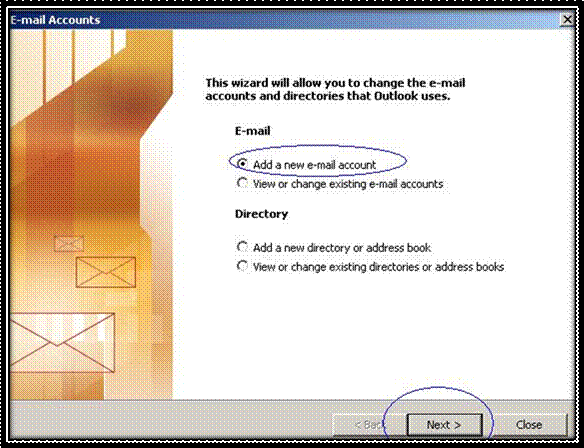
Just select the first option which is “Add a new e-mail account” and press next button.
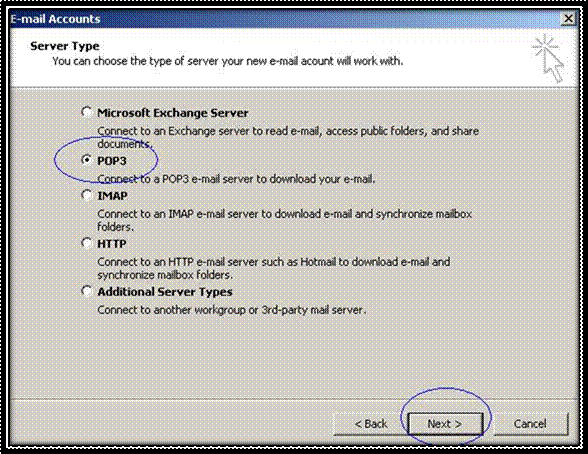
Step 3:
Here you would have several types of servers and you need to select the option. Just select “POP3” and click the next button as highlighted.
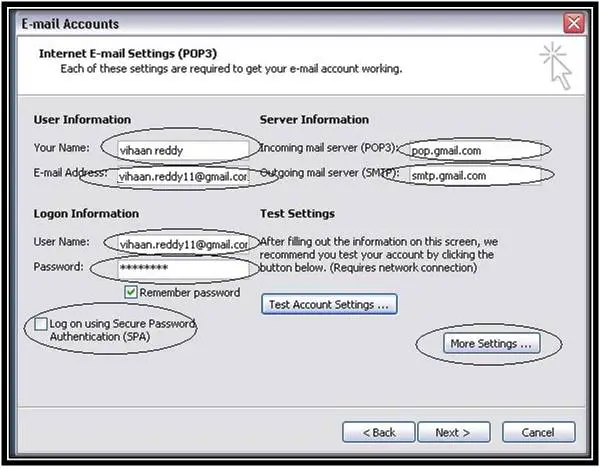
Step 4:
After selecting the “POP3” in the option at the previous step now you need to configure this server. First write the name then Gmail account which you want to connect with outlook under “User Information” category. Then here is a “Logon Information” put your Gmail username and password. It should be note that the username must be your Gmail full account e.g. vihaan.reddy11@gmail.com . Do not check the “Log on using Secure Password Authentication” as highlighted in the below diagram. Put “pop.gmail.com” in “POP3” field and smtp.gmail.com in “SMTP” field. Click on the “More Setting” button.
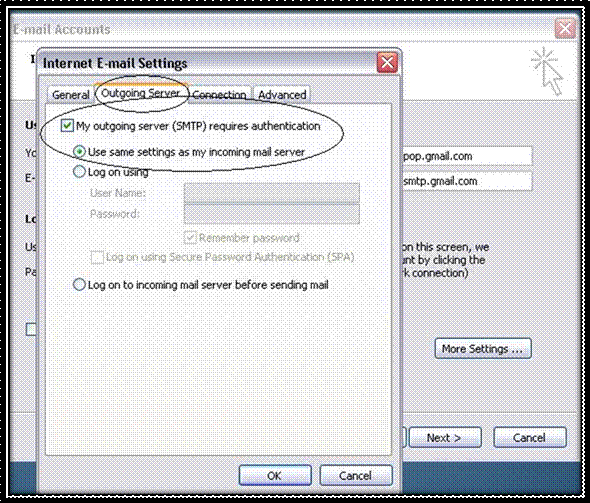
Step 5:
Check the option as highlighted in the picture under the second tab in “More Settings”.
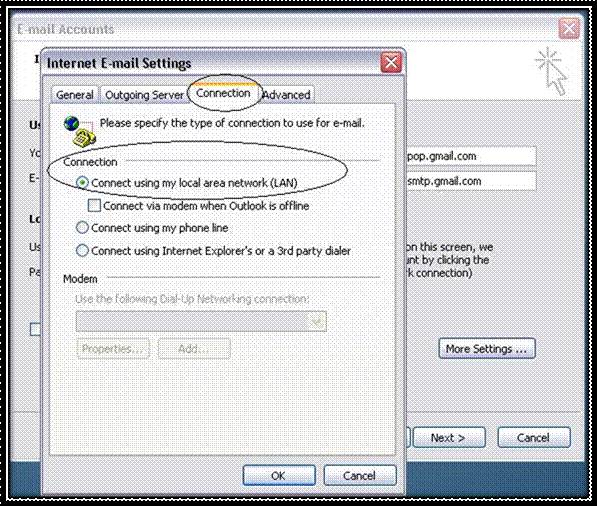
Step 6:
Connection needs to be verified staying in the same screen on the third tab. Verify that connection option is correct as depicted in the screenshot below.
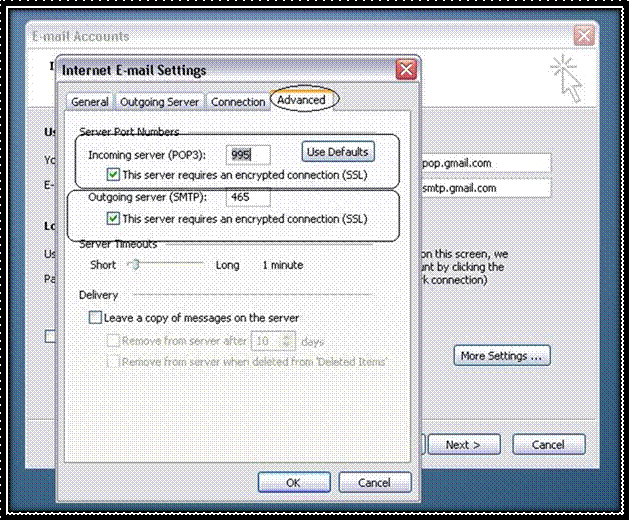
Step 7:
Staying the “More Settings” window, it is required to move onto the “Advanced” tab. Both POP3 port and SMTP port need to be checked for SSL as depicted below. The port number for POP3 is required to be 995 and the port number for SMTP is 465. Click “OK” to proceed.
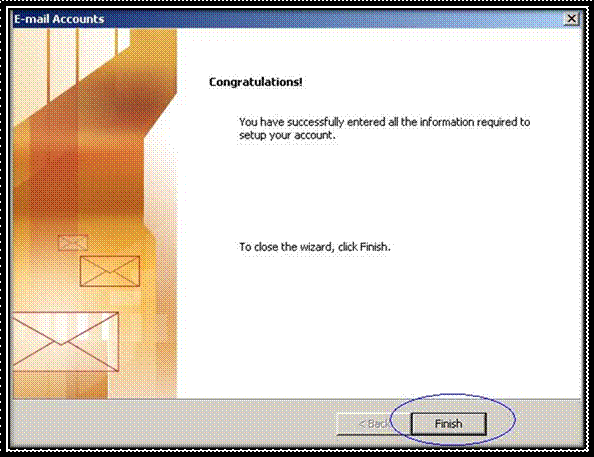
Step 8:
Congratulations screen is prompted and finish need to be pressed to proceed further.
Step 9:
Click “Send/Receive” and start using your Microsoft Outlook as the configuration has successfully been completed.

Configuring MS Outlook 2007 with Yahoo Email Account:
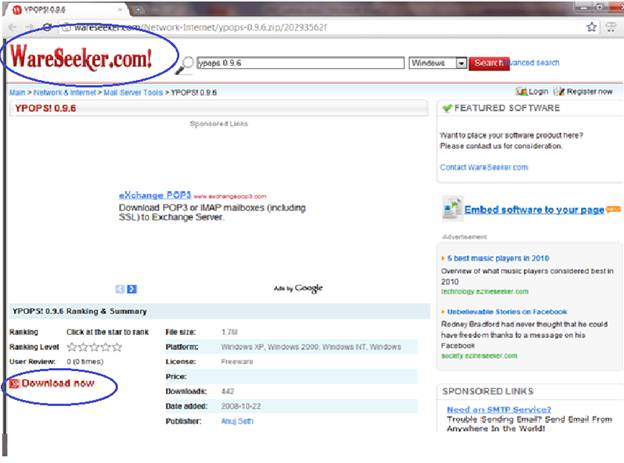
Configure Microsoft Outlook 2007 with Yahoo Email Account, for this purpose YPOPS (an add-in) is required to install.
Step 1:
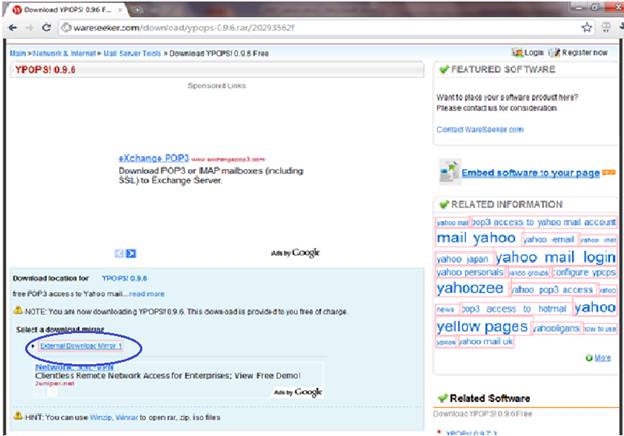
Here is the website from user can download it. Just click on Download Now. The version is 0.9.6.
Step 2:
The user will be asked to select mirror.
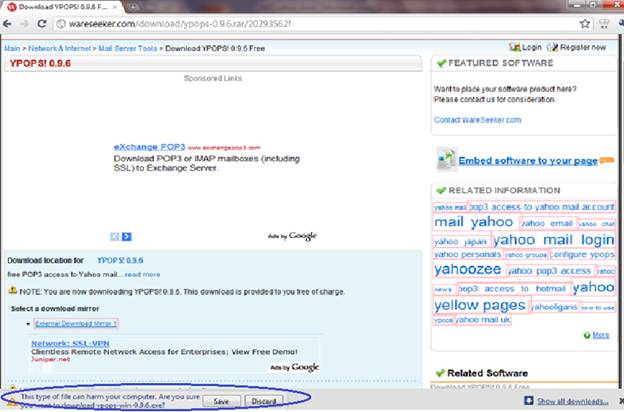
Step 3:
The User will be prompted to save this downloaded file to hard disk. To save it, click on Save.
Step 5:
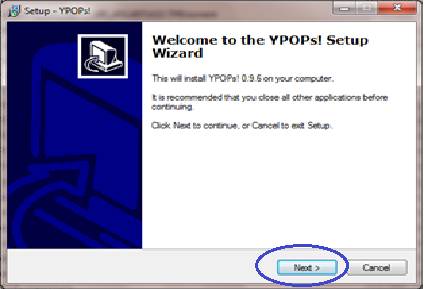
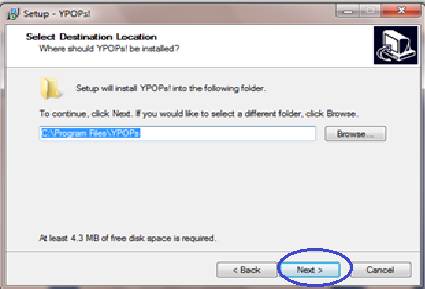
After downloading the Exe file, click on it to install it. The following dialog box will open, click on Next to proceed.
Step 6:
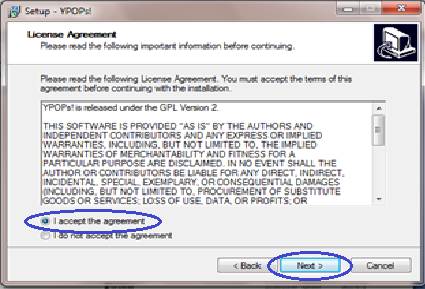
Check radio button “I accept the agreement” and then click on Next to precede installation process.
Step 7:
Click on Next button.
Step 8:
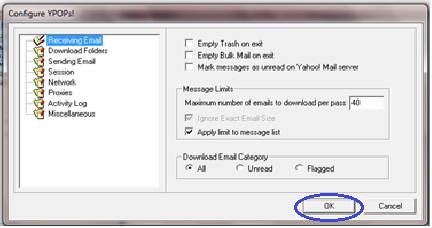
After installation, run the YPOPs and keep it with its default settings. Simply click on OK.
Step 9:
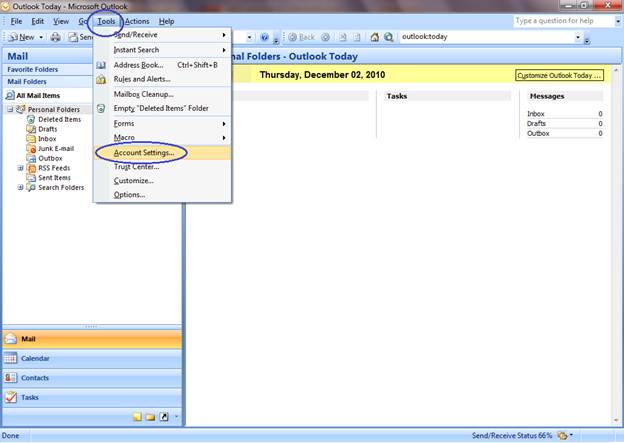
After successful installation and configuration of YPOP, to configure a new Yahoo email address, open M.S Outlook 2007 and go to Tool Menu and then click on Account Settings.
Step 10:
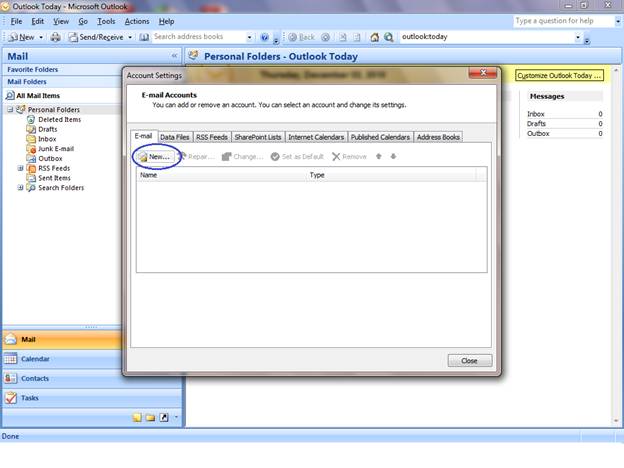
Simply click on “New” button showing as in picture.
Step 11:
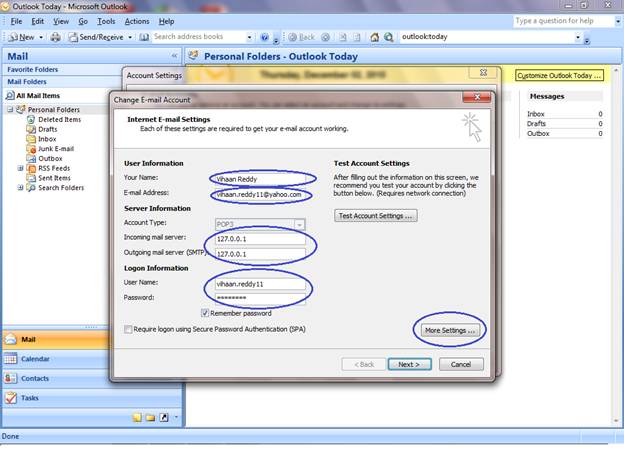
- In the first section, write complete user information step by step.
- Write your name in first text box e.g. Vihaan Reddy
- Write E-mail address e.g. vihaar.reddy11@yahoo.com
- Then in server information section, write 127.0.0.1 for both Incoming mail server and outgoing mail server (SMTP).
- In logon information section, write your yahoo Email address but without (@yahoo.com) e.g. vihaan.reddy11 and then give Yahoo password in the password field.
- After completing these steps, click on More Setting for further configuration.
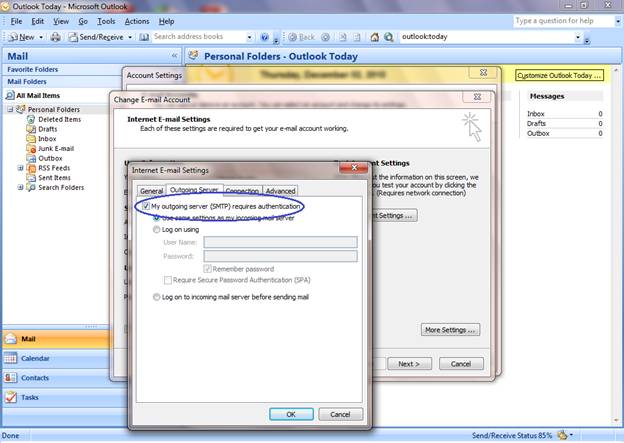
Step 12:
Click on Outgoing Sever tab button and then check the option “My outgoing server (SMTP) requires authentication”.
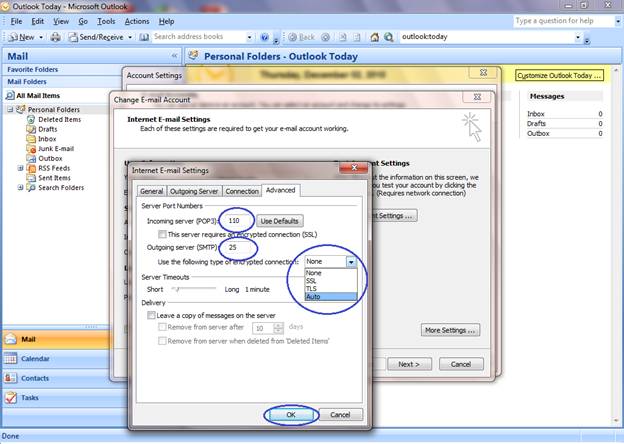
Step 13:
Click on the Advanced tab button to and keep the POP3 and SMTP settings as default, No need to change these settings. However, just click on Drop Down Menu, and Select the last option i.e. Auto. And click on OK button to finish these settings.
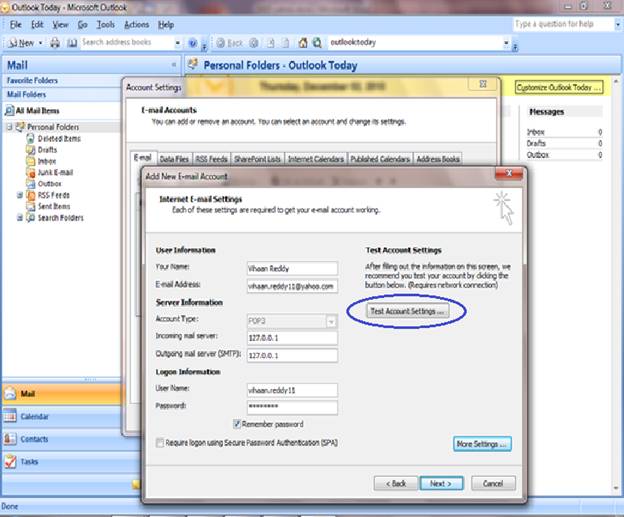
Step 14:
After configuration, testing is must, so click on “Test Account Settings” button to check the incoming and outgoing settings.
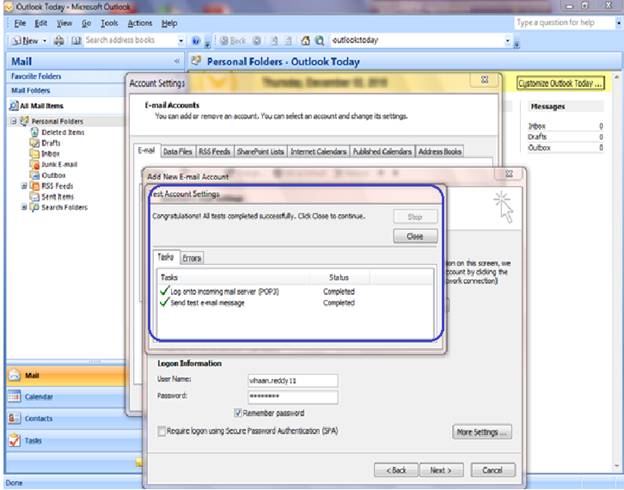
Step 15:
As in the following dialog box, log into the incoming mail server (POP3) and sending email messages are shown with Completed status, Hence all the configurations are working properly and Yahoo Email Account has been configured successfully with M.S Outlook 2007.
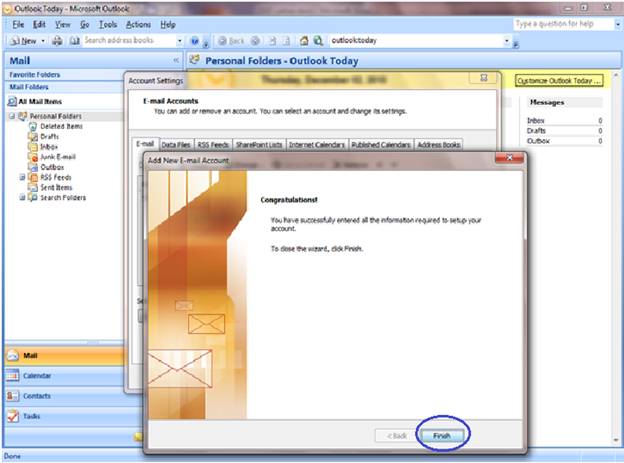
Step 16:
Click on Finish button to complete the configuration process as Congratulation messages have been prompted.
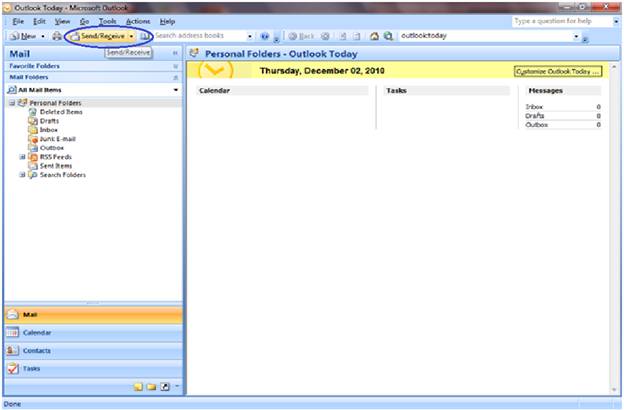
Step 17:
Click on the Send/Receive button to send and receive emails.
Step 18:
After clicking on send/receive button, following status box is showing that all messages are receiving and sending successfully.

Configuring Microsoft Outlook 2010 with Hotmail.
Microsoft has launched its latest version of M.S Office in the year 2010 with improved performance and features. Configuration of Hotmail would be covered in very simple steps as follows. We will configure a Hotmail ID i.e. vihaan.reddy11@hotmail.com
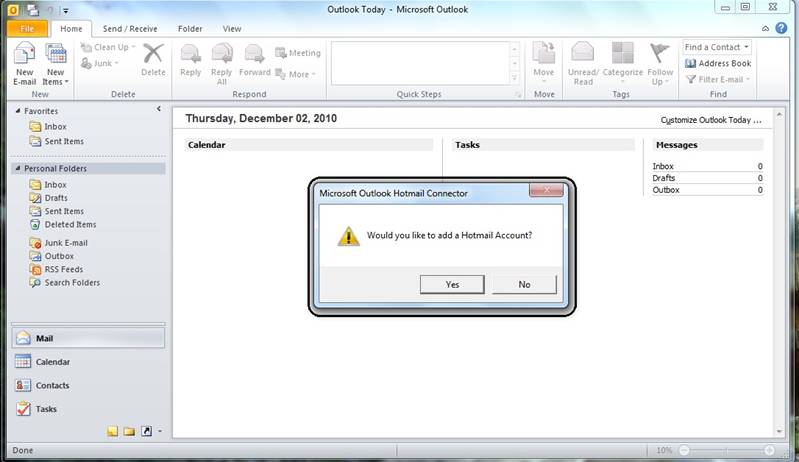
Step 1
In order to configure your Hotmail ID with M.S Outlook 2010, you are required to download M.S Outlook Hotmail Connector. Once the Add-in is successfully installed open M.S Outlook 2010. You would be prompted to add Hotmail Account as shown in the screen shot below, click Yes to proceed.
Step 2:
Enter your name, complete Hotmail ID and your password in the dialog box as shown below.

Step 3:
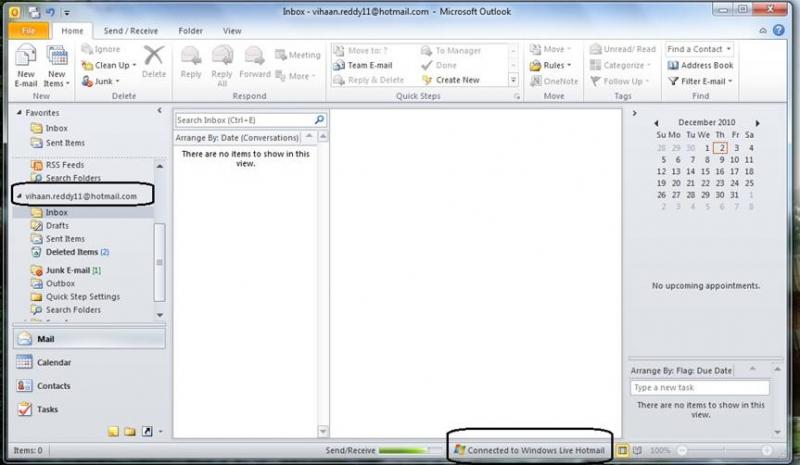
Your configuration is complete and you are successfully connected with Windows Live Hotmail as highlighted in the screen shot.
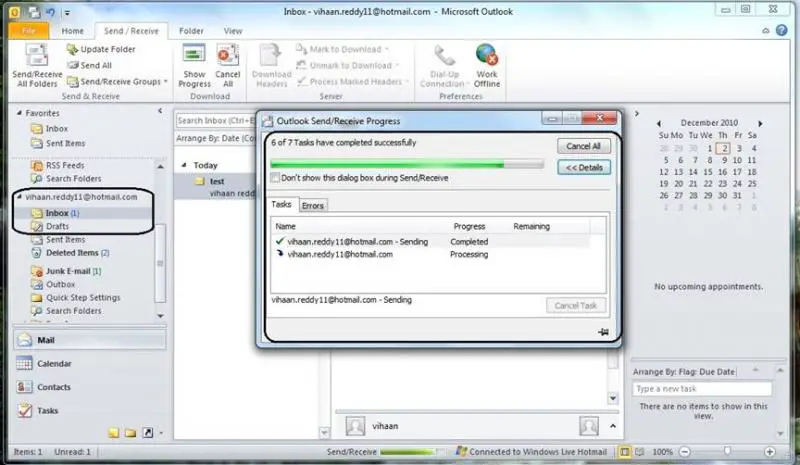
Step 4:
Final step is to send a test Email and you are done with the configuration.


