Shared Folders and Local Users in Window 7
The option of shared folders in computer management console of window 7 has made it easy to access the remote resources and showing the remote activities on that system. It manages all file sharing and set permissions as well as mange all open files and users that are connected to share files.
Shared folder has three main components.
1. Sessions
2. Open files
3. Shares
Following are the steps to share a file :
Step 1:
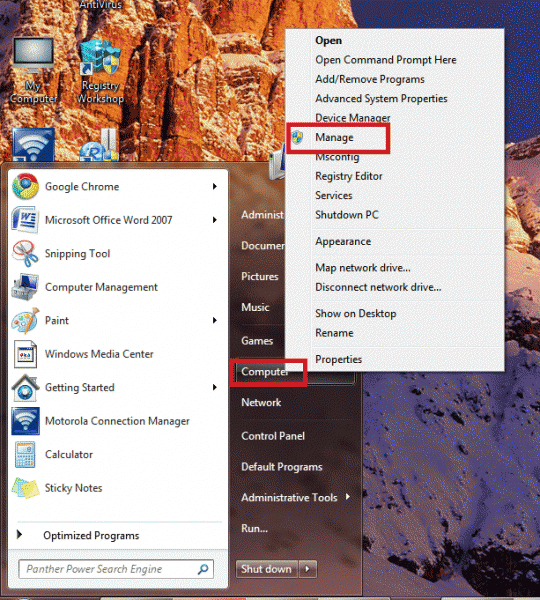
To share a file user first must go to “Computer management “console by right click on Computer icon in start menu and click on Manage.
Step 2:
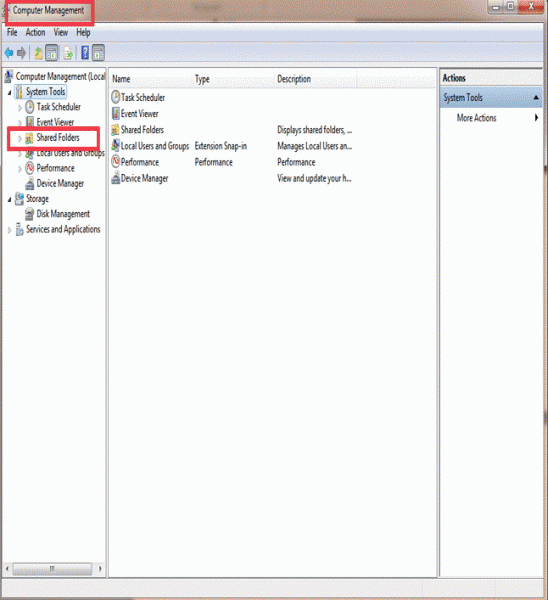
Following window will appear after step 1. This is “Computer Management” console and click on the Shared Folders button on the Right Side hierarchy of computer management console.
Step 3:
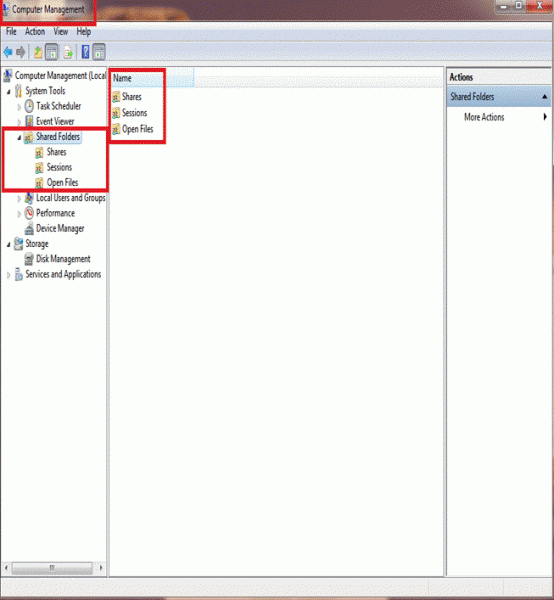
System tools contain many options i.e. Shared Folders, Event Viewer, Task Scheduler etc. Click on Shared Folders button then following window will shown.
Step 4:
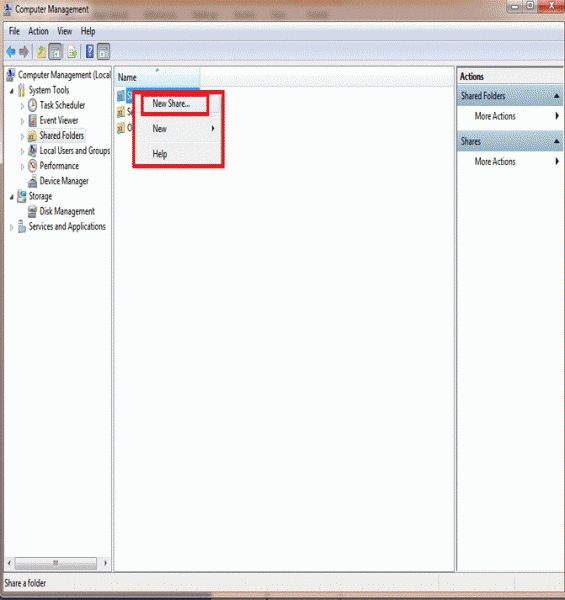
After step 3 Right Click on the Shares. An Option menu will appear containing the option of “New Share”. To start the Wizard clicks on option “New Share”.
Step 5:
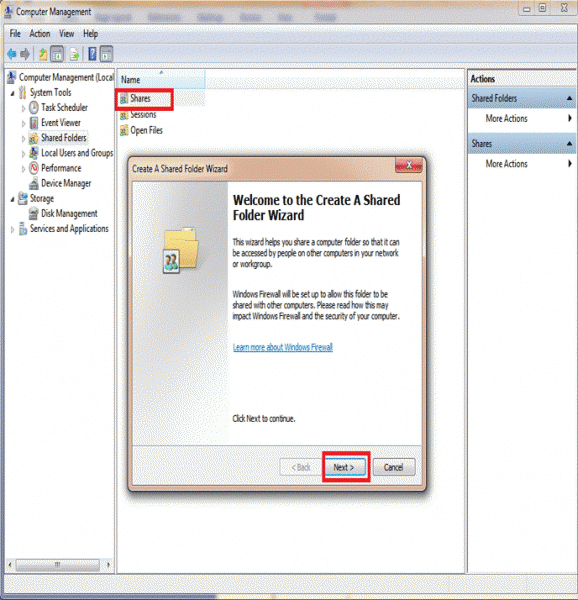
The wizard will open first window box, containing some basic information to create a Shared Folder. Click Next button to proceed.
Step 6:
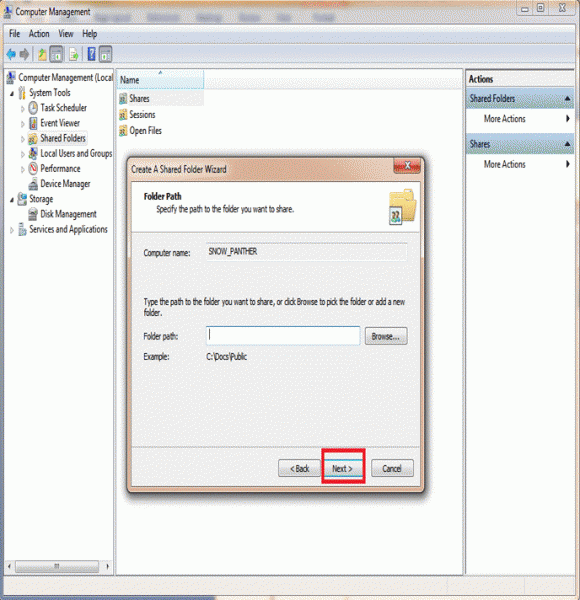
After step 5 the wizard will open 2nd window box contains Computer Name and asking for Folder Path of folder that you want to share.
You can browse the path of specific folder or write the name as example is given below the folder path. Then Click on Next button.
Step 7:
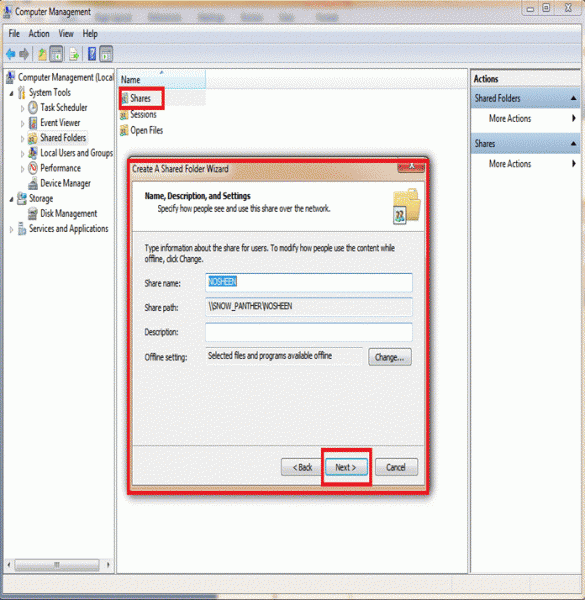
The seventh step is to give a name and description to the folder. Path of the folder is automatically generated then click Next button.
Step 8:
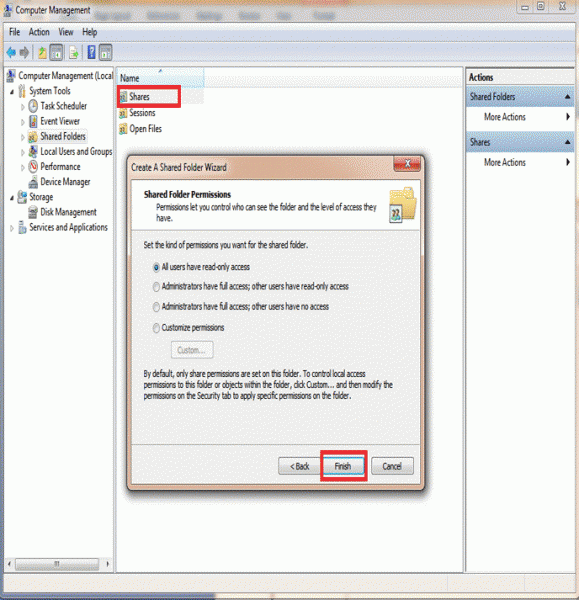
After choosing the folder to share now the last window box of wizard has some options like all users have read-only access, customize Permissions etc.
You can select any of the option according to your requirement.
After selecting the option then click finish button to end the wizard.
Sessions
Step 1:
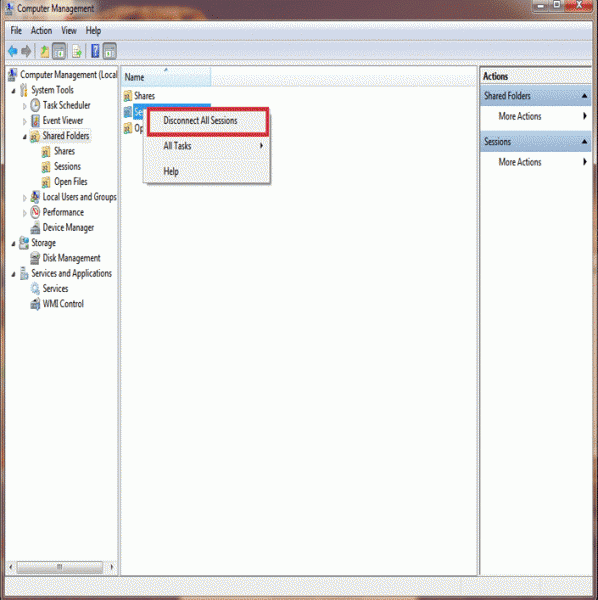
To disconnect all sessions with remote users Right Click on Sessions option of Shared Folders. An Option menu will appear contains the option “Disconnect All Sessions”.
Step 2:
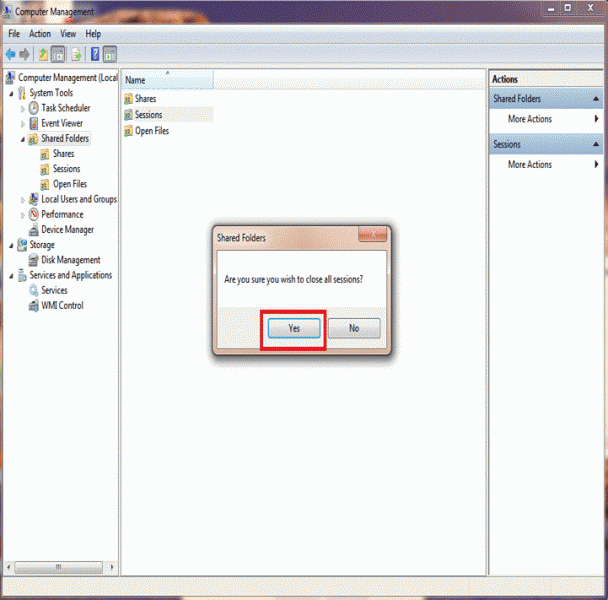
After step 1 here is dialog box to close all sessions.
You can select Yes and No according to your choice.
Local Users
Some time administrator of the system restricts the ability of some users by assigning rights to them to perform certain tasks. You can secure and manage your user’s accounts that are stored locally on your computer. Some steps are required to perform to create a user in your computer.
Step 1:
To create user you must go to “Computer management “console by right click on Computer icon in start menu and click on Manage.

Step 2:
Following window will appear after step 1, this is “Computer Management” console System tools option on the right side of the window shows some options i.e. Task Scheduler, Event Viewer, Local users and Groups etc.

Step 3
To start the wizard to create the new user Right Click the option Users. An Option menu will show the option “New User” Click on that.
Step 4:
After step 4 a wizard will open first window box that contains the following options
- User Name
- Full Name
- Description
- Password
- Confirm password
- And some options for changing the password.
After entering this information about the new user click on “Create” button.
Step 5:
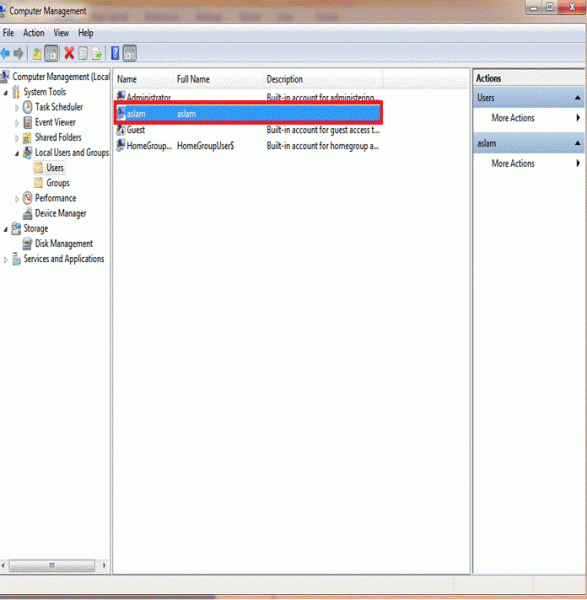
After creating the user you can check it and change some information by Double Click the option “Users”.


