Surefire Steps To Setup A Website On Cloud
Before setting up the setup of the websites on cloud, we will discuss what Cloud Flare is? Cloud Flare is a free service provided by the server which acts as a safety firewall to your website. In the process of setting up the website on cloud, basically you hide the IP address of your system from the server for the security purpose. If someone contacts you or ping your website, then he or she will see the IP address of the Cloud Flare rather than your personal IP address information. Cloud Flare can do multiple tasks, it not only protects your system, but it also reduces the bandwidth by caching up the images on your server.
How to set up cloud flare:
By setting up your website to cloud flare, you can easily protect your website. In this article I’ll explain you each and every step which will help you to understand how to set up a website on cloud.
1. Sign up at Cloudflare.com: First of all, you need to go to the website www.cloudflare.com and sign up here with your working email ID e.g [email protected]. You don’t have to make a paid account here, but the advantage of making paid account is that you will get some additional features like Better security of your website etc.. You can create your cloud flare account in such a way:
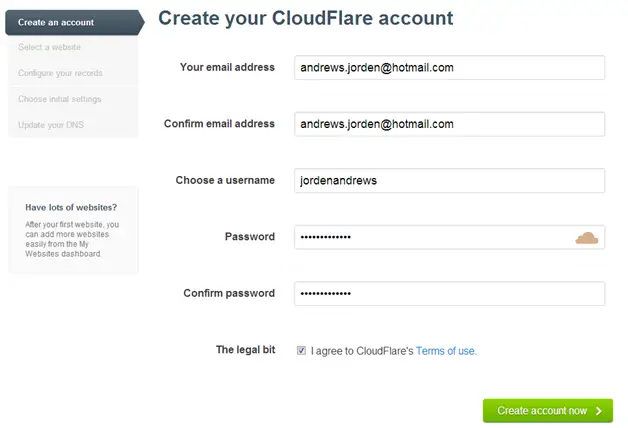
After filling all the details click on the create account now button. After clicking on this, you can start the process of setting up your website on cloud.
2. Add Domain name: Once your account will be created, it will give you the space to add a domain or website. You just need to type the name of your website here. The advantage of this cloud flare is that after adding one domain (i.e. website name) you can add more domains as well.
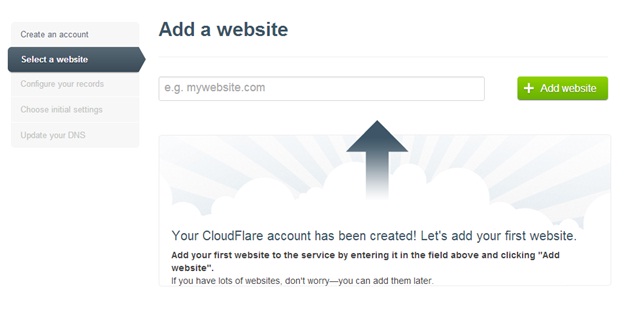
At this point, it will show you a video that will help you to understand its functionality easily. This video will take about 50 seconds. After watching the video you can continue to step 3.
3. Add DNS Information: After adding your web site to cloud flare, you need to add the DNS (domain name server, it is a 16 digit number which provides the unique IP addresses to your system) information. In most of the cases, cloud flare automatically detects its DNS information, but in some cases, you need to fill all the information. Here is an example of how to configure DNS records:
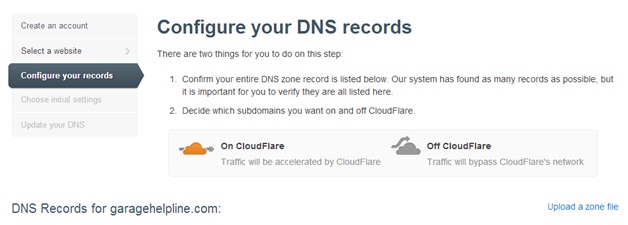


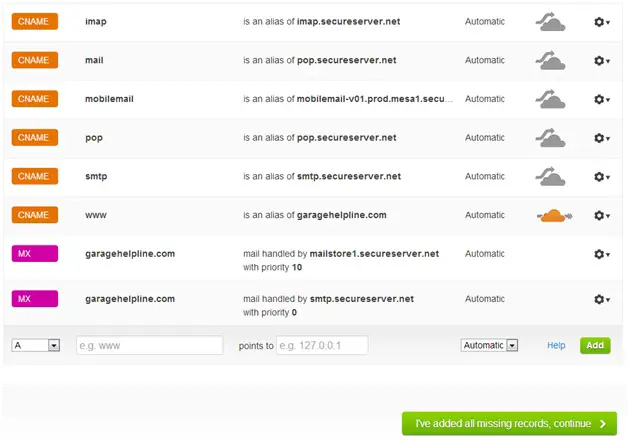
If you want that your website normally directs to your hostname, then selects ‘A’ (HOSTNAME). If you need any other types of records in your website, then you can customize all the record according to you.
Once you have finished this step, you can proceed to another step by clicking on the continue button.
Note: A Hostname is the unique name given to a computer connected to the Internet. For example, the hostname of my website is www.abcd.com. The hostname is composed of two parts. The first part is the local name, which in this case is www. The second part is the domain name which is abcd.com. When you combine the two parts you have the hostname.
4. Choose settings: In next step, you need to choose initials setting for your website.
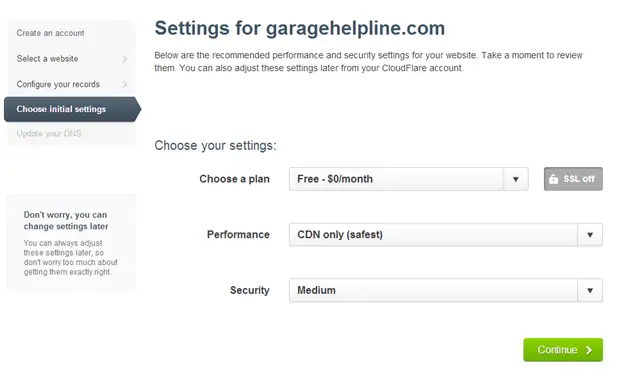
5. Edit the details: Now if everything looks right, just click on the next button and continue with your steps, you can also edit or move backward or forward to edit any setting of the server.
6. Register your Domain: After completing all these steps, it will give you the DNS records of your website which you will need to update as soon as possible. For this, you must login to register your domain points to those DNS servers.
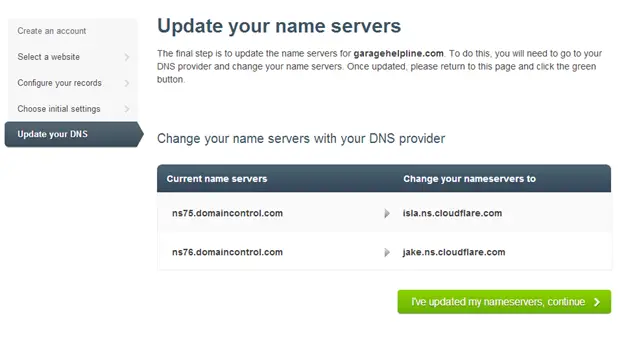
Once you have finished everything, you need to click on the bottom button to continue.
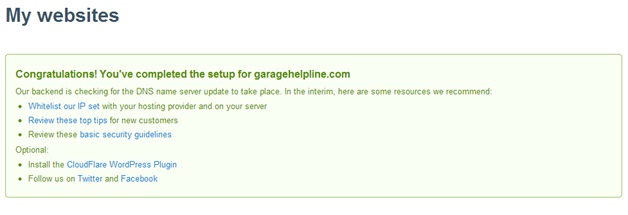
7. Add more Domains: After completing everything in this process, you can go back to the dashboard and can easily access all the above steps easily.

CONCLUSION:
The conclusion of this article is that, here I setup a website on cloud flare server that will protect you from the malware functions and provide you some important security functions.
On this server I have copied and saved all the login information and configuration setting for your future use. You just need to simply put another website and reload the configurations.


