EXCHANGE HUB
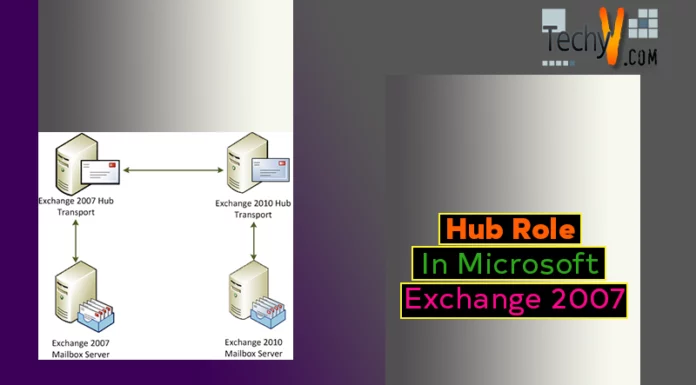
The Hub Transport server role is responsible for all message delivery regardless of whether the message is being delivered from one mailbox to another in the same mailbox database, a Mailbox server in the same Active Directory site, a server in a remote Active Directory site, or outside of the organization. At least one Hub Transport server role is required in each Active Directory site that contains a Mailbox server
Hub Transport is configured at the server and the organization workcentre area on ECM. Open Server workcentre to set Domain controller, Global Catalog, DNS both internal & external and the limit on message configuration. For configuring on the domain level you have to use organizational container.
Hub transport servers are responsible for:
Mail Flow:Hub transport servers process every message sent inside an Exchange 2007 organization before the messages are delivered to mailboxes or routed outside the organization. There are no exceptions
- Message Submission
- Message Categorization
- Message Delivery
Protection: Hub transport (and Edge) servers, are the only Exchange 2007 servers that can be configured, with anti-spam agents, to filter and cleanse the messaging stream before messages are routed to recipients.
Messaging Records Management: Hub transport servers, provides a single point of contact, for Exchange to be able to apply transport and journal rules to messages as they flow through the organization.
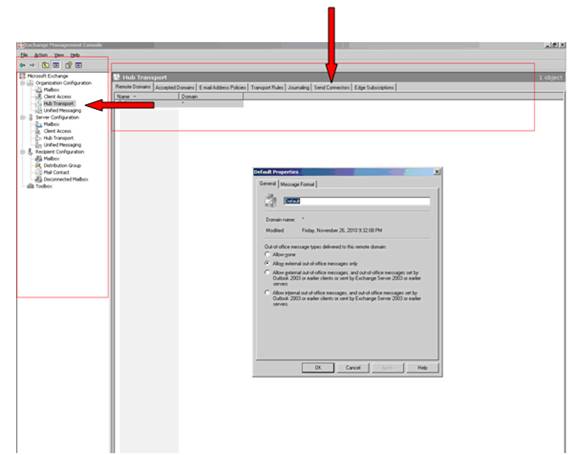
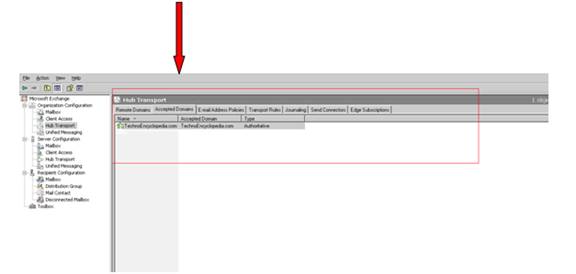
Below, the screenshot shows the configuration of the Hub at the organization and the server level.

In Exchange 2000/2003, each Exchange server had one or more SMTP virtual servers. These SMTP virtual servers received inbound mail from other servers, from outside of the organization, or from POP3/IMAP4 clients. The SMTP virtual server could be configured to host an SMTP connector for delivering messages to external SMTP hosts or it could host a routing group connector (RGC) for delivering messages to remote Exchange 2000/2003 routing groups.
Exchange Server 2007 has replaced the SMTP virtual servers and SMTP connectors with Send connectors and Receive connectors.
Although Receive connectors are configured for each server, Send connectors are organizational connectors that you can assign to a number of different Hub Transport servers. Each server also has an implicit Send connector, but that connector is used only for transferring mail to other Hub Transport servers. The implicit Send connector does not show up either in the Exchange Management Console (EMC) or when you use the Exchange Management Shell (EMS), and there are no properties that can be set for the implicit Send connector. Send connectors are managed in the EMC under the Hub Transport sub-container of the Organization Configuration work center. Figure below shows the Send Connectors tab in the results pane


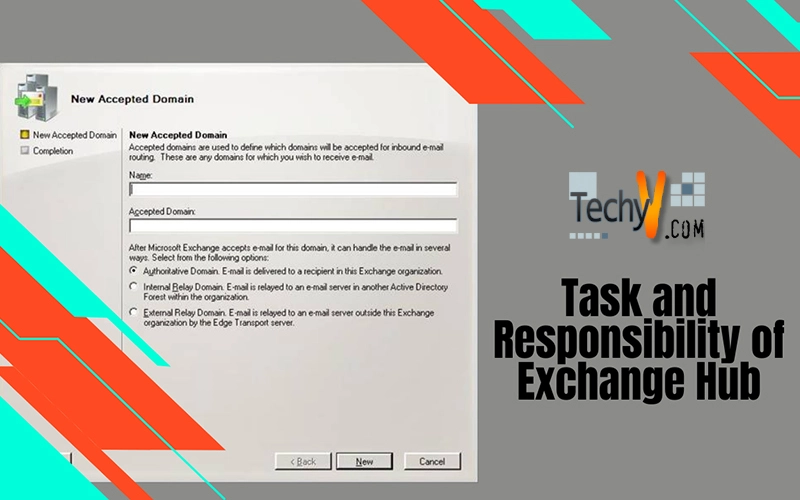
Using EMS you can configure an accepted domain by invoking the cmdlet new-AcceptDomain -Name “Techno.com” -domain type “Authoritative”. By using the same cmdlet you may also configure relay for both external & internal. Internal relay is used to route message to a different forest but within the same organization you use external relay if you are relaying messages to an Email server outside your current exchange organization.
The New Accepted Domain option is selected by right clicking in the Hub window under organization configuration
You can also use the New Accepted Domain Wizard to configure an internal relay domain and an external relay domain. The internal relay domain option is used if you want e-mail relayed to another Active Directory forest within your organization. An external relay domain is used to relay traffic to an e-mail server outside the Exchange organization.

Since Exchange Server 2007 does not have a default SMTP connector for outbound mail, you will need to create at least one Send connector. Most organizations will need to create only a single Send connector; this connector will be used to send mail to the Internet, to an Edge Transport server, or to an SMTP smart host system that will deliver mail to the Internet on behalf of the

Exchange server
Now we’ll go through an example of creating a Send connector that will be responsible for sending mail to the Internet. In the Hub Transport subcontainer of the Organization Configuration work center, make sure the Send Connectors tab is highlighted, and then click the New Send Connector task on the Actions pane. This launches the New SMTP Send Connector Wizard shown in figure above. On the Introduction page, you must provide the name of the connector and specify the intended use of the connector.
The wizard will allow you to create four types (intended use options) of Send connectors, but these are just predefined configurations and you can always change the properties of the connector you create later. The four types of Send connectors you can create are as follows:
- The Custom Send connector type allows you to manually configure all of the configuration settings at some point after the connector is created.
- The Internal Send connector type allows you to configure a connector that connects to other Hub Transport servers in your organization. Since all internal mail routing is automatic, you will usually not need to create an internal send connector.
- The Internet Send connector type is used to send mail to the Internet using DNS MX records.
- The Partner Send connector type creates a connector that will be used to send mail to specific Internet domains and will use certificate authentication and TLS encryption.
On the Address Space page of the wizard, you can specify the SMTP domains to which this Send connector will deliver e-mail. Since this connector is going to send mail to the Internet, we will use an address space of * in this example


On the Network Settings property page, you can configure smart host if you want mail to be delivered to another SMTP host for external delivery, such as with an Edge Transport server, or you can specify Use Domain Name System (DNS) “MX” Records to Route Mail Automatically. If you use DNS for mail delivery, then this Send connector will be responsible for all outbound mail delivery


The Source Server page allows you to specify the Hub Transport servers that will deliver mail for this Send connector. If you have more than one Hub Transport server, we recommend you use additional Hub Transport servers for redundancy.


Once you click the New button on the New Connector page, the EMC will execute the command necessary to create the new Send connector. The following is the EMS command that was executed:
New-SendConnector -Name ‘Internet Connector’ -Usage ‘Internet’
-AddressSpaces ‘smtp:*;1’ -DNSRoutingEnabled $true
-UseExternalDNSServersEnabled $false
-SourceTransportServers ‘Techno’

Once you have created the connector, you should make one additional configuration option. On the General property page shown for the Send connector, enter the public name of the FQDN for this server, such as mail.TechnoEncyclopedia.com. This name is the name that the Send connector uses in the EHLO or HELO command when it connects to a remote SMTP system. If you don’t specify an FQDN for the connector to use, the connector will use the default FQDN for the server. Often this is an internal name that is not recognized on the Internet. Some Internet hosts will reject a connection if the name cannot be resolved.
You will use Exchange Management Console to create an e-mail address policy that applies to a specific department within your organization. This policy will allow members of this department to use a special reply-to address that has a different suffix from other regular mail users within the organization. To complete this practice, perform the following steps:
1. Log on to the computer that you installed Exchange Server 2007 on with the Vihann Reddy user account.
2. Open Exchange Management Console.
3. Select the Hub Transport node under the Organization Configuration node.
4. Click New Accepted Domain under the Actions pane.
5. In the Name text box, enter Techno. In the Accepted domain text box, enter techno.com. Ensure that the Authoritative Domain option is selected. Verify that the settings match those in Figure and then click New. When the Accepted Domain Wizard has completed, click Finish.

To Create a E-mail Address Policy

Click on New E-mail Address Policy under the Actions pane. This will launch the New E-Mail Address Policy Wizard. In the Name text box, type Techno and ensure that all recipients’ types are selected, as shown. Click on Next.

On the Conditions page, check Recipient is in a Department. In the Step 2 box, click the word specified, which is underlined in blue. This will open the Specify

Department dialog box. Type in the department name Technical and click Add. Click OK. Verify that the Conditions dialog box appears the same as in Figure and then click Next.

On the E-Mail Addresses page, click Add.

On the SMTP E-Mail Address dialog box, select the First name.last name option.
In the E-Mail address domain drop-down, select TechnoEncyclopedia.com. Verify that the settings match those in Figure and then click OK. Click Next.
On the schedule page, ensure that the immediately option is selected and click Next.

On the New Email Address policy page, verify that the settings match those in Figure and then click New. Once the policy has been created and applied, click Finish.

The Receive connector is the point where inbound SMTP mail is received on the Hub Transport server. Receive connectors do not deliver outbound mail (unlike the Exchange 2000/2003 SMTP virtual server). Each Hub Transport server automatically has two Receive connectors. These are the Default connector and the Client connector as shown in the above figure on the Exchange Management Console and the Server Configuration work center. In the Hub Transport subcontainer, you can see each server that hosts the Hub Transport role. The Receive connectors for server Techno is given below

The properties of the Client Techno Receive connector is shown above, specifically the Network property page of the Receive connector is shown. Notice that the Client Receive connector listens on port number 587, not port 25. The Client Receive connector is intended for receiving mail from non-MAPI client such as POP3 and IMAP4 clients. You would, of course, have to change the non-MAPI client’s outbound SMTP port in order to use this connector.

The Default Receive connector is used to receive inbound SMTP mail from other Exchange 2007 Hub Transport servers in the organization.

In figure below, the Permissions Groups properties of the Default Techno Receive connector are shown. These are the default permissions for the Default Receive connector

The below figure represent default receive connector for Techno server seen from the server configuration workspace. Note that the default port here is 25


