Task Scheduler in Microsoft Windows 7
It is used to run Windows programs automatically. If the user wants to run a program automatically while working with Windows 7, he can choose its Task Scheduler feature to do so.
Task scheduler is a very efficient feature and will not let the user down. It also keeps assisting the user. The user may forget a particular task, so he should create required tasks with Task Scheduler. If the user wants to clean the disk on daily routine or weekly, he may create a task schedule with Task Scheduler. The following are the step by step procedure to create a task with Task Scheduler in Windows 7.
Step 1:
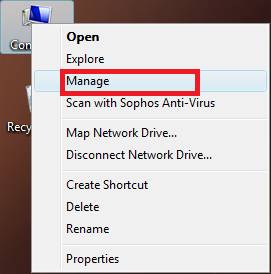
To open Task Scheduler wizard, a user must go first to “Computer Management” console by right-clickingon theComputer Icon and clicking on Manage.
Step 2:
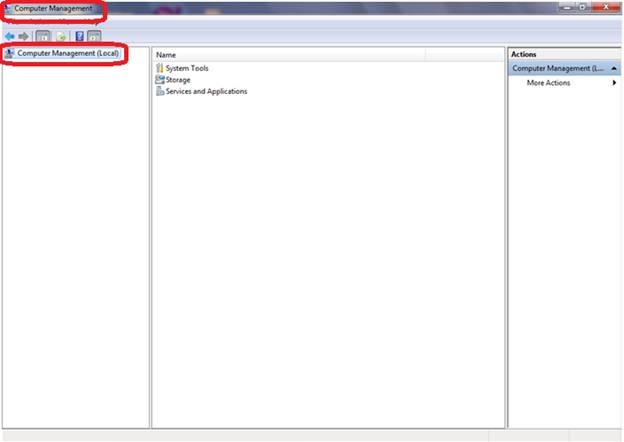
The following window will be appearing after step 1, it is the Computer Management console and click onComputer Management (Local) button.
Step 3:
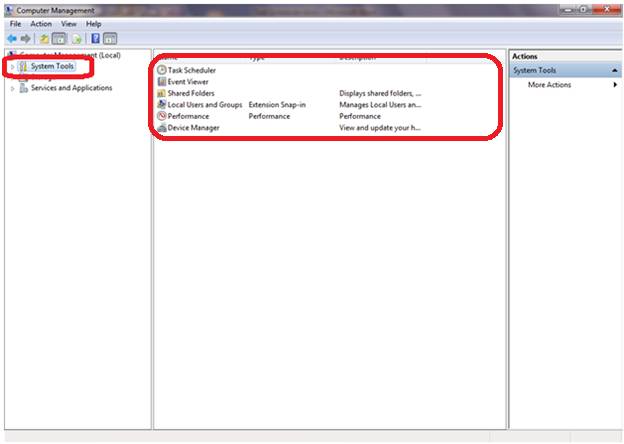
System Toolscontains many options i.e. Task Scheduler, Event Viewer, Shared Folders, and etc.
Step 4:
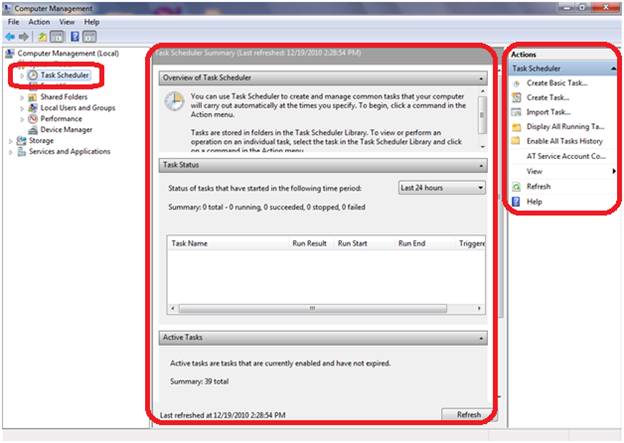
Clickon Task Scheduler button to view its detailed status (if it already exists). On the right side of the window, there is an option to Create Basic Task i.e. create a task schedule.
Step 5:
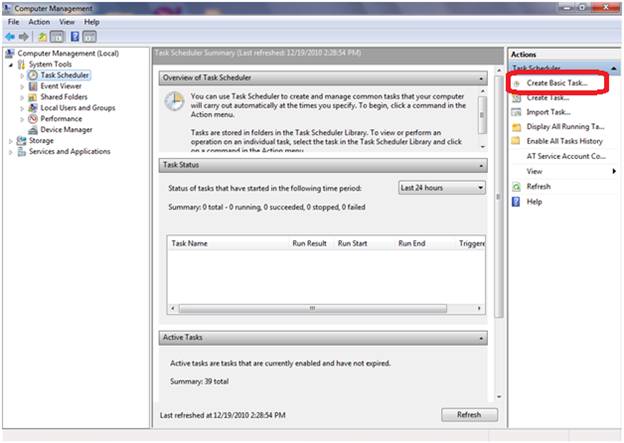
To start wizard, click on Create Basic Task option.
Step 6:
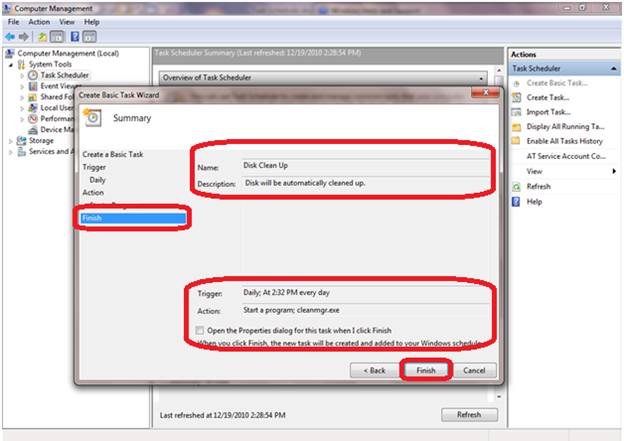
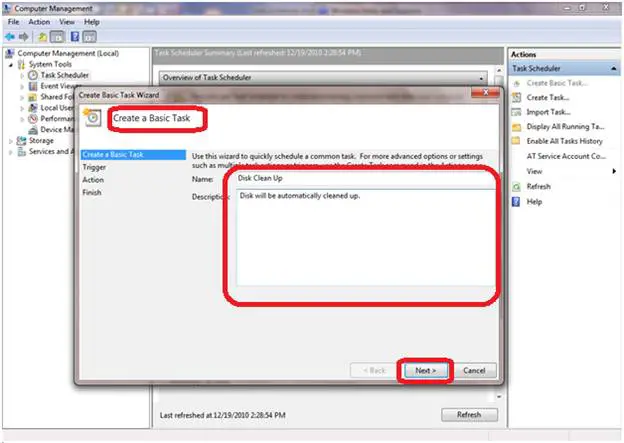
The wizard will open first a window box, asking for task name and its description (optional). As we are going to run disk clean up application, so in name write, Disc Clean Up and click on Next button.(User may write anything in this box e.g. Cleanup Disc, Disc Cleanup Mission, etc.)
Step 7:
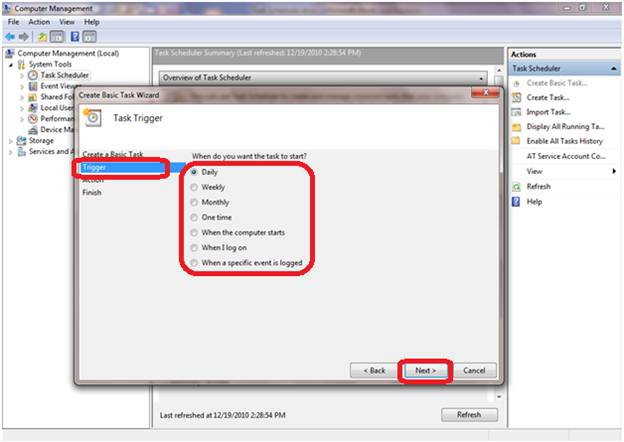
The sixth step is to create a Trigger, it will run automatically the task on chosen option. User may want to run a task on daily basis, weekly basis, monthly basis, one time, when the computer starts, when he logs on, or when a specific event is logged. Here the Daily option is selected. And click the Next button.
Step 8:
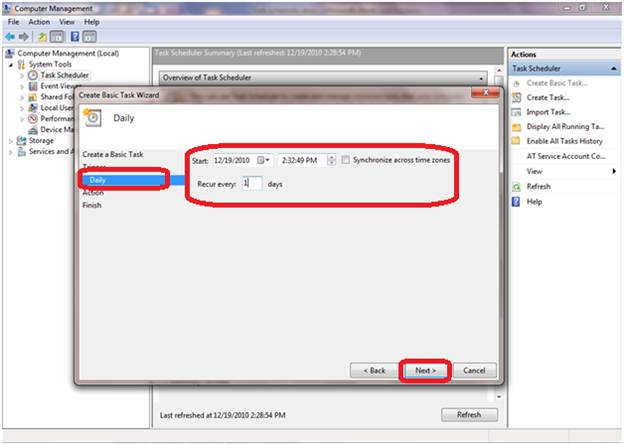
After choosing the Daily option, user can select start data and time. Click on Next button to proceed.
Step 9:
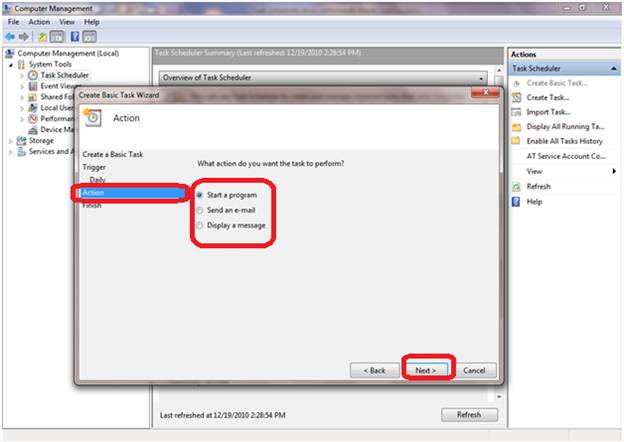
Now it’s time to select the task, in action options, there are three further Tasks Head i.e. start a program, send an e-mail, and display a message. So the user has to click on Start a program in order to run the disk clean up program and then click on theNext button.
Step 10:
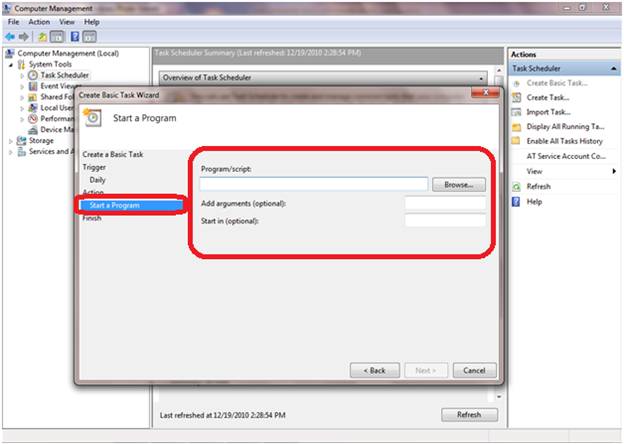
To start a program, a window will appear with a browse button so that the user can select a program to run.
Step 11:
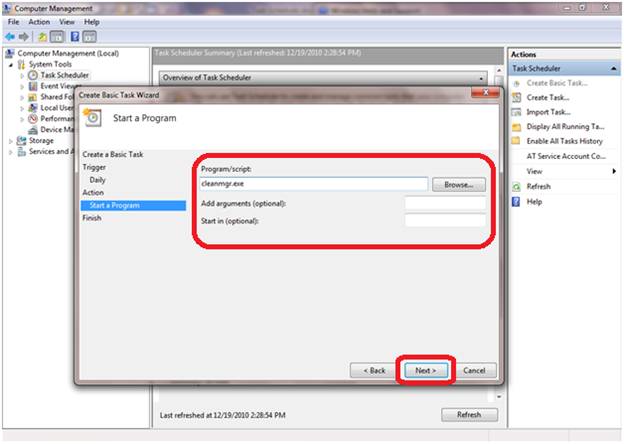
User may select the required program with browse button giving the path of a program, and he also can write manually the name of the program with .exe extension. To start disc clean up, user can type cleanmgr.exe, and click on theNext button.
Step 12:
Final summary will appear with task name, description, trigger (daily, time and date);user can make some changes (if required) by going back with theBack button. If he/she is fine with everything, he/she can click on theFinish button to end the wizard.
