What is Terminal Services (TS)?
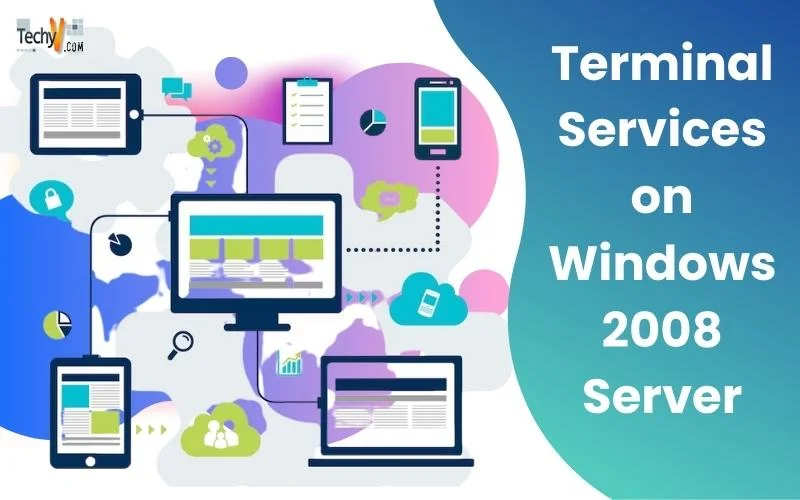
Terminal Services enables you to connect to a remote computer (server/client) from your local area network (LAN). Once connected, we can run the programs located on the remote machine.
TS server in Windows 2008 Server allows user access to programs that are installed on a terminal server. Using Remote desktop connection, a user can take full desktop of the remote system. This helps a user to seamlessly connect to any computer on their LAN or the Internet. When a user interacts with a program on a terminal server, the program actually runs from the server.
Why use Terminal Services?
Since programs are deployed from the server, it leads to the following:
- Programs are deployed from the terminal server and never installed on the user’s desktop. This helps manage the programs easily from a central location.
- Frequently updated Programs can be deployed and published on the terminal server, resulting in the reduction of cost and manpower hours, which leads to ease in managing etc.
- Terminal services reduce the network bandwidth over the network.
- Programs that are used by third party vendors or external clients can be published on the Terminal server and prevents external clients to access the corporate network.
Components of Terminal Services
Terminal Server: Enables a server to host windows based programs and provides full desktop control using remote desktop connection and remote applications.
- TS Licensing: Terminal Server Licensing controls the client access licenses (TS CALS), monitor the availability of the TS CALS.
- TS Web Access: enables user to access remote desktop connection to the terminal server via a website.
- TS Gateway: enables the access of resources to authorized users.
- TS Session Broker: controls the session load balancing between terminal servers.
Terminal Services installation consists of two parts.
Installation is done in two steps:
- Install TS on the System.
- Install TS License Manager.
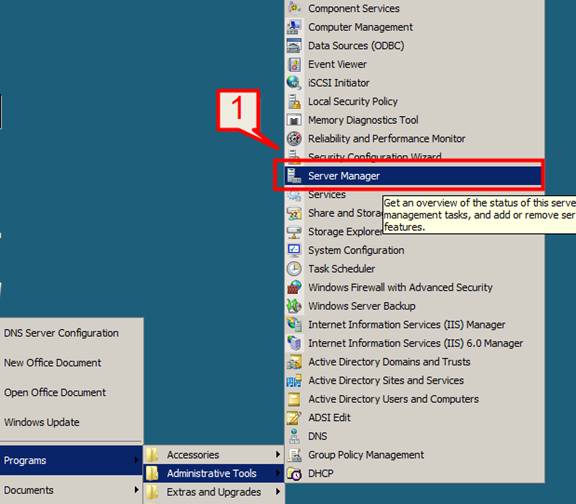
#1.Go to Start->Programs->Administrative Tools->Server Manager
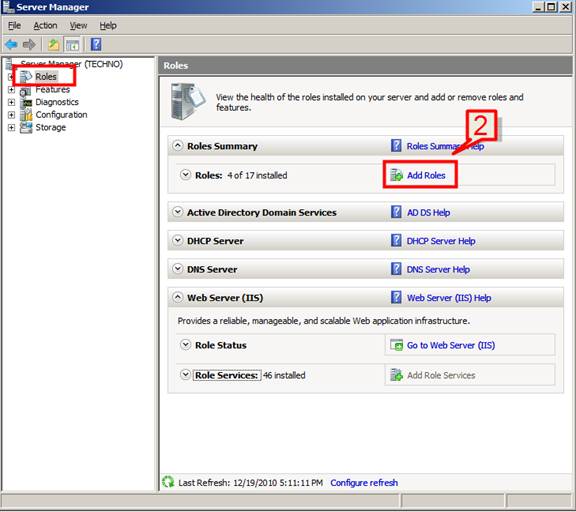
#2.Select the Roles on the left Roles node window and on right pane console window click Add Roles
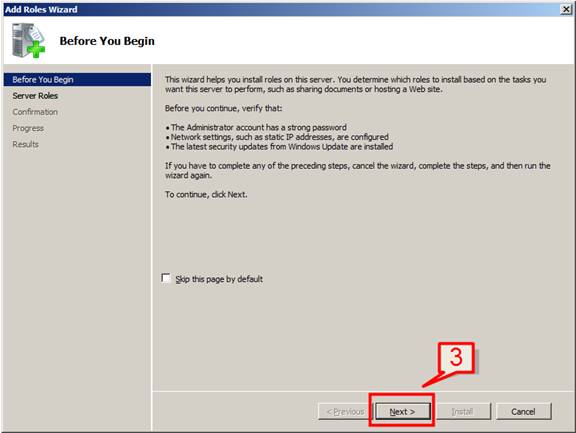
#3. On the Add roles wizard Begin installation window click next
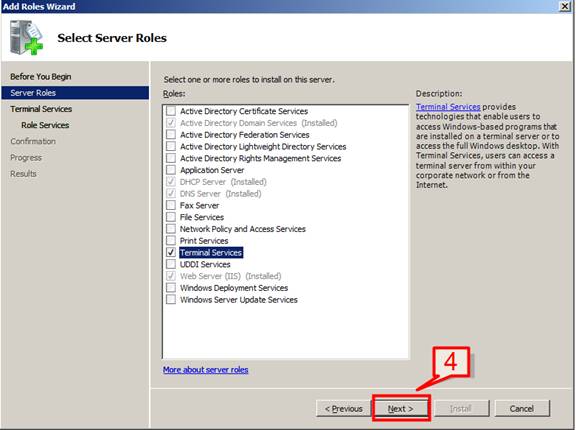
#4. Select a check on Terminal Services checkbox on the Server Roles window and click Next.
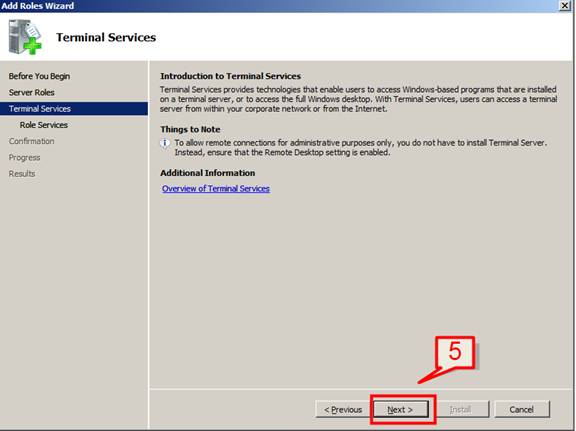
#5.The Add Roles wizard will display Terminal Services window which will display a short introduction on what terminal services is all about. Click next
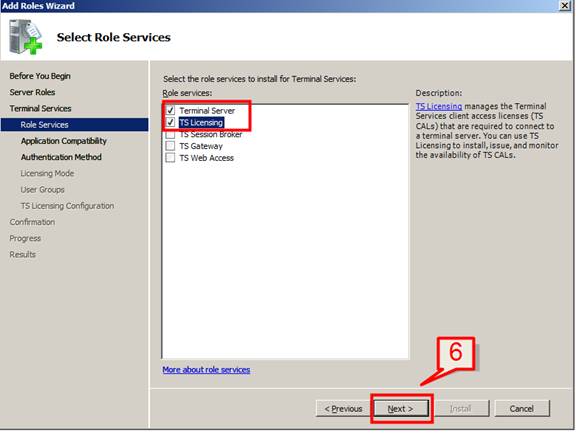
#6. On the next screen select the both TS Licensing and TS and click Next
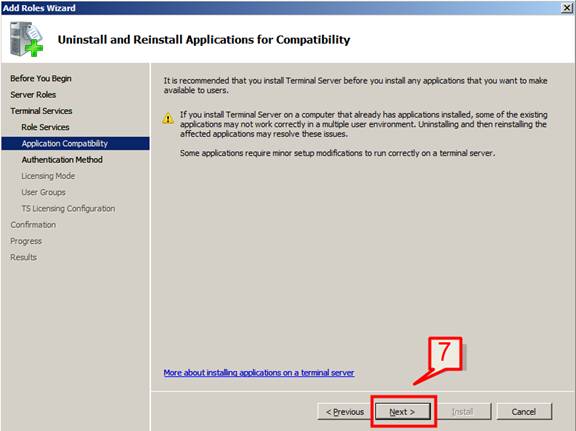
#7. On the next Add Roles wizard page click next
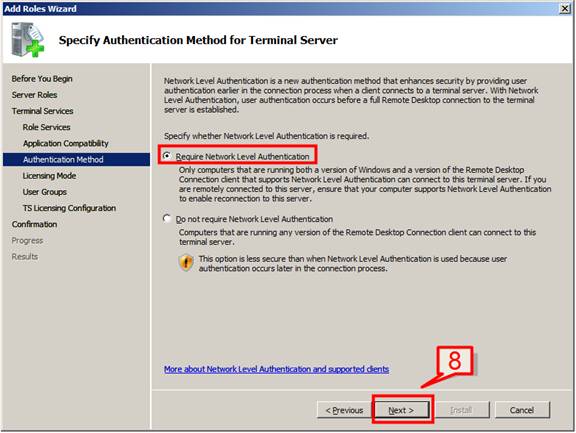
#8. Choose the first Network Level Authentication option on the next installation window
Note: This option will not work on Windows XP Service Pack 2 and lower. Also this is a secure option to select as user need to login with their login authentication before a full remote desktop connection or when connecting to a terminal server.
#9. On the next installation screen, choose the first option Configure later and click next.
We will cover TS Licensing mode when we configure terminal server.
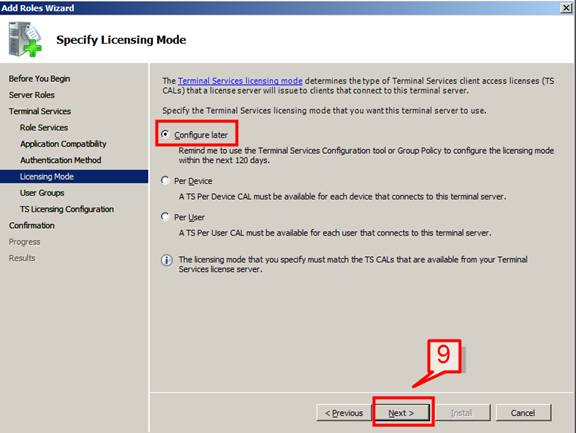
#10. Leave the default option on the next Add Roles wizard page. We can also add and remove users and users groups from this screen.
Click next
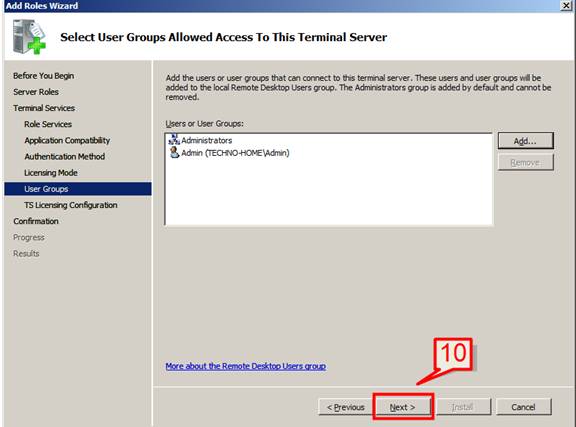
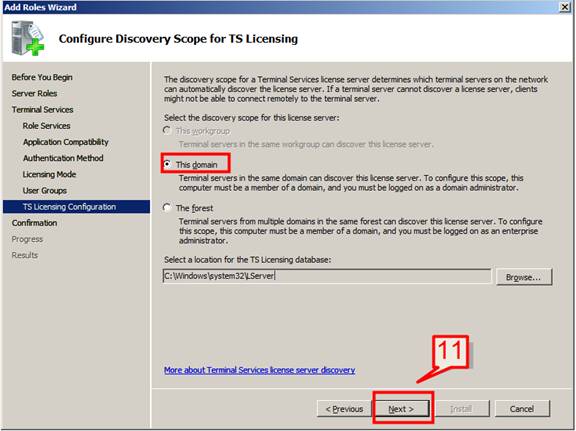
#11. On the next installation page select this domain if the organization has only one domain in place. Select the second option (i.e. Forest) if you have more than one domain in your network.
The TS licensing Database file default will copy to C:Windowssystem32LServer folder. In case you need this to be placed on some other location, select the Browse option and choose a folder.
Choose the default and click next
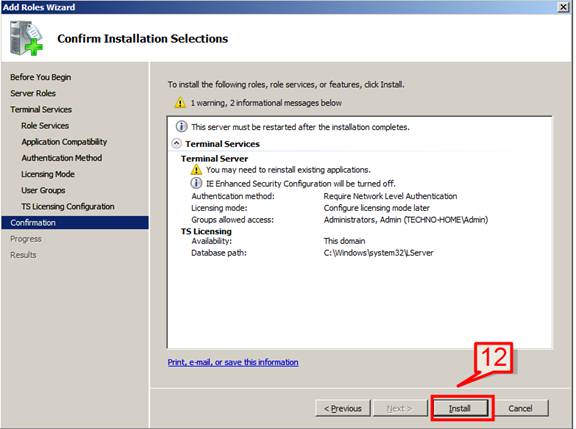
#12. Review the option that you selected, read about the information and warning messages on the Confirm Installation Selections window and click install
#13. Installation will then start for Terminal services.
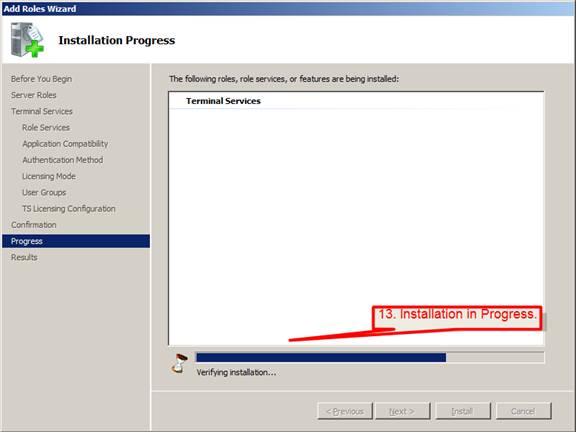
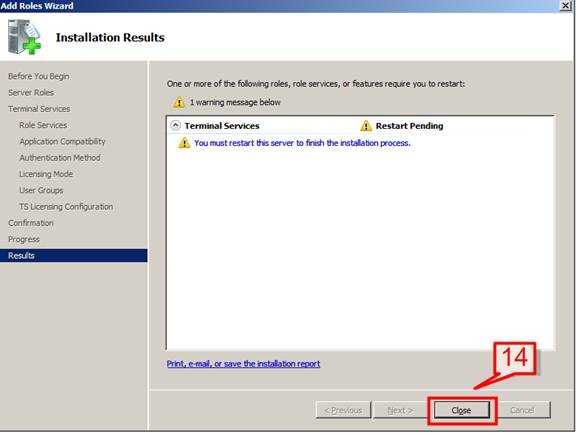
#14.After installation is done a warning will pop up to reboot the system to finish the installation.
Don’t reboot now and click close
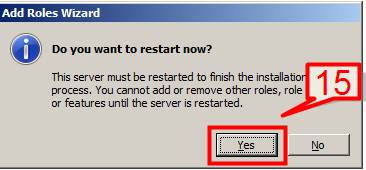
#15. Click Yes to reboot the server now.
#16.The TS installation will resume after the system is restarted.
Click close once installation is done.
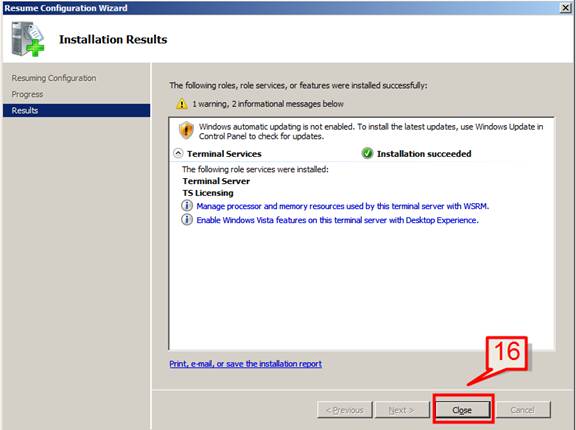
While the installation is done but the TS licensing configuration is not yet done which we will do now.
TS Licensing mode Configuration
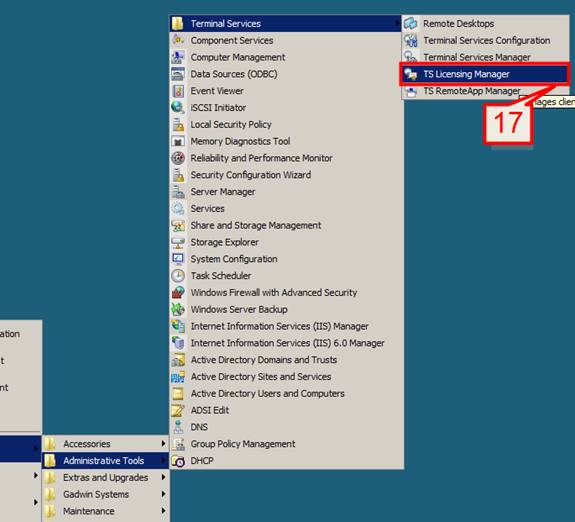
#17.Open Start -> Programs -> Administrative Tools ->Terminal Services -> TS Licensing Manager
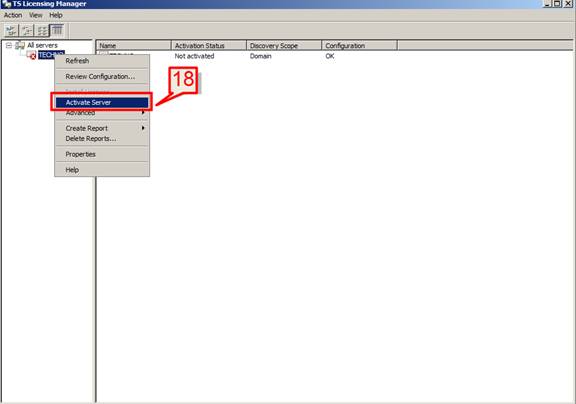
#18.The TS license manager will display NOT ACTIVATED,
Open the Terminal Server Licensing Manager MMC, select server on the left pane->right click on server name->Click Activate Server.
Note: The activation process below is the procedure that one can follow to activate the license manager and actually will differ from case to case as it depends on the company’s type of license agreement.
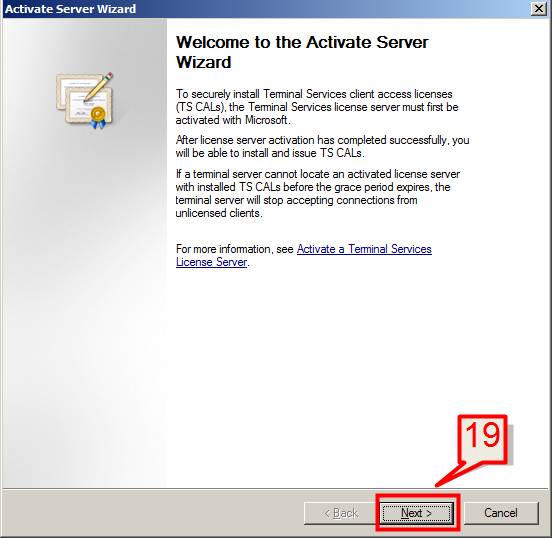
#19. Click Next on Activate Server Wizard first page
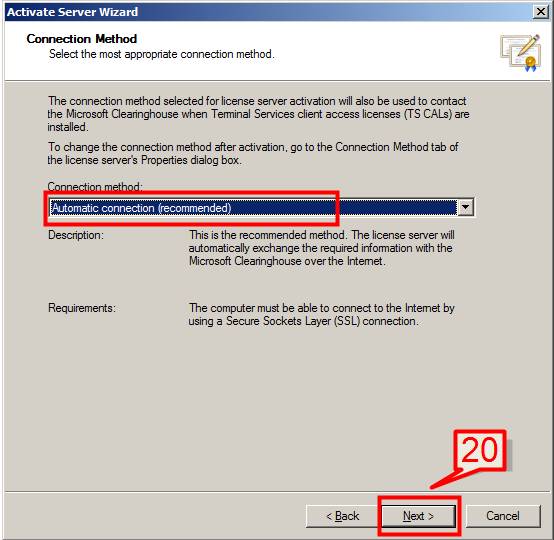
#20. On the next page a drop down menu option will appear. Choose Automatic Connection (recommended) and Click Next.
#21.The wizard will then connect to Microsoft (Internet connection is required).
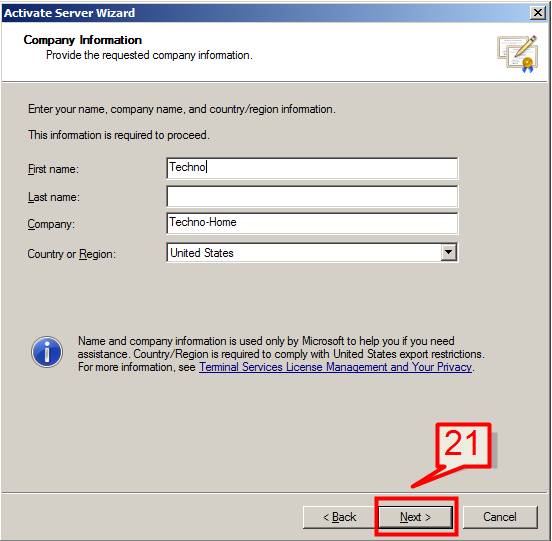
Provide the company information details information such as First name, Last name, Company, region on next configuration page and click next
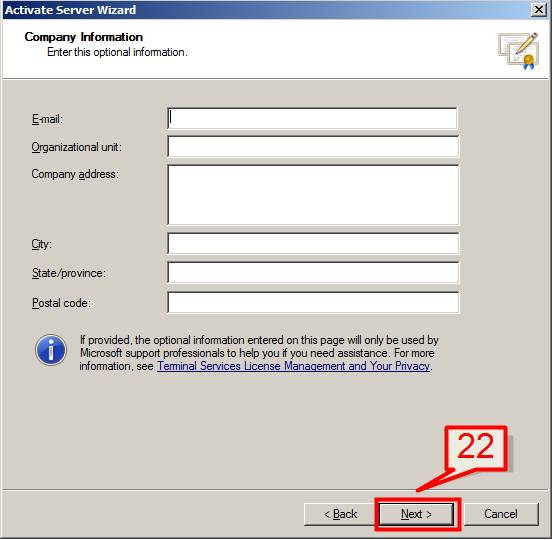
#22.Provide the other information of your company and click next
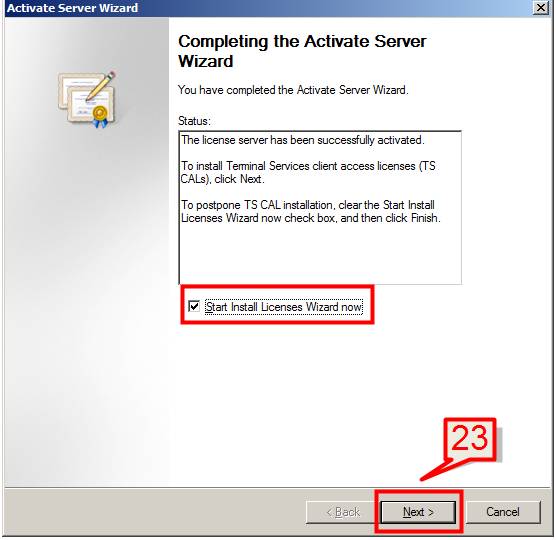
#23. On the next screen check the option Start Install Licenses Wizard and click Next.
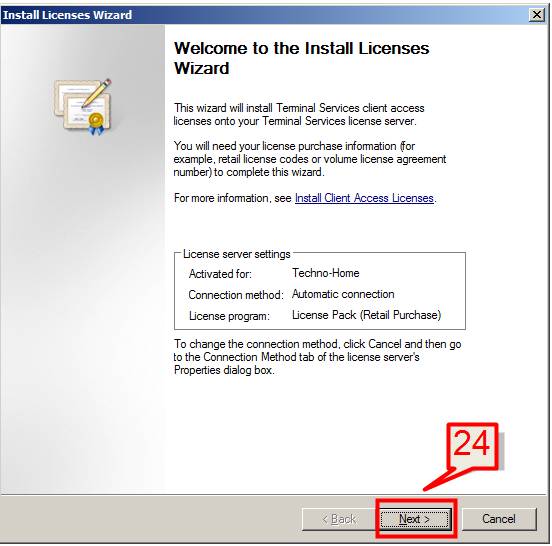
#24.On the Welcome to the Install Licenses Wizard click Next
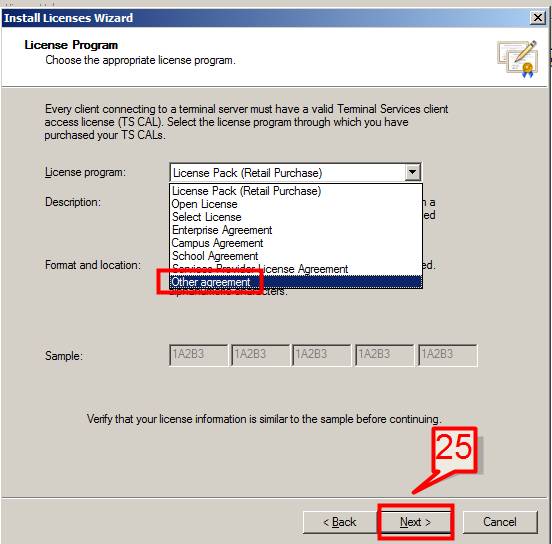
#25.On next License program window select the type of License program. For this tutorial we will choose other agreement.
Click next
PS: For Corporate Environment, choose the appropriate license program to proceed for further steps.
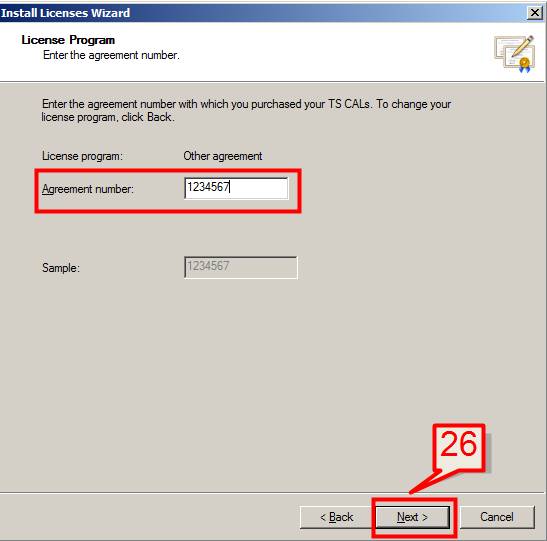
#26. Enter the Agreement number for the chosen program type on the License Program page,
Click Next.
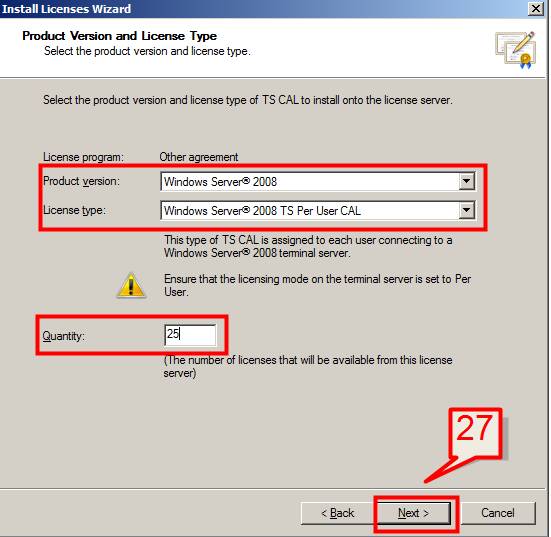
#27. On the next configuration window select the Product Version as Windows Server 2008, License Type as per user CAL and Quantity as per your company’s need and Click next
License Wizard will then start installation, Click Finish to complete installing TS licensing.
TS Licensing Mode Configuration
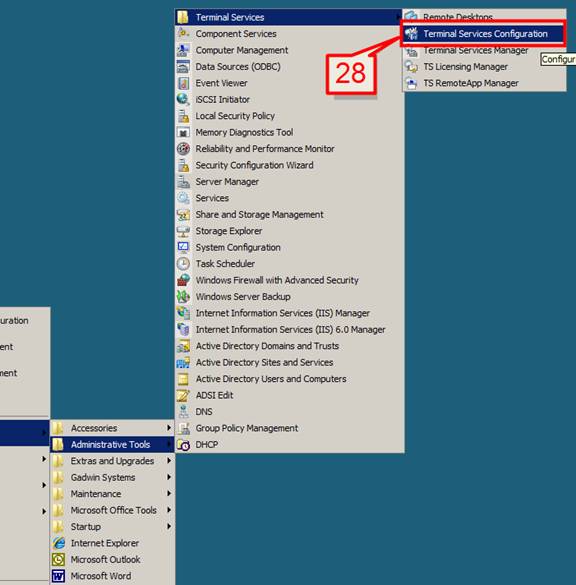
#28.Select Start->Programs->Administrative Tools->Terminal Services-> TS Configuration
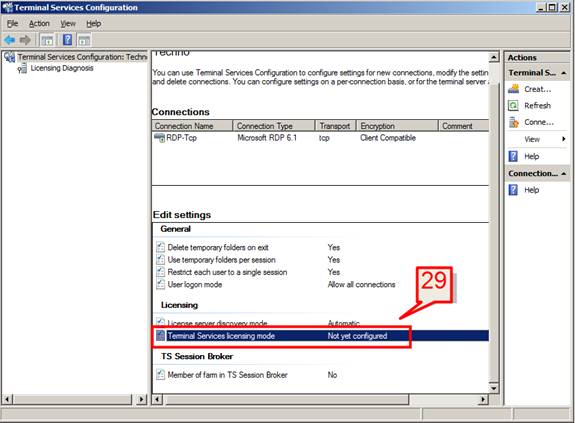
#29. TS Licensing mode is not configured yet. Select and double click on the TS licensing mode on the Edit Settings section.
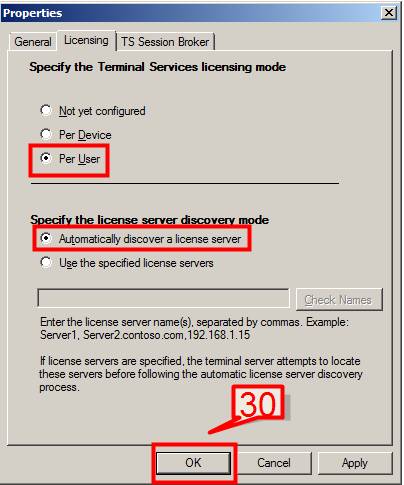
#30. On the Licensing tab choose Per User and choose automatically discover a license server option as per below screen.
Once the configurations are done click on OK.
