Introduction
The .NET Framework is a collection of tools and libraries that help applications run on Windows. Microsoft initially developed it, but it’s now an open-source project. Here’s how you can troubleshoot the .NET Framework and repair it:
1. Run System File Checker
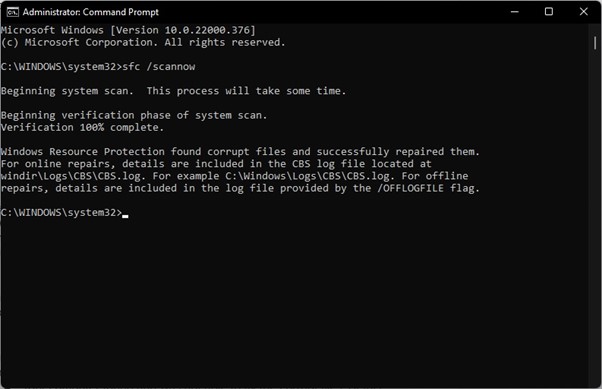
System File Checker is a windows utility that allows the users to scan for and restore corruptions in Windows system files & restore corrupted files. It can fix problems with missing or corrupted DLL, SYS, and OCX files. Suppose you want to repair .NET Framework on your computer. In that case, you must run this utility to fix the problem because it will help you eliminate errors related to .NET Framework.
2. Run DISM Tool
- To run the DISM tool, you need to be an administrator and know your Windows version. It would be best to see the directory path where your .NET Framework is on your system.
- To repair the .NET Framework, use this command:
- Dism /online /Cleanup-image /ScanHealth
- If you are using Windows 10, then there is no need for a reboot after running this command because it will be performed automatically as part of its scan process. If you are using another version of Windows or have not rebooted since installing new updates in recent days, then follow these steps:
3. Enable NET Framework Using Control Panel
- If you are using Windows 7 or 8, the easiest way to enable NET Framework 3.5 is through Control Panel.
- Click on the Start menu and select Control Panel from right-click menu.
- When Control Panel opens, select the Programs and Features option from the left side panel of the window.
- Under the “Programs” section, click Turn Windows features on or off link (if this isn’t visible, then click Change settings link instead)
- Choose .NET Framework version 3, which opens up another window like the one below.
4. Reset Winsock
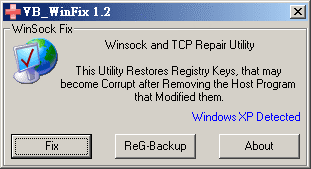
- Winsock is a network protocol that allows applications to communicate with one another. That is in many different ways, but the most common use case is sending data to the Internet through your computer’s Internet connection.
- If you have a problem with Winsock, there are several ways to repair it:
- Stop all Winsock programs (such as Skype or Internet Explorer). It will temporarily block any running processes from using Winsock and replace it with another application that does not use it. If multiple programs have issues using this component, try resetting them all at once by uninstalling them from
- Control Panel > Add/Remove Programs > Change/Remove Programs tab and then reinstall fresh copies from their manufacturer website; this may help restore functionality in cases where none of these troubleshooting steps work independently.
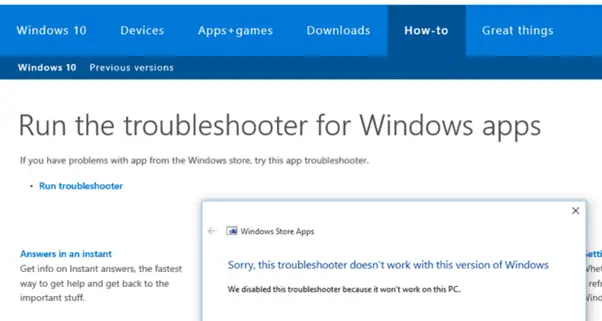
5. Run Troubleshooter
If you have already tried to repair the .NET Framework and have found that it has not fixed your issue, this troubleshooting tool can help. It will detect any errors or missing files and then recommend setting them. You’ll need to run this tool as an administrator for it to work correctly. After running the troubleshooter, you can review its results before making any changes or restarting your computer if necessary
6. Reinstall NET Framework Using Command Prompt
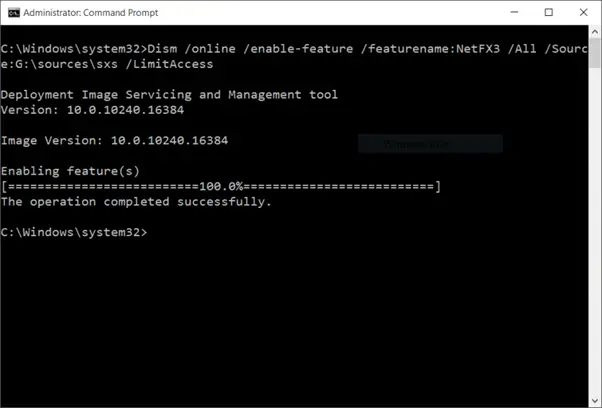
- Reinstall NET Framework using Command Prompt
- Open the Command Prompt (CMD) and type the following command:
- netfx4 /full
- It will uninstall the .NET framework and then reinstall it.
7. Reinstall NET Framework Using CCleaner
Reinstall NET Framework using CCleaner. This tool is excellent for cleaning up leftover files and ensuring that your computer has no unnecessary junk on its hard drive. You can download this program from Microsoft here: http://www-304.ibm.com/pc/support/site/us/en/. After downloading it, open up the application and click on Tools > Startup > Uncheck All Items (or whatever other options you want). Then click Run Cleaner!
8. Uninstall And Reinstall NET Framework Manually
- When you’ve tried all the other solutions, it’s time to give this a shot.
- Uninstall .NET Framework manually by following these steps:
- Open Windows Control Panel and select Programs > Uninstall a program (or Programs and Features).
- Locate .NET Framework and click Uninstall on it. If prompted, click I accept before proceeding with the uninstallation process.
9. Remove And Reinstall The Visual C++ Redistributable Package
- To uninstall the Visual C++ Redistributable Package, follow these steps:
- Click on Start and then Control Panel.
- Type “Uninstall” and press Enter on your keyboard.
- In the Uninstall list section of the Control Panel, select Microsoft Visual C++ 2010 Redistributable Package x86 x64 Edition from there and click on it to uninstall it from your system (if you have already installed any other version of this package).
- If it does not appear in this list, try searching for Microsoft Visual C++ 2010. Redistributable Package x86 Enterprise Edition instead.
- It will give you better results when removing it from your computer’s registry entries and folders within Windows directories like the Program Files directory, where all application-related files reside.
- However, are there any other versions installed on your PC? In that case, they might be under one category called Other Products instead, so make sure that all such similar entries are before proceeding further along with step 3 below!
10. Scan For Malware Or Virus Infection
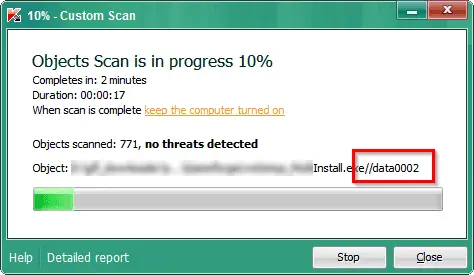
- Scan for Malware Or Virus Infection
- If you have good antivirus software installed on your PC, then it can scan for malware and virus infections. If not, then you can use antivirus software such as AVG AntiVirus Basic or Norton System Works Free Edition to check the system files for any malicious code that may be present in them. Also, some viruses try to hide from being detected by using stealth techniques like hiding themselves deep inside another application’s executable file or encrypting their data before sending it over the network.
Conclusion
We hope that you find this article helpful and that it helps you fix your .NET Framework issues.


