What is Virtual Private Network (VPN)?
VPN enables you to connect network resources from one network to another. Through VPN, we can create a secured link between a private network (such as corporate office’s network) through a public network (Internet). It uses particular TCP/IP protocol called Tunneling method, which provides similar protection and characteristics with a private network through Internet or through another public network. The information is transmitted using a routing infrastructure.
Using VPN and Internet connection, you can login to your secured private network anywhere. VPN also allows companies to link to other company’s network or to its other remote branches’ network.
Types of VPN connections:
- Remote Access Virtual Private Network: enables the user to access the remote server from the private network from home using public network.
- Site-to-site VPN: This is also called as router-to-router Virtual Private Network connections. This allows the companies to use routed methodology to connect to its own branch offices located in other regions or other companies over public network.
How VPN works?
With site-to-site VPN, a routed connectivity is established to the system by VPN server. The VPN client (calling router) acknowledges itself to the VPN server (answering router) and on a mutual authentication, the VPN server confirm itself to the VPN client. This creates a two-way authentication and data in form of packets are sent from both servers and client router.
Components of a VPN
- VPN Server: Server that host Routing and Remote Access, configures the server as a router, sets the connection properties for the client, etc.
- VPN Client: Client computer must be configured to access a VPN connection from the server.
- VPN connection: VPN uses Remote Access connection or Site-to-site connection mechanism.
- VPN Tunneling Protocol: VPN uses Point-to-Point Tunneling Protocol (PPTP) protocol to encapsulate IP packets over a public network. VPN also uses other tunneling protocol such as Layer Two Tunneling Protocol (L2TP) and Secure Socket Tunneling Protocol (SSTP).
Installation of VPN on Windows 2008 Server
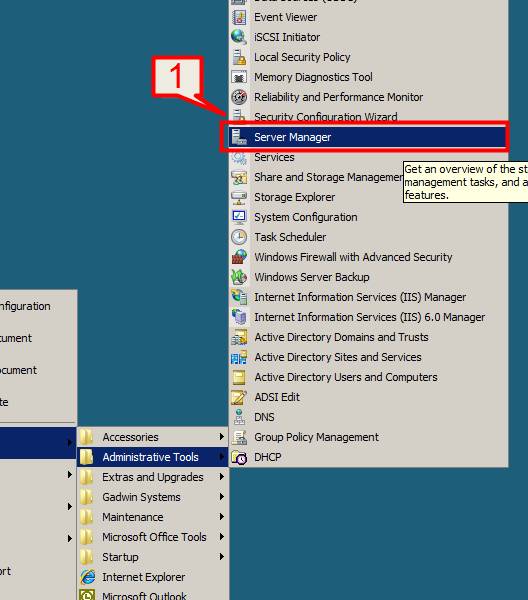
#1.Select Start -> Programs -> Administrative Tools -> Server Manager
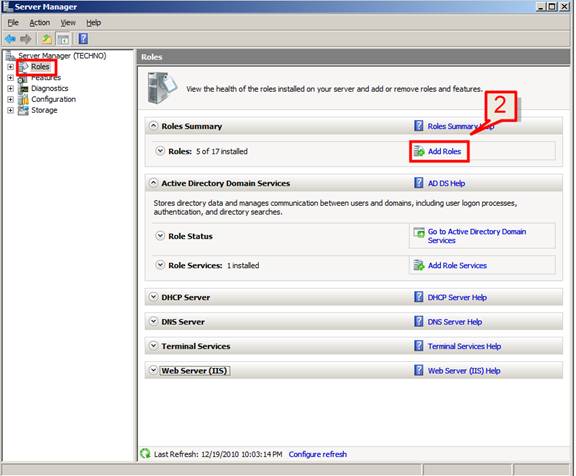
#2.On the right pane of the Server Manager select Roles and on the left pane click on Add Roles
#3. OnBefore You Begin page Click Next
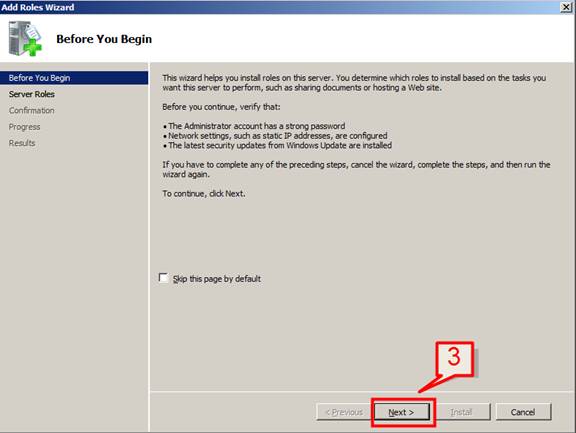
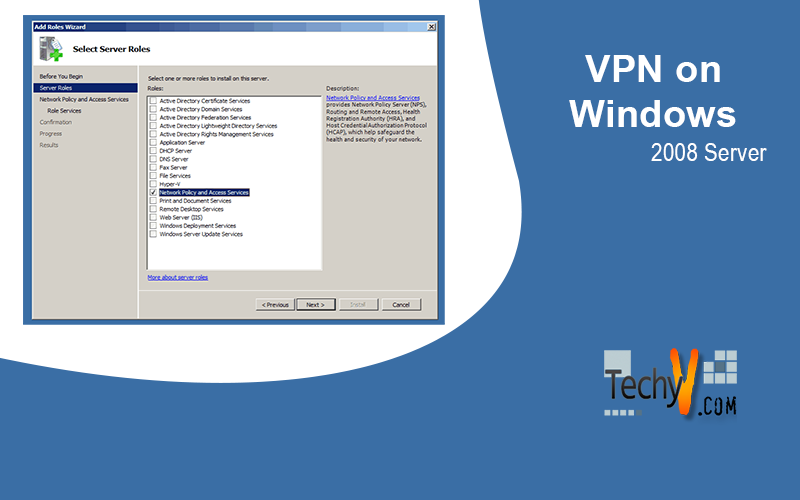
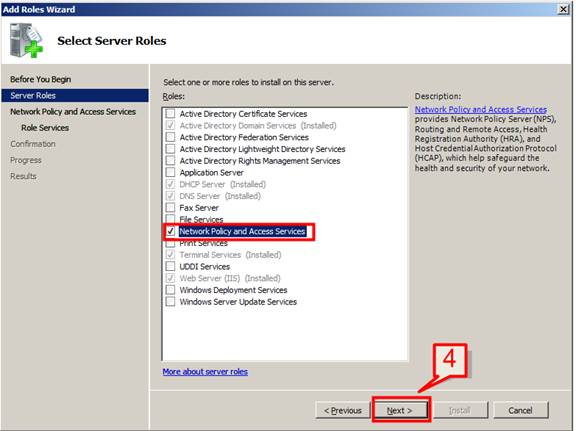
#4.Tick the box on the Network Policy and Access Services in the Select Server Roles dialog and click next
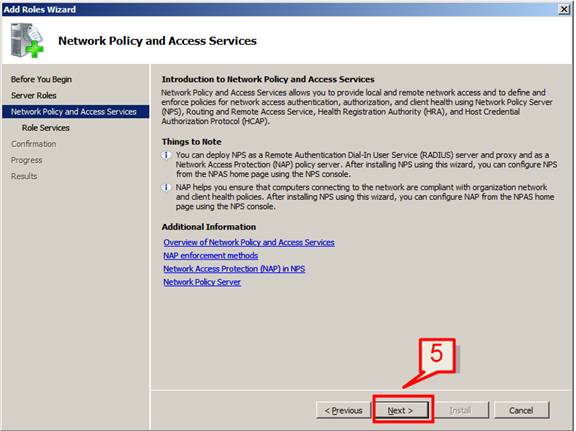
#5.The next page introduces an overview about the Network Policy and Access Services and their components. Click Next
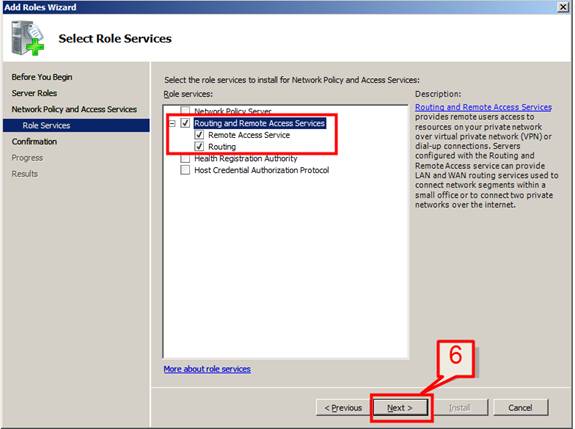
#6.On Role Services windows tick the box on Routing and Remote Access Services and click next
#7. Review your selection and click Install
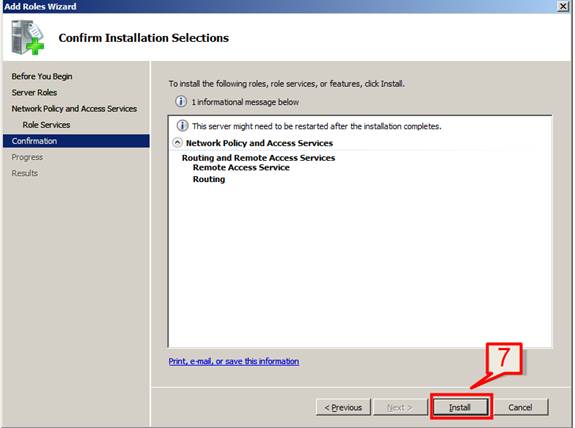
#8.Installation will then start
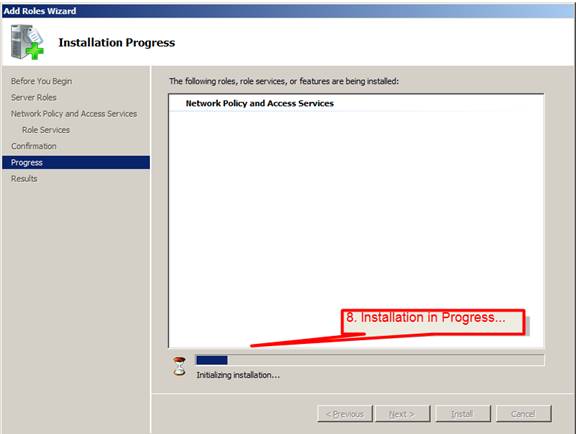
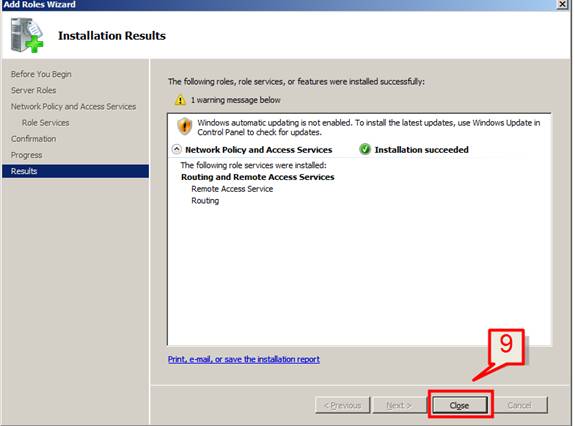
#9.Click Close on the Installation Results page
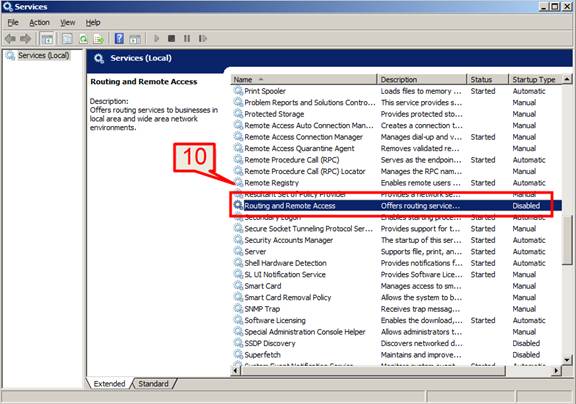
#10. After Installation, notice that the Routing and Remote Access (RRA) is still disabled.
To check service status, Start -> Programs -> Administrative Tools -> Services
Configuration of VPN Server
Now let’s enable the service and configure the server for routing and remote access.
Note: If the administrator is not a domain administrator, the ID needs to be added to RAS and IAS Services security group.
#11. Open Routing and Remote Access from Start -> Programs -> Administrative Tools -> Routing and Remote Access
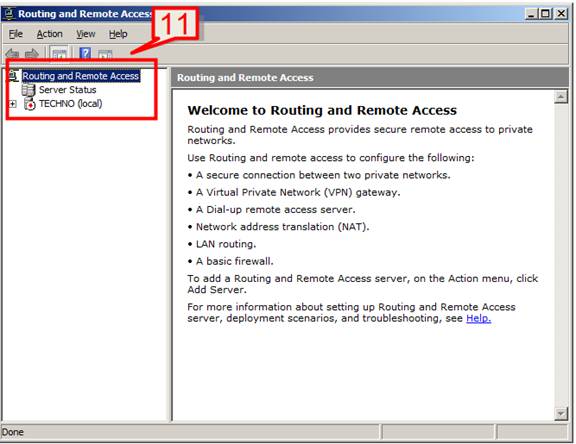
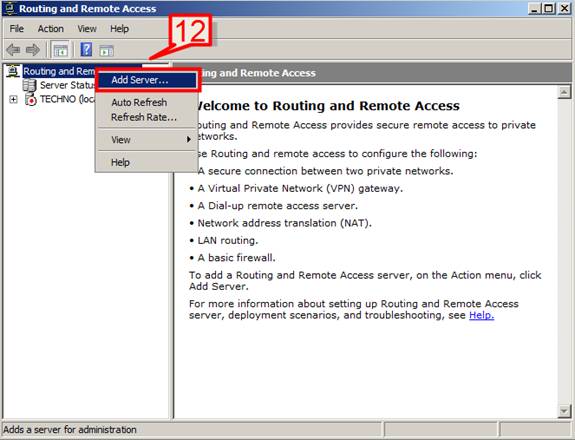
#12.By default, the local computer is listed as server.
To add another server in the console tree, Right click Server Status and then choose Add Server
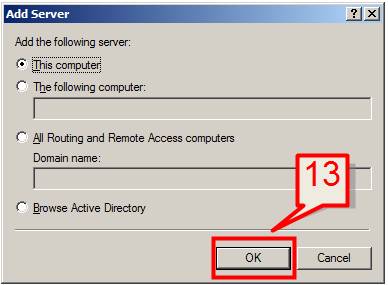
#13.Select the desired server that you want to add and click OK
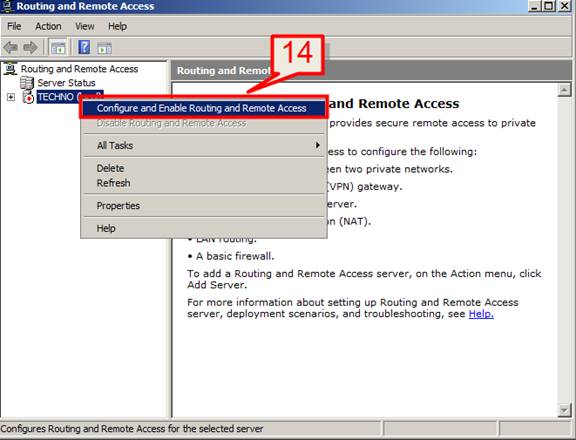
#14.On the console tree, right click on the server you want to enable and then click Configure and Enable Routing and Remote Access.
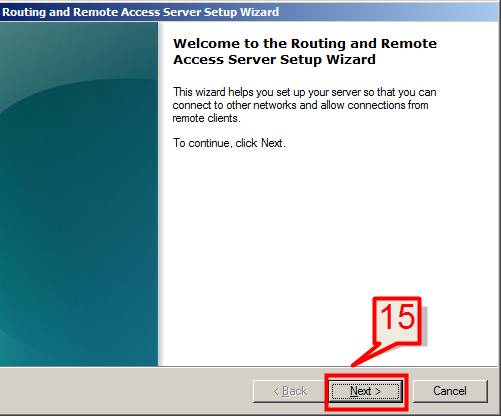
#15.On Routing and Remote Access Server Setup Wizard click next
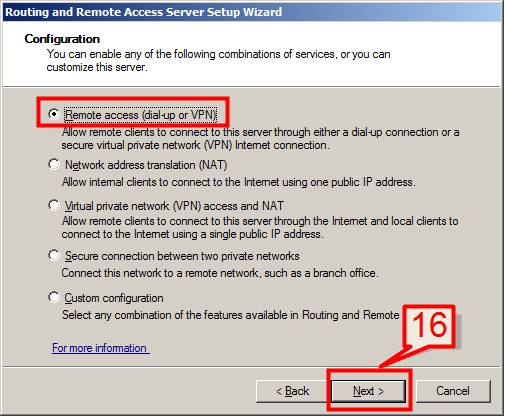
#16.Choose either dial-up or VPN Remote access and click next
Note: You can choose the configuration here that best suits for your network. To configure VPN server, it requires at least two Network Interface Cards (NICs). You can select custom configuration in case your server has a single NIC.
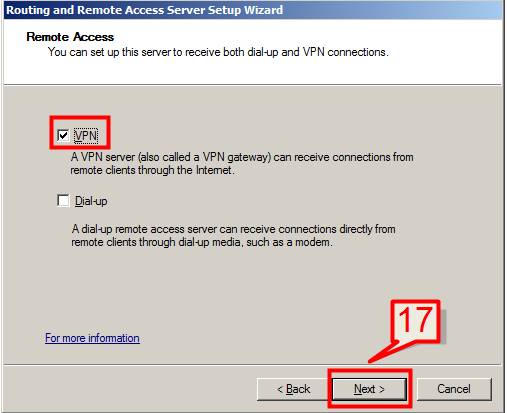
#17.On Remote Access page select VPN and click next
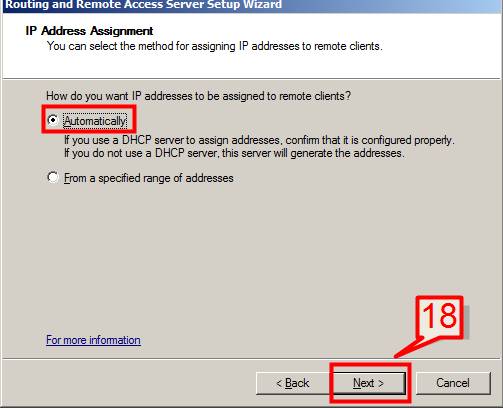
#18.On the IP assignment page select Automatically and Click next
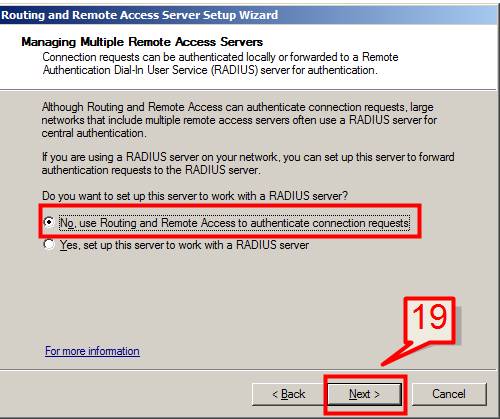
#19.On the Managing Multiple Remote Access Servers select the first option (No. use Routing and Remote Access to authenticate connection requests) and click Next
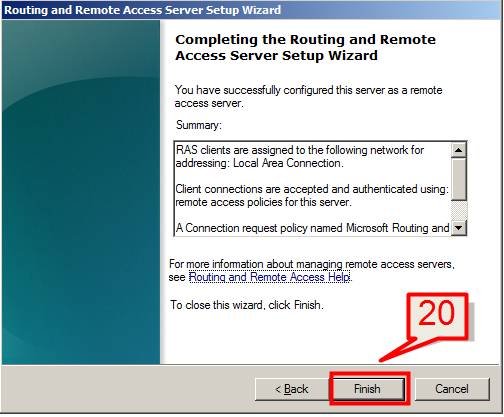
#20.Click Finish on the Completing the RRA Server Setup Wizard window, click Finish
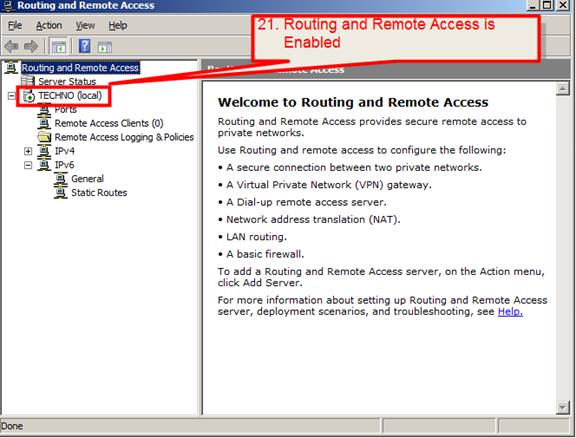
#21.Once configuration is done, the Routing and Remote Access service will be enabled and Remote and Remote Access configuration is added to the console tree.
Configure a Router through RAS
The Remote Access Server must be configured as a router with either routing protocols or static routes to forward traffic properly inside the network.
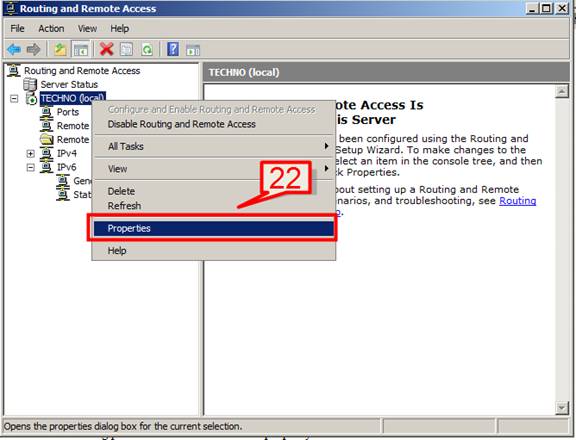
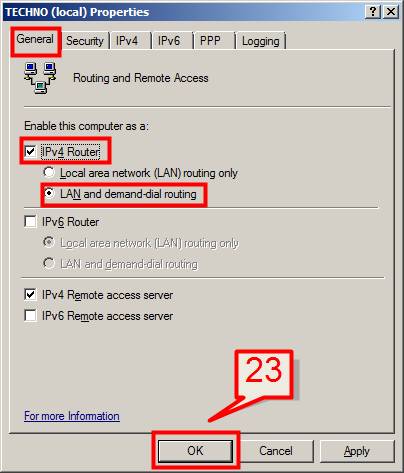
#22.On the server console pane, right click on the Remote Access Server and click property
#23. Go to General tab and then under the section enable this computer as a select required Router (IPv4 or IPv6) and select LAN and demand-dial routing.
After this, click OK to close the Properties dialog box.
Note: if IPv6 router is configured on the network then you can select IPv6 router the same way as IPv4 router is chosen above.
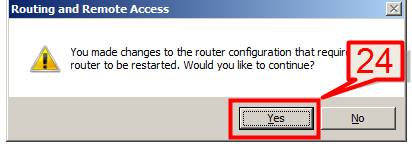
#24.Click Yes on the Routing and Remote Access page to restart the router
Modify the Number of Simultaneous Connections
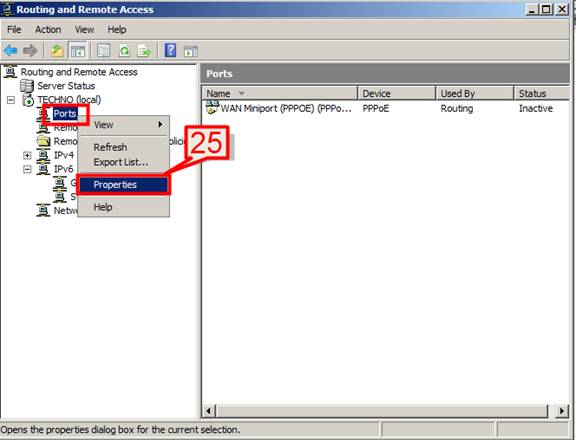
By default VPN connections permit 128 concurrent users connections. To change this settings
#25.On the Remote and Routing Access right pane, select Port and the right click on properties
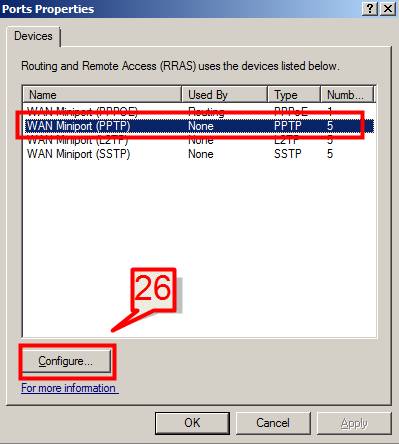
#26. In the next page Ports Properties, select WAN Miniport (PPTP) and click Configure
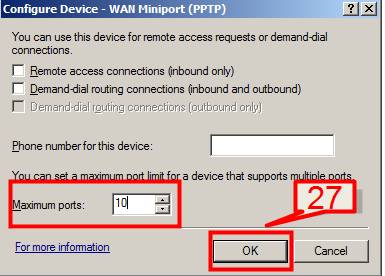
#27. On the next Maximum ports window enter the number of VPN connections that is required for your organization to allow and click OK
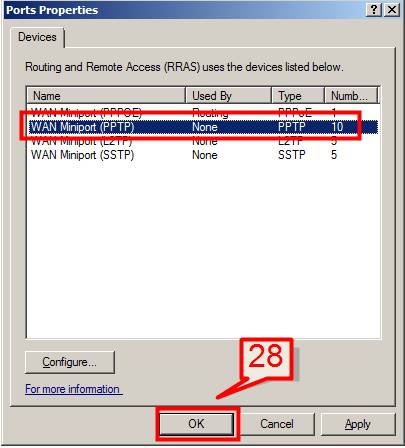
#28.When the configuration is done, on the Ports Properties page click OK
User Configuration to allow Access to VPN or dial-up connections
By default users don’t have access permission to access to dial-up networking or the one is controlled by NPS Security Policy.
To enable a user to use dial-up connection
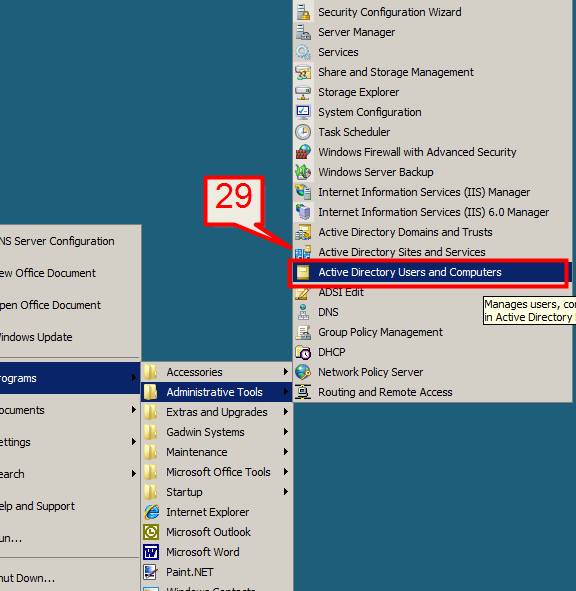
#29.Select Start -> Programs -> Administrative Tools -> Active Directory Users and Computers
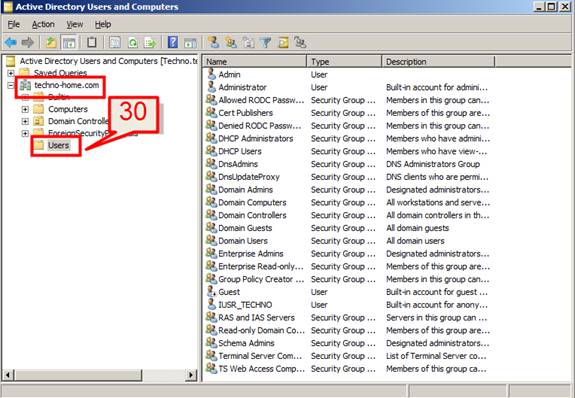
#30.On the Active Directory Users and Computers right pane expand the Server DC and select Users
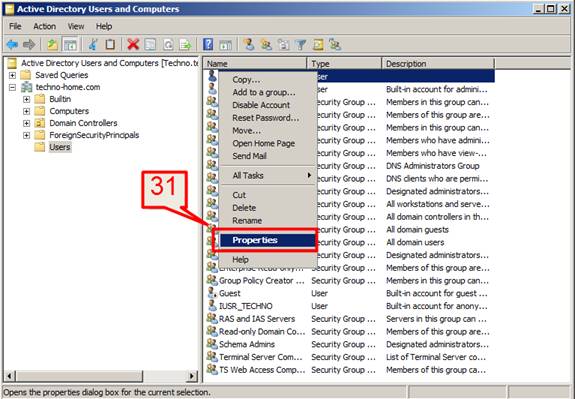
#31.On the right pane, select a user, right click on the user and click properties
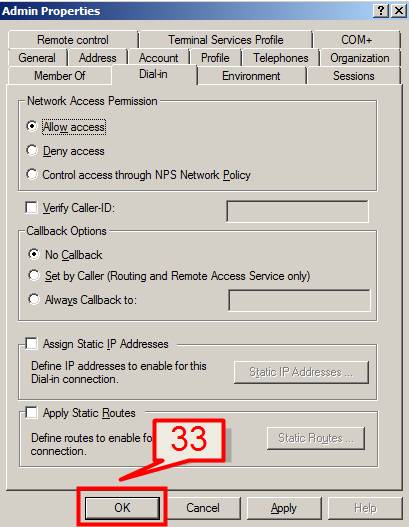
#32.On the user property page Select the Dial-in Tab and Choose Allow Access under Network Access Permission
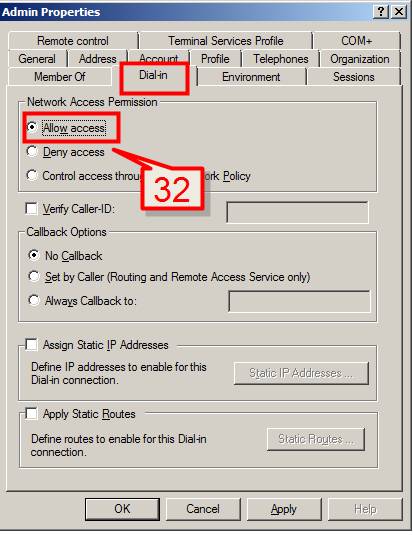
#33.Click Apply and ok to save the configuration changes
