Workgroup in Windows 7
It was very difficult and took lot of time to share any information in ancient times. With the passage of time, man has invented different ways of communication to bring convenience and comfort in life. Now it becomes very easy to communicate and share any kind of information at anywhere in the world and this world is called a Global Village.
Computer is the one of the main hub and source to share anything around the globe with ease. There must be an operating system installed in a computer so a layman can able to use it conveniently. When we talk about operating system, Microsoft comes to everybody’s mind immediately because of its highly useable and user friendly features. As rapid advancement in the computer and technology, security risks are also getting high. Microsoft Windows 7 covers both the aforementioned aspects in regards to security and features aspects. Microsoft Windows 7 has brought enhanced security features, networking, sharing and user interactivity.
Local network is designed in either a domain mode or a workgroup mode. Domain is used for a larger span of network with increased security accessibility. However, workgroup is used for small networks of about five to ten computers and it is normally used for multimedia, files and internet connection sharing. It is to note that the successful workgroup networking requires having an identical “workgroup” as the members of the same workgroup can only be a part of a local network. Microsoft Windows 7 allows user to have a password protected workgroup networking or an unprotected network according to the user choice. Users can give read only permissions or editing permissions to the users they want to have sharing with.
Accessing Workgroup
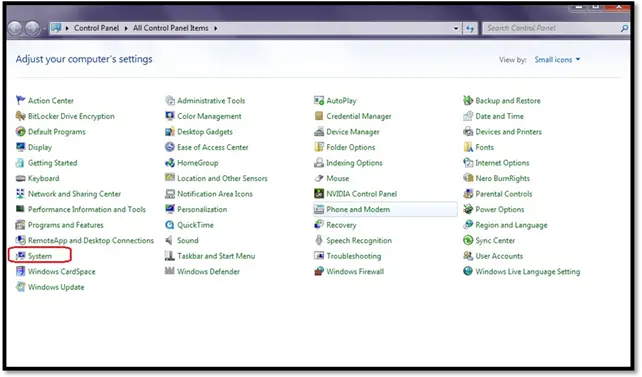
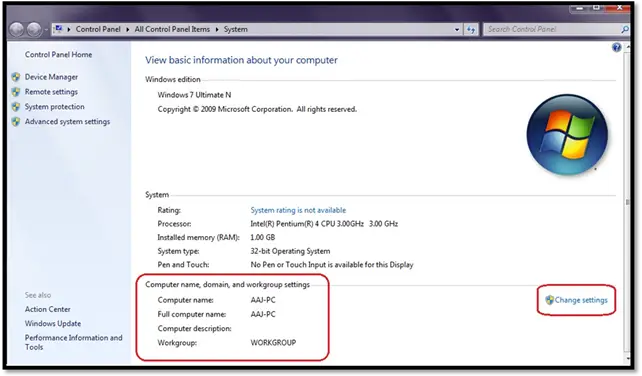
The workgroup information and settings can be accessed by going into Control Panel and selecting System option. The screenshot below highlights the said option.
Computer Name and Workgroup Settings
The System details contains basic information about the computer i.e. Windows version, System details and details regarding the workgroup and computer name as highlighted in the screenshot below. Users can change the computer name and workgroup by clicking on the “Change Settings” as encircled with a small rectangle below.
System Properties
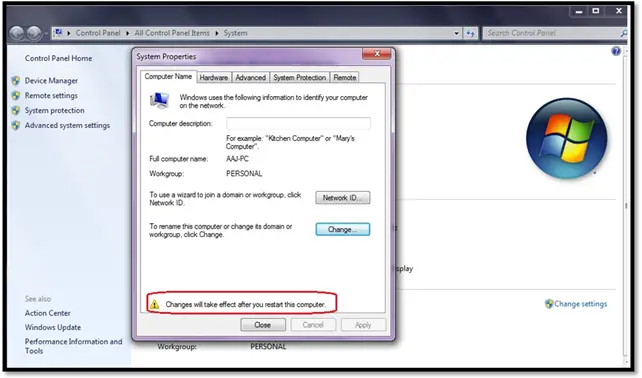
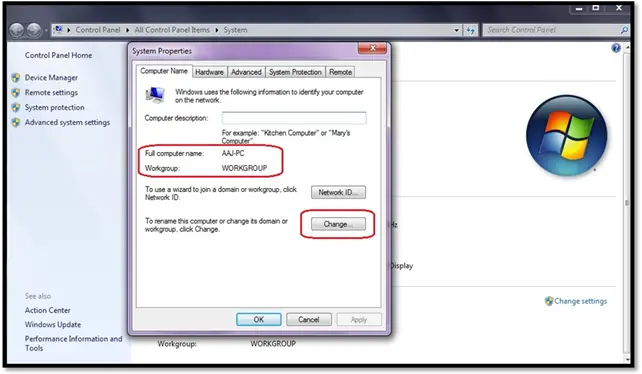
As depicted in the illustration below there is full computer name and the workgroup. It can change by pressing the “change button” as highlighted.
Computer Name or Domain Changes
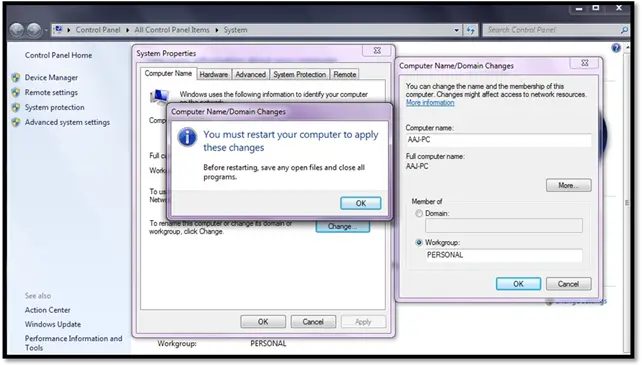
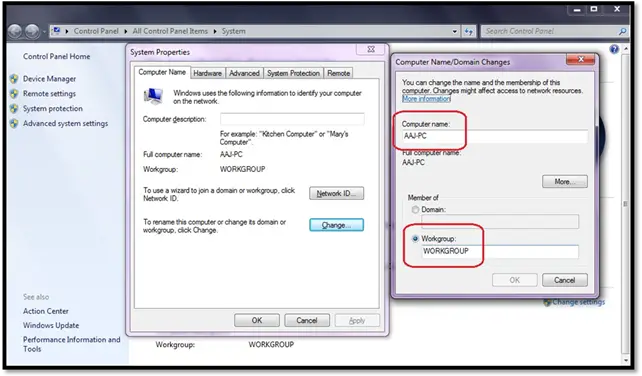
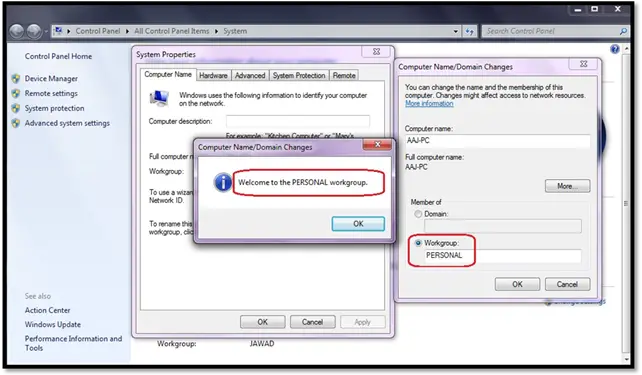
After pressing the change button there would be a small dialog box appear on the screen where a user can modify the computer name. The second rectangle is showing the workgroup, by default it would always be WORKGROUP but it is recommended to change so unknown computers would not able to enter into the network. It is to note that all of the members of the workgroup having same workgroup. In the picture below it is changed as PERSONAL.
Restart at Change Workgroup
After changing the workgroup, a popup window will be shown on the screen which notifies about the system restart. Computer needs a restart for changes effect.
