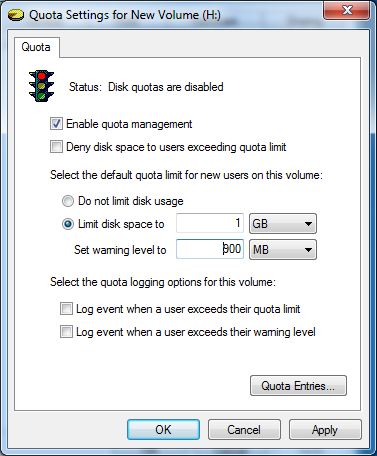
How to provide disk quota to an user in Windows 7
Asked By
0 points
N/A
Posted on - 12/16/2012

Hi experts,
Can you say the process of applying disk quota to the users?


