How to Setup Windows 7 in PendriveUSB Stick
I need to make a bootable Windows 7 in my Pendrive USB Stick. What is the simplest method to perform this? I need the step-by-step method as I am not that techie kind of person. Thanks.
Hi Donald!
One of the most simple methods of creating a bootable USB flash is using the WinToFlash software. You can download it from their page, it's free and very easy to use. You need a CD with the Windows installation on it and an empty USB stick, since it's going to format itself when you install the operating system on it.
Download the Novicorp software. Extract the file from the .zip archive and then double-click on the WinToFlash.exe.
Click Accept and then click the button to enter into Wizard mode. Click Next. On the Windows file path click Select and then choose the CD/DVD drive that contains the Windows version you want to put on the flash drive, or the folder that contains it.
Click OK. On USB Drive, click Select button and choose the USB Flash you have plugged in. Click OK, then Next, then check the "I agree with the terms of…" box and then click Continue. Click OK when the warning appears. Wait for the files to move, then click Next and Exit.
You can follow all these steps on the below tutorial video. I hope this helps you! Now you're ready to go!
Â
There are many ways to create a bootable Windows 7 on a pendrive.
– Obtain Windows 7 ISO:
Steps:
1. Install a burning software that can create ISO files. For example is UltraISO.
2. Insert your Windows 7 DVD and then launch UltraISO. Search for Copy to Image or Create Image options. And then choose your DVD drive to be the source.
3. Save the ISO file on your desktop. The ISO file that you will create will be the same size to the disc you will copy. So you need to ensure that you have enough hard disc space on your hard drive. Creating the ISO will take too much time depending on your computer speed.
– Create a Bootable Drive:
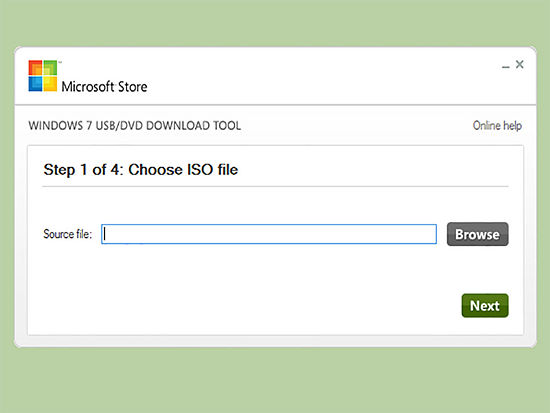
1. Download the Windows 7 USB/DVD Download Tool from the Microsoft website.
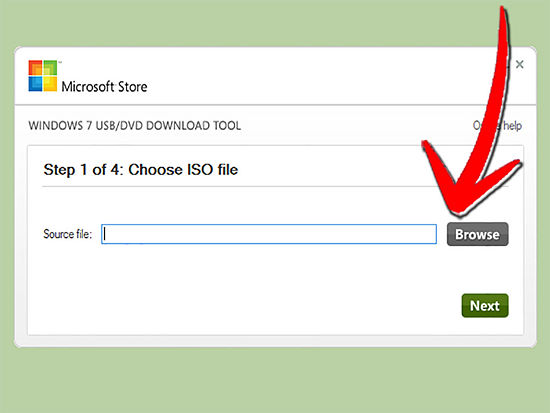
2. Choose the source file or the ISO file that you just created.
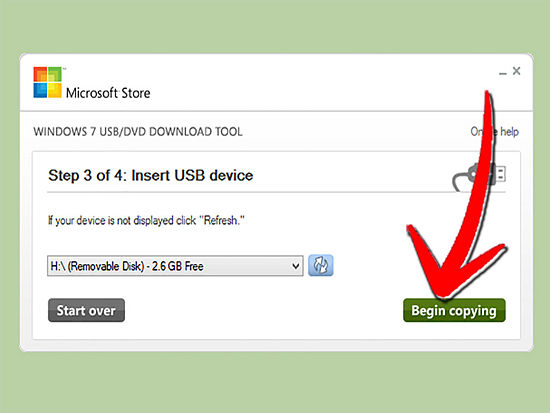
3. Choose the USB device. You have the option to burn the file to a DVD or to create a bootable USB. Select the USB device.
4. Select your USB device and ensure that the pendrive or flash drive is connected properly. You need at least 4GB space to copy the Windows installation.
5. Wait while the program formats the USB drive to boot properly and copy the ISO file on the drive. It can take up to 15 minutes to finish.
– Use the Command Line to make a bootable disk.
Steps:
1. Connect your Flash drive to the USB port on your computer and copy the entire content to a safe place on your hard drive.
2. Run the Command Prompt as an administrator.
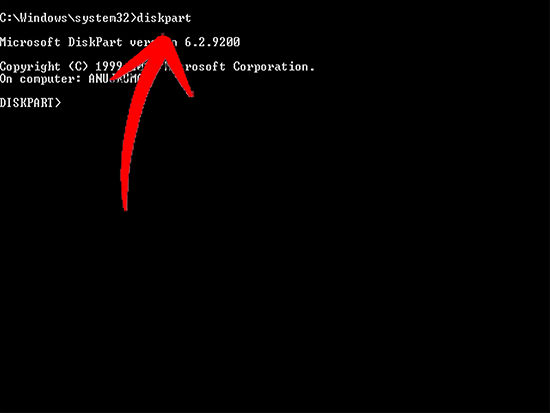
3. Use the Diskpart utility to search for the drive number of your flash drive. Type the following command on the CMD. Running the Diskpart will show the version of diskpart that you are running and your computer name.
Type list disk to display the connected disk drives. Take note of the number assigned to your USB or pendrive.
4. Format your drive. Ensure that you will replace the Disk 1 with the correct Disk number from the DISKPART.
Select disk 1
Clean
Create partition primary
Select partition 1
Active
Format fs=NTFS QUICK
Assign
Exit
5. Create a bootable flash drive. Use the bootsect utility that comes with Windows 7. Insert the Windows 7 DVD and then take note of the drive letter of the DVD drive. Sample below shows the DVD drive is D: and the USB drive is G:
Go to the directory where bootsect is placed.
D:
Cd d:boot
Use the bootsect option to make your USB or pendrive bootable.
BOOTSECT.EXE/NT60 G:
Close the Command Prompt box.
6. Copy the entire files from the Windows 7 DVD to your newly formatted USB or pendrive stick. Use Windows Explorer to do this. Just simply open the disk and then Ctrl+A to select all and drag it to the flash drive. This will take a few minutes.