How To Start Virtual Keyboard On Windows 10
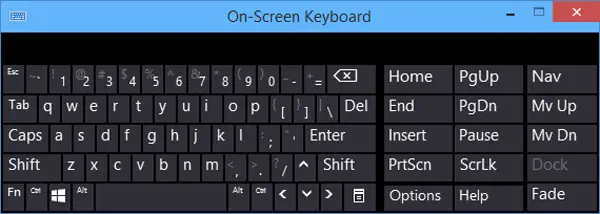
I was wondering about the alternate input methods to my computer in addition to the keyboard and it struck me that Windows also has an on-screen keyboard. I was wondering how to start a virtual keyboard?
Yes. All versions of Windows operating system provide an on-screen or virtual keyboard. It is very simple to enable the on-screen keyboard. It is useful in emergency situations where the actual keyboard stops working or when you are just curious.
To enable the on-screen keyboard, all you need to do is right-click on the taskbar and select show touch keypad button. This will enable a keyboard like an icon on the taskbar near the wi-fi and volume icons. Click on this keyboard icon and this will enable the on-screen keyboard.
That’s right. Windows has its own virtual keyboard that you can use in case your physical keyboard suddenly encountered a problem like one key is stuck or the entire keyboard is not working. The built-in keyboard or virtual keyboard is called the “OSK” or the “On-Screen Keyboard.” The On-Screen Keyboard has been included with Windows, I think, since Windows XP.
The On-Screen Keyboard displays a visual keyboard with all the standard keys. To press a key, you can use your mouse or any pointing device. You can also use a single key or set of keys to cycle through the keys on the screen. To activate the On-Screen Keyboard, click “Start,” “All Programs,” “Accessories,” “Ease of Access” then “On-Screen Keyboard.”
If you want to change how the information is entered or how the keys are used to enter text, start the On-Screen Keyboard then click “Options.” Now, under “To use the On-Screen Keyboard” section, select the mode you want to use: