Asked By
elsietbrown
20 points
N/A
Posted on - 05/26/2013
Hi guys,Â
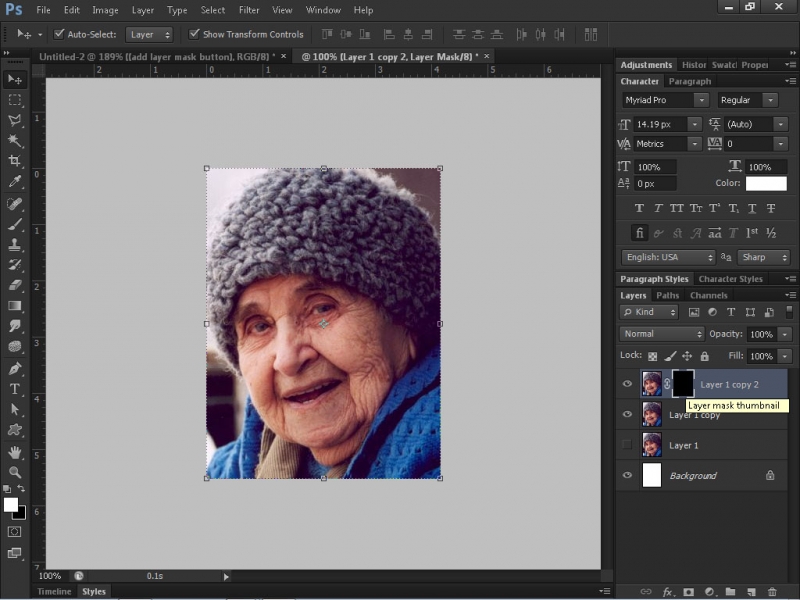
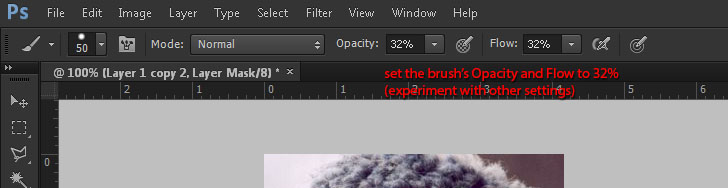
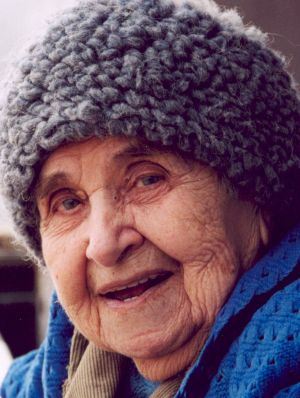
I have a lot of JPEG images that I need to edit. I need tips in face enhancement with Photoshop. This is my first time using Photoshop and I find it a bit technical. I need to remove a face wrinkle digitally. I have Adobe Photoshop CS 6 on Windows 7 64 bit. Thanks.
I need tips in face enhancement with Photoshop
Hi Elsietbrown,
Photoshop is a very powerful photo editing software. It is very complicated for beginners. Face enhancement is very complicated for beginners but I will give you one tutorial for this.
Firstly, you must learn to work with the layers, and then you can start to work something else.
You have more than a hundred tutorials on the internet, here is one of them.
I need tips in face enhancement with Photoshop
Hello Elsietbrown,
After correcting your image's brightness, color saturation, I could point you to a direct solution. Prepare your image and duplicate it, you should have three layers of the image, the bottom-most layer will be your backup. Click the eye icon beside it(visibility).
Now with your two layers, select the upper layer, go to filters > blur > gaussian blur. Change the setting to 9.5 (might be different for your image's resolution, but for the purpose of removing wrinkles, let's continue.)
After applying your gaussian blur the layer (Now you would see your image blurry, of course. ), alt + left click on the 'add layer mask button' shown below:Â
Then, you will see a black square beside your layer called the layer mask thumbnail.
Your image looks normal again. Now click on the brush tool and make sure to set the default foreground and background color (white over black)
Â
Make sure your 'layer mask' black square is active with white cross lines around it.
Â
Â
Set your brush's Opacity and Flow to 32%. Brush over the wrinkled areas, to erase, switch to black over white, on your default colors.Â
Â
 ​Note: I created an extremely example, you could tweak each tool.
Â
BEFORE:
Â
Â
AFTER: