Asked By
Curtt
10 points
N/A
Posted on - 06/20/2011

Hello Techyv!
I want to know how to create backup files?
I am using Windows Vista Premium.
I have the numbers of some important files, that have been saved onto my documents and need to be backed up for the meantime.
But the problem is, I don't know how to create a backup file. As I click the backup/restore wizard, I don't know which option I need to click.

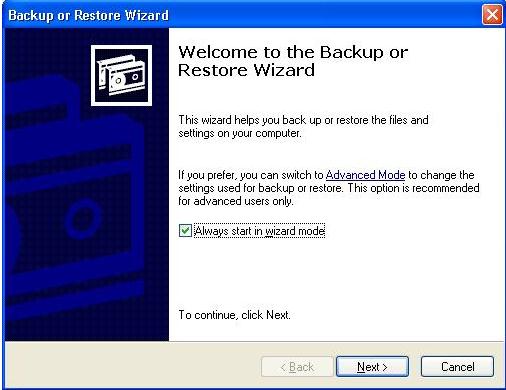
This wizard helps you back up or restore the files and settings on your computer.
If you prefer, you can switch to Advanced Mode to change the settings for backup or restore. This option is recommended for advanced users only.
I want a concise instruction, in order for me to understand the pattern easily. I know you guys have broad knowledge about this matter. So please feel free to post your ideas!.
Thank You,
Curtl.
Creating Backup files in Windows Vista

Hi Curtt !
I am here to give you some precautions and procedures, which will be helpful for you while doing a backup.
To make sure you don't lose the files that you create, modify, and store on your computer, you should back them up regularly. You can manually backup your files any time or set up automatic backups.
-
Open Backup and Restore Center by clicking the Start button  , click Control Panel, click System and Maintenance, and then click Backup and Restore Center.
-
Click Backup files, and then follow the steps in the wizard.  If you are prompted for an administrator password or confirmation, type the password or provide confirmation.
Notes
-
Do not backup files to the same hard disk, that Windows is installed on. For example, do not back up files to a recovery partition.
-
Always store media used for backups (external hard disks, DVDs, or CDs) in a secure place, to prevent unauthorized people from having access to your files; a fireproof location separate from your computer is recommended. You might also consider encrypting the data on your backup.
Thanks for the question!
Answered By
dino222
0 points
N/A
#126653
Creating Backup files in Windows Vista

Question : I want to know how to backup files in windows 7.
Answer:
Creating backup of essential files on a network location is a very wise move which every computer user must undertake. Creating a regular backup for your digital files can save you from the risk of permanent data loss which can occur due to various internal and external factors. It can also save you from the extra effort you will put in for downloading and installing a data recovery software when it is too late.
Setting a back up service on windows 7 involves a few simples but important steps.
This process is important because there is no guarantee for your digital files which are prone to corruption and deletion due to system crash or external sources like viruses, Spyware and Malware
For creating a network backup for Windows 7 you need to first access the Windows Control Panel by clicking on the Start button. The Control Panel will display a lot of programs in the list from where you need to choose 'System and Security' section and click on 'Back up your computer link' and then click on 'Set up Backup link'.
Once you get inside 'Set up Backup' window choose the 'Save on a Network' button. Immediately after this step you will be required to select the network location, where your network hard drive is located. By clicking on the Browse button, you can search for your network to backup your data. After this step, you will be asked to enter the username and password, you set on your network hard drive and click on the 'OK' button.
After you click on 'OK' you will be shown a list of places in your network hard drive, where you can backup your data by selecting the files from your system. Finally, click on the Save settings and run backup button to let the network backup your precious files. Remember to run the same process every week, for regular backup of files.
However, if you have already experienced a system crash and lost your precious data, you can recover the files using a powerful third party recovery software, which you will find in our section on Backup and Recovery.


 , click Control Panel, click System and Maintenance, and then click Backup and Restore Center.
 If you are prompted for an administrator password or confirmation, type the password or provide confirmation.


