Asked By
joey keen
190 points
N/A
Posted on - 07/11/2012

Hi,
I changed the registry with W7T and now Ninite won't work. At first I thought it was a component removal, but this can't be the case because I did a test with no changes to the registry, and it works great.

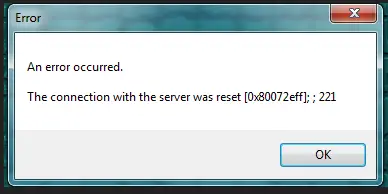
Error:
An error occurred. The connection with the server was reset [0x80072eff]; ; 221
I don't know which registry change caused the problem, but it has to be one of them.
Possibly down to Internet Explorer?? If I had to guess, I would suggest that it has to be something to do with the system.
Nothing has been tweaked, any ideas?
Any help will greatly be appreciated.
Ninite Not Working After Registry Change in Windows 7

Hi there user:
Ninite Pro Automatically updates application. After trying the repair tool and the error still occurred, you must hop your head now to Ninite Pro Application. Although we know it update automatically, you still should check it. I suppose the problem is the Ninite Pro.
You can update us for the status when. We’ll see what we can do for you. We’re always here to help. Just post it her at techyv.com
Thanks,
Ninite Not Working After Registry Change in Windows 7

I don’t think that problem is with the application. It appears more like related to your network connection. If you are using Ninite, make sure you are connected to the internet. The program is used or designed to automatically update installed programs on your computer like Dropbox, Google Chrome, Skype, Audacity, Avira, and more.
Now, since it is designed for updating programs, it requires that your computer is connected to the internet. If you keep receiving that reset error whenever you try to use Ninite, try restarting your router. If the router has a power button, press it to turn it off then unplug it from the power for about ten to twenty seconds (10 – 20).
Press any button on the router to drain any leftover power or to power cycle. After this, plug the router back to the power and turn it on. If this doesn’t work, uninstall and reinstall Ninite. Download the free version of Revo Uninstaller and install it. Once installed, start Revo Uninstaller then select Ninite among the applications and click “Uninstall”.
Follow the normal uninstall process. When uninstall is complete, click “Scan” to scan your computer for any leftover files and delete everything it finds. This removes everything the program created on your computer. When it is finished, exit Revo Uninstaller then go to Ninite homepage. Here, check the apps you wish to update automatically with Ninite then click “Get Your Ninite” to download the custom installer or updater.
Ninite supports Windows 7, Windows 8.x, and Windows 10.


