Asked By
martyables
1170 points
N/A
Posted on - 07/12/2011

A salute to all, I had an IPod for my listening pleasures. When I wanted to add some contents in it, I installed iTunes to my new computer. After the installation process finished, when I attached my IPod player, there is an error message that appeared,.
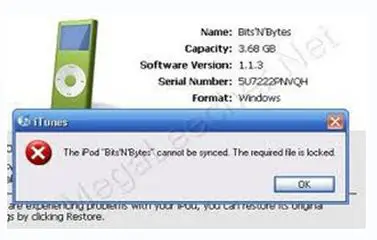
Posted herewith is the screenshot of the error.

iTunes
The iPod “BitsNBytes” cannot be synced. The required file is locked.
As I looked upon the error its too technical and I am not a technical person to understand such errors. I also asked some help from my friends, but they don't have any idea on my problem. I searched the internet, to look for similar errors, I found nothing,
Please help me find ways, on how to solve my problem, more power and thank you.
IPod Error on iTunes: The required file is locked

ITUNES required file is locked
When we have installed ITUNES in our computer, and when we inserted our Apple Device or your IPOD in your computer’s USB port, ITUNES automatically run after detecting your device and synchronize your IPOD contents into your local folder at the first time. Folders are located inside the “My Pictures” folder.
Inside the My Pictures folder, you will find an ITUNES where libraries and temporary files from your IPOD are stored. If these folders are exclusively set to policy that only the owner can access the folder, it will comes out with error when synchronizing or IPOD to your computer. You must have the full-control to that folder, so that the system and you can access that folder. Here’s a simple guide from us for you to follow on setting full control to the ITUNES folder:
-
Of course, before anything else, you must open or navigate the folder first. So let’s assume that you are in the folder now. By the way ITUNES folders are located at My Documents, My Music folder. Right click on the ITUNES folder.
-
On the pop-up menu select or click Sharing and Security. ITUNES properties window appear.
-
Click the Security tab.
-
Under the Group or user names’ list, select your username on the list. If you can’t find your user name, click Add button. Then input your user name on the field. You may click advanced button to find your user name on the list if you don’t really know your username is. Then click Ok.
-
On the Permissions for User list, check the Full Control checkbox on the Allow column. Then Click Ok.
Now, you have already permission to access the ITUNES folder, Go inside the folder then check all libraries file attribute. You need to check if library files are read-only. If it is read-only, it will lead you to error during executions of your ITUNES. Here’s a little guide for you to check the file attribute of each library files.
-
Right click on the library file, the click properties. File property dialog box appears.
-
On the General Tab, if the Attributes are Read-only, it means that the file is read-only and it is locked for editing. ITUNES required those library file for synchronizing if it is locked for editing your ITUNES cannot synchronized to your IPOD.
-
Uncheck the read-only options then click Okay.
Do the same way for the other libraries. Also check all subfolders inside the ITUNES folder. Also check your access to each sub folder.
Please note that giving an access or changing the access settings on each folder requires Admin account.
Once all configurations have been finished, you can now run your ITUNES to check for the accessibility of your IPOD. Connect your IPOD on the computer’s USB port then wait until the ITUNES detects your IPOD. You will notice that your IPOD has been detected by your ITUNES when you see the name of your IPOD on the ITUNES desktop. Then you may now begin managing your IPOD copy files and folders and downloading applications.


