What To Do When Windows Remote Assistance Is Not Connecting?
I downloaded Windows Remote Assistance via the Internet. But it is not connecting to the computer. What to do when Windows Remote Assistance is not connecting?
Windows Remote Assistance allows a user to temporarily view and control another Windows computer through a network without directly using the remote unit. Remote Assistance features only in Windows Vista, XP, 7, 8 and 10. The problem of connecting Windows Remote Assistance arises when the remote host name is irresolvable.
To set the Windows Remote Assistance connection,
• First it is important to check the subnet connection. Insert IP address in RA invitation file (this file is further sent to the user of another computer).
• Select Tools on the Internet Explorer.
• Open Windows Messenger (Sign in to the messenger with the required Email Id).
• Select Help and Support on the Start Menu.
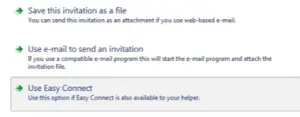
• Select “Ask for Assistance” (invite the friend for the connection. There are options that ask for your details and enter the details in the mentioned places).
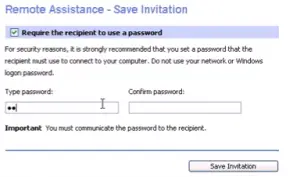
• Click on the option Continue after finishing the entries (It is going to ask for a recipient password).
• Click on the option “save invitation” as “RAInvitation.msrcincident.” (Copy the public IP address of your network and use it for getting a different text available after pasting the IP address in notepad with the help of RCTICKET string).
• Save the text in RAInvitation.msrcincident and send this file to the user of other computer via email.
• After he receives the file on the email, he can download the file and double-click on RAInvitation.msrcincident to create the Remote Assistance Connection.
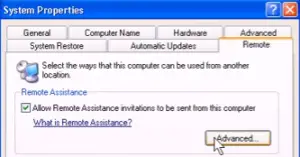
Otherwise, to enable to connection, go to Control Panel, select the option “System and Security” and then the option “System” and the “Remote Settings.” Also open Remote tab on System properties simultaneously. Click on “Allow Remote Assistance Connections” to enable the connection.