How to make a screenshot using Windows XP?
My dad, who is 55 years of age, is not techy person. He recently approach me and ask if my phone's camera is working. I've asked him why do you need it for?
He told me that he needs to take a shoot for the payment he made to the bank so he can forward it to them via an email. So I laugh and told him that you do not need that because you're laptop can do that. He was amazed and asked me how. Well, told him that all he need is the PrtSc button on his lappy and his good to go.
If you want a clear and precise image of any documents, don't use a cellphone camera. Otherwise, you'll end up with an image with black and white lines in it.
So where the heck is the PrtSc button and what does it look like?
PrtSc is means Printscreen. Usually will either appear on your keyboards as PrtScor Prt Scr.
In computers, usually it is Prt Scr button and is located on the upper right corner of your keyboard next to Scroll Lock button. A visual guide for it is given below.
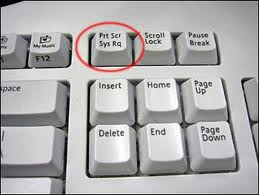
In laptops, it is typically known as PrtSc and is located also on the upper right corner of your keyboard next to Pause/Break button. Visual example is provided below.

Now, that you are aware of what is Printscreen button, I can now help you on how to do a screenshot. This visual guide is for user's using Windows XP.
Step 1: It is important that the document or item that you need to do a screenshot is displayed on your desktop screen. if you're ready to make a screenshot of it, just press on the Prt Sc button or PrtSc button located on your keyboard. After that, click on Start button.
.
Step 2: Click on All Programs > Accessories.

Step 3: Choose Paint. Then that application will open and will look like the image next to the first one below.
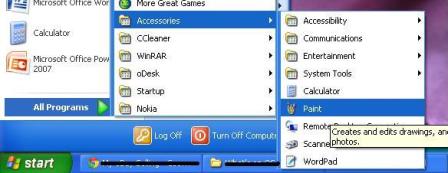
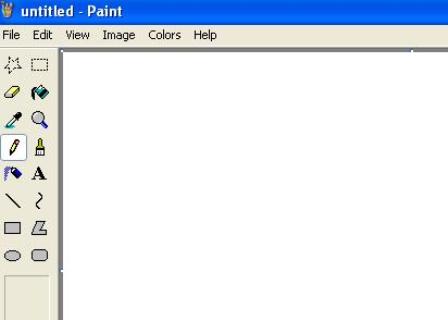
Step 4: Now, on Paint window, hold down Ctrl button + V. That is the command key is the shortcut for paste command. That will paste the image you've printscreen on the Paint application. This is needed to save the image you've screenshot into JPEG format. The image pasted will look like this.
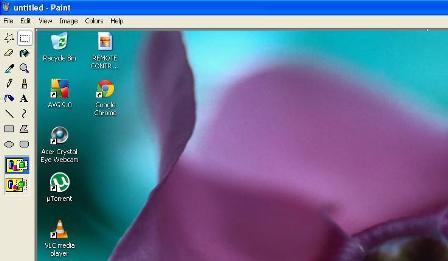
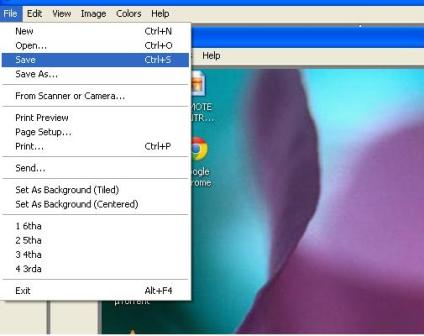
Step 5: Now, that you've pasted the image you've screenshot on the Paint application, you need to save it into JPEG format so that it can be viewed as photo file. To do that, click on File > Save.
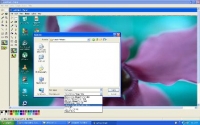
Step 6: A small window will open, allow you to save it. Provide the file name and on the "Save as Type" portion, click on the drop down arrow and locate JPEG and click on it. Then, click Save button. That will save the image you've screenshot in JPEG format.
Viola, now you're ready to attached the image you've screenshot to your email or on any website. Just locate the file from where you've save it.


